How do I Create a Product List for Vend using a CSV?
You can add your products into the app one-by-one, or you can use our handy CSV import feature to add your products in one list. To learn how to do this, follow the instructions below:
Before you start, you’ll need to have some information ready:
The names of your products, and the different versions, like sizes, colours, and flavours.
-
Retail prices of your products.
These are tax exclusive prices if your store displays prices exclusive of tax.
These are tax inclusive prices if your store displays prices inclusive of tax.
Any existing barcode numbers you have
The exact names of the taxes you’ve set up in Vend (make sure you’ve set these up first!)
The names of all of the outlets you’ve set up in Vend if you’re planning to set up inventory. (make sure you've set these up first!)
If you’re using Loyalty, the loyalty amount for any product you want to set to something other than your store’s default amount.
You’ll also need to set up your products as one of these three types:
Standard product: a product that has no different types or versions.
-
Variant product: a product that has different attributes, like sizes, colours, or flavours. In Vend, these products are grouped together as one family.
This family shares certain values, including supplier, accounting codes, and tags for categorisation. If you’re planning to link your store to an online store like Shopify, variant products are also displayed as one product, with a drop-down on the online store.
If you want each version of your product to have their values, or to be able to be displayed individually online, set each one up as a standard product.
Composite product: A product that is created from the inventory of other items in your store. Composite products let you sell groups of items, like a gift basket, or parts of items, like a glass of wine. Because composite items rely on the stock of other items, they don’t have their inventory levels or reorder points.
There are two parts to importing your products into your Vend Store using a CSV:
Creating a Product CSV:
1. Get your template.
2. Open this in Excel or use free spreadsheet software such as Google Docs, Open Office or Libre Office.
Important: Be careful when using Excel as it can sometimes truncate numbers. You can read more about this here.
3. Add your new products to the CSV file.
4. Save, and upload.
1. Download a template
Download our template. If you're finding it confusing use the link on the 'Import Products' page in Vend to get a template with all the correct store headers. You can also create a product in Vend first, and export your product list so that you have an example product.
If you use our template:
Make sure you update the outlet name for the inventory fields to match your store. For example, change Inventory_Main_Outlet to Inventory_Outlet_Auckland. If you have two stores with similar names (e.g. Inventory_Outlet_Auckland and Inventory_Outlet_Auckland_Warehouse), you'll need to update the name of the second store. You could change it to Outlet_Akld_Warehouse for example.
For tax-exclusive retailers, the tax is set per outlet. You'll need to change the 'tax_name'field to 'outlet_tax_your_outlet_name'. You'll need a column for each outlet. We recommend using the template on the 'import products' page to get a pre-configured template.
Remember, be careful if you're using Excel: Read our article on truncated numbers first.
2.Add your products
What's New?
CSVs are often used to bulk import and edit products in Vend. We've made some improvements to make this process even faster and easier to use.
- SKUs and Handles will now automatically populate if you do not include these as columns in your CSV.
- The name field is now the only mandatory field required to import your products, unless you are working with variant or composite products.
- You can now use a column matcher, when importing your product CSV, to fix any columns that are incorrectly named.
Once you downloaded the Vend CSV template or have generated your own, you will need to add in your product information. Below is a list of all the different columns you might want to include and fill out in your product CSV.
Important: It's really important to set up your tax rates properly, so you don't encounter problems later. Make sure you read the section on tax rates below.
Field Name
What it's for
ID
This is a number Vend generates as a unique ID for each product. Please don't change this, and leave the field blank when you're creating new products.
Name (Mandatory)
The name of your product. You can have letters, numbers, and symbols in this field. Do not include #, $, or & symbols.
Handle
This is an ID for your product. Make sure it only has letters and numbers. You cannot have spaces or symbols in here.
You can also choose to leave this column blank and allow Vend to automatically generate unique handles for your new products. This will be a system generated unique code, so we only recommend doing this if you don't already use a pre-existing handle format.
SKU
The stock keeping unit for your product. You can scan or type the existing barcode number for your product here if you have one.
Otherwise, you can leave this column blank and Vend will automatically generate unique SKUs for your new products.
Every product must have a unique SKU. Make sure it only has letters and numbers. You cannot have spaces or symbols in here.
Supply Price
The supply price for your product, excluding tax. Don't include a currency sign, just put the number.
You should always include a supply price - if your product price fluctuates, you can specify the exact price for each order when you complete a stock order.
Retail Price
The price you sell your product for. Don't include a currency sign, just put the number.
If you display the prices of your items including tax, this is the tax inclusive price.
If you display the prices of your items excluding tax, this is the tax exclusive price.
Tax_name INCLUSIVE ONLY
For tax-inclusive stores, this is the name of the tax rate you want to use for this product. Leave this blank or type 'default tax' to use the default tax for your store. Do nottype the name of your tax, e.g. GST, into this field if that is your default store tax.
If you want to use a different tax rate for this product, this needs to exactly match the name of the tax you have set up in Vend.
Important: Leaving the field blank will not overwrite existing data. If you want to update a rate to default tax, type 'Default Tax'.
Outlet_Tax_Your_Outlet_Name EXCLUSIVE ONLY
For tax-exclusive stores, this is the name of the tax rate you want to use for this product in this outlet. Type 'default tax' to use the default tax rate for that outlet, or specify the name of another tax rate you have set up in Vend. Do not type the name of your tax, e.g. GST, into this field if that is your default tax for that outlet.
You need a column for each outlet.
Important: Leaving the field blank will not overwrite existing data. If you want to update a rate to default tax, type 'Default Tax'.
Loyalty_value
If you've got loyalty turned on , this sets the amount of loyalty earned for the product. Leave this blank if you want to use the default loyalty ratio you set, or type a number in here to set a custom value.
Composite_Handle
If your product is a composite product, add the handle of the item that's a part of the product here. Don't forget to leave the first line of the composite product blank - this creates the composite product.
Composite_SKU
Add the SKU of the item that is part of the composite product here.
Composite_Quantity
Add the quantity of the item that is a part of the composite product here. This can be a whole number or a decimal.
Variant_Option_One_Name
The first category/option for variant product. For example 'Size' or 'Colour' or 'Flavour'. Follow the same guide for the Variant options 2 and 3.
Variant_Option_One_Value
The value for the first variant category. For example 'Small' or 'Black' or 'Chocolate'. Follow the same guide for the Variant options 2 and 3.
Active
Set this to 1 if you want the product to be available to be sold, or 0 if you don't. If you leave this blank, it will default to 'active' (available to be sold).
Description
The description of your product. This field can have letters, numbers, and symbols.
Type
The high-level category this product belongs to. For example 'Clothing' or 'Accessories' or 'Services'.
Important: leaving this column blank will overwrite any existing types you have on these products. If you do not wish to replace these types, delete the column (along with the 'Type' header)
Tags
Lower-level categories this product belongs to. For example: 'Casual; Cotton; Summer Range; Mens'. You can have as many of these as you want. Separate each tag with a semi colon ;
Important: leaving this column blank will overwrite any existing tags you have on these products. If you do not wish to replace these tags, delete the column (along with the 'Tag' header)
Brand_name
The brand of your product. This can have letters, numbers, and symbols.
Supplier_name
The supplier of your product. If you have more than one supplier for the product, leave this blank.
Supplier_code
If your supplier has an order code for the product that you don't use for your SKU, add this here. You can set one for each variant.
Account_code
Used for Xero integration. If you want sales of this product to post to an account other than your default sales account (set in the Xero integration settings), add the account code you'd like to post to here. Leave this blank if you don't use Xero, or want to post to the default account.
Account_code_purchase
Used for Xero integration. If you want stock orders of this product to post to an account other than your default purchases account, add the account code you'd like to post to here. Leave it blank to use default or if you don't use Xero.
Track_inventory
Set this to 1 if you want Vend to keep track of your inventory levels. If you want cost figures, you need to track inventory.
Reorder_point_{outlet_name}
When you create a stock order, if you choose to autofill the order, we'll check to see if your current inventory is less than this number. If it is, we'll add the item to your stock order.
Restock_level_{outlet_name}
If an item is added to an autofilled order, this is the quantity of the item that will be ordered (you can change this once it's added to the order if you want a different amount).
3. Variant Products:
When you set up variant products, the products have the same name and handle, but each has their own SKU. The first line (which also includes a variant option) needs to include all the information about that product family, such as type, tags, brand, supplier, description.

4. Composite Products:
When you set up a composite product, you need to use the first line to create the product. This is where you need to specify the name, handle, SKU, price, tax, description and other information for the item.
The lines below this are where you add the composite handles and SKUs. These rows will have the same handle and SKU as the one creating the product. You do not need to specify pricing and other details in these lines. These products must already exist in Vend, or must also be created in the same CSV file.
Composite products do not need any inventory information as their quantities are set by the component items.

Importing your Product CSV
Once you have created your Vend product CSV, you'll need to import it into your store.
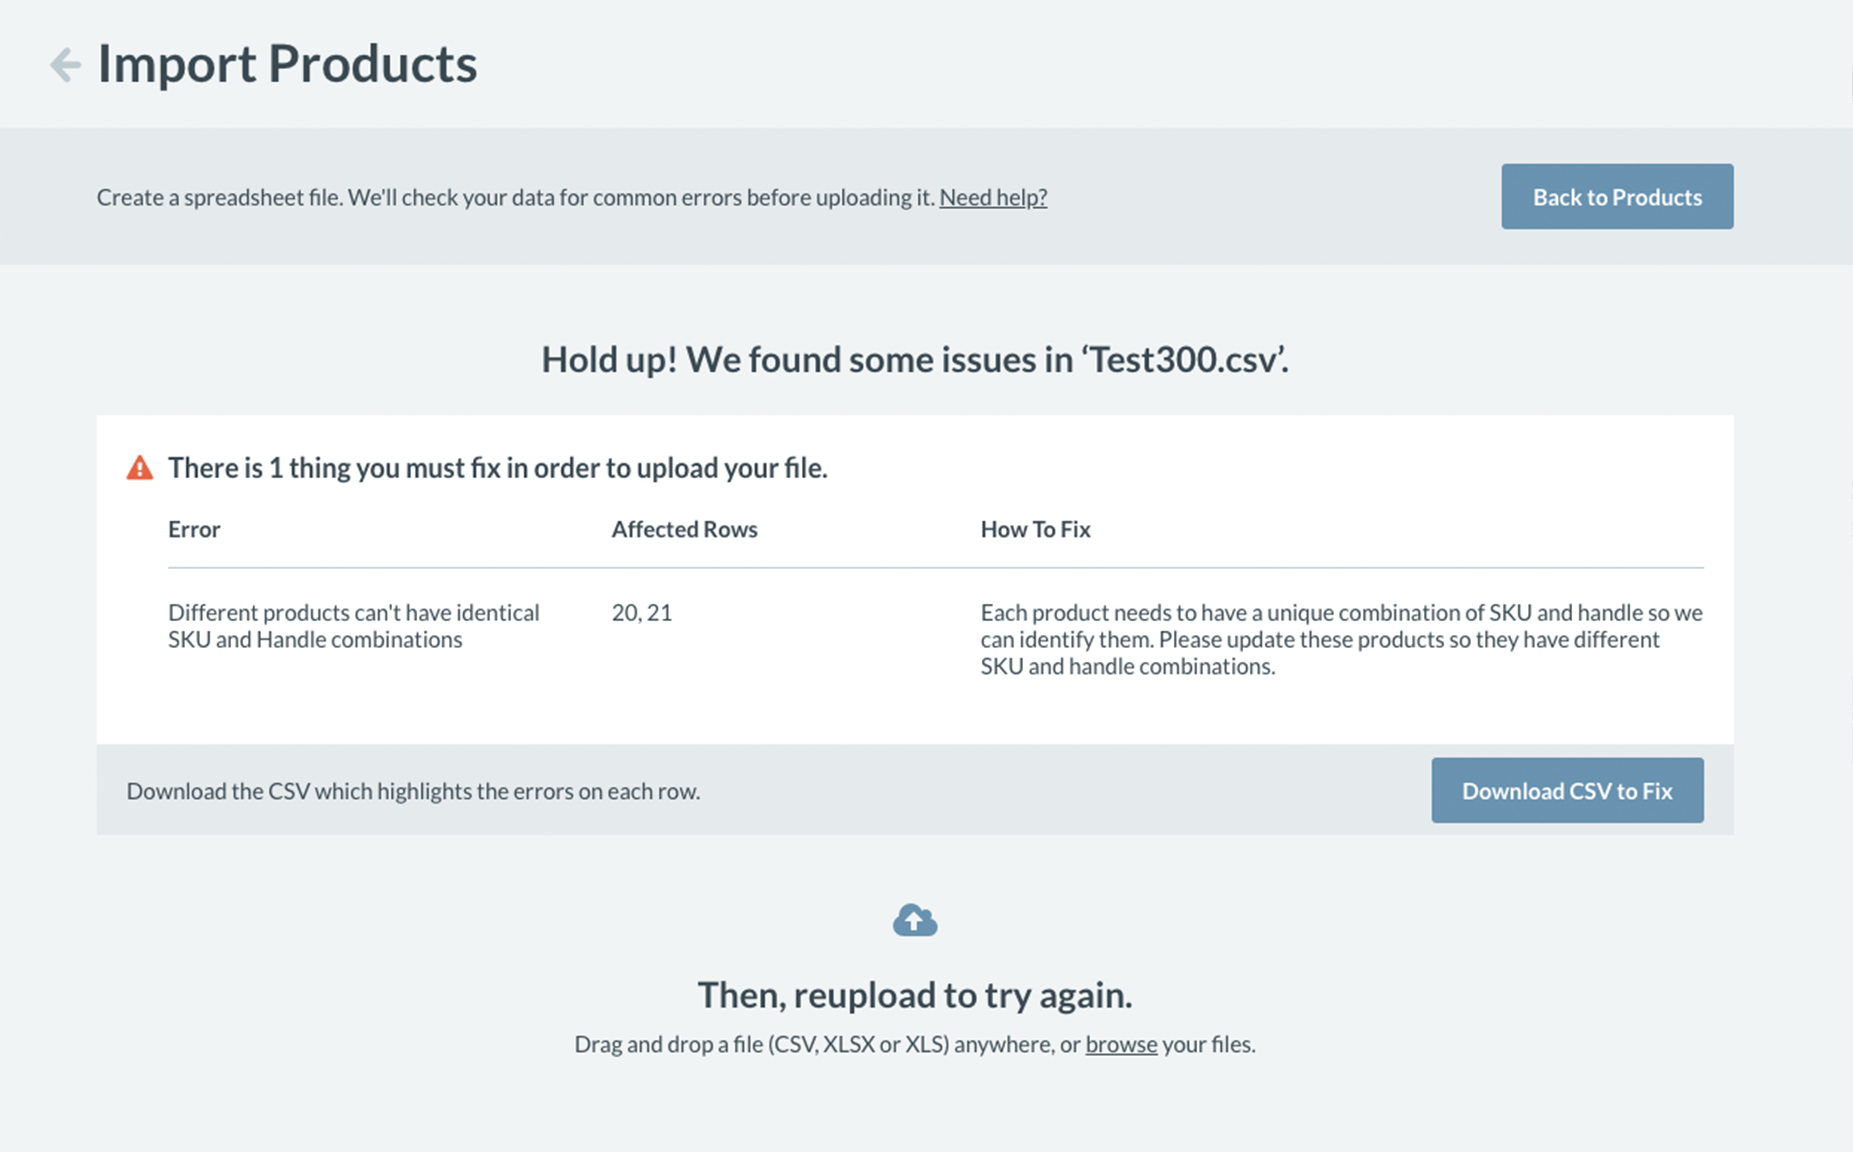
Vend's CSV checker will look for some of the most common import errors in your CSV file before it imports into your store.
How does it work?
When you choose to import or update products using a CSV, your CSV will be put through our system so that Vend can run a quick check on your CSV file. It will check for any formatting issues or errors such as column headings and mandatory fields and let you know if any of these errors are present in your CSV file.
How do I do it?
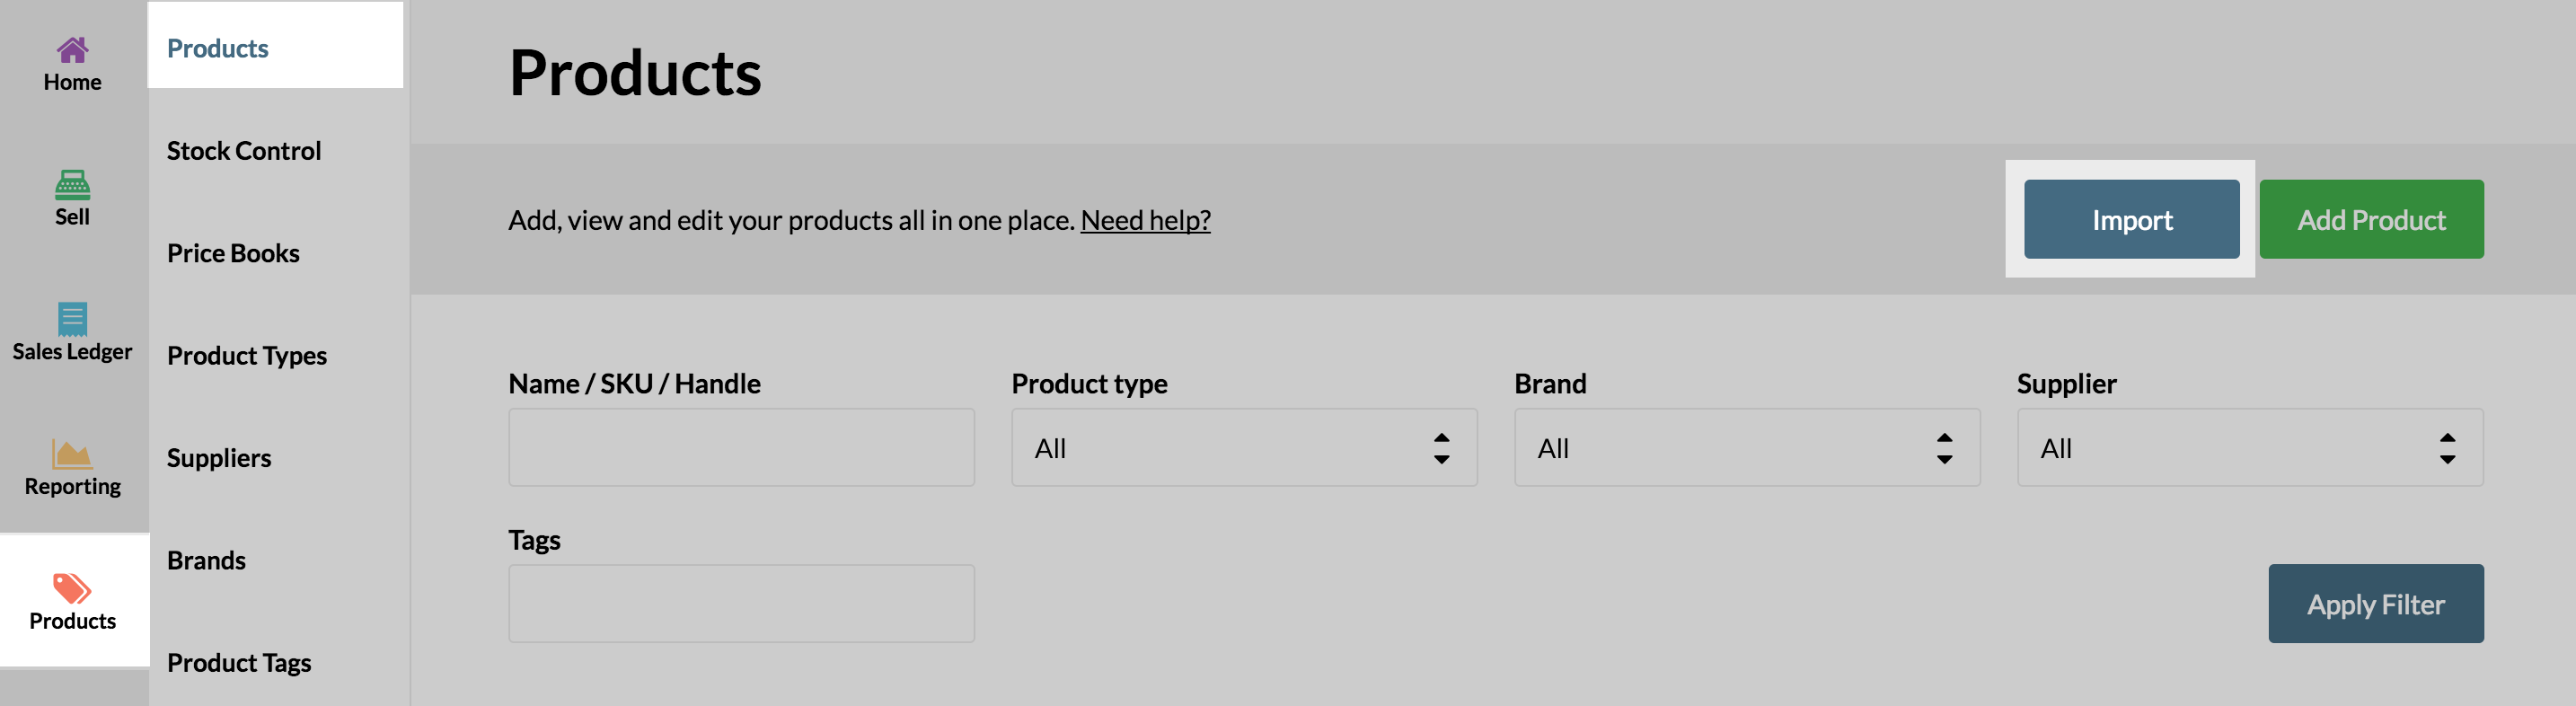
To validate and import your product CSV you must first navigate to Products -> Products in the sidebar and then select the Import button on the products page. Once here, follow the steps below:
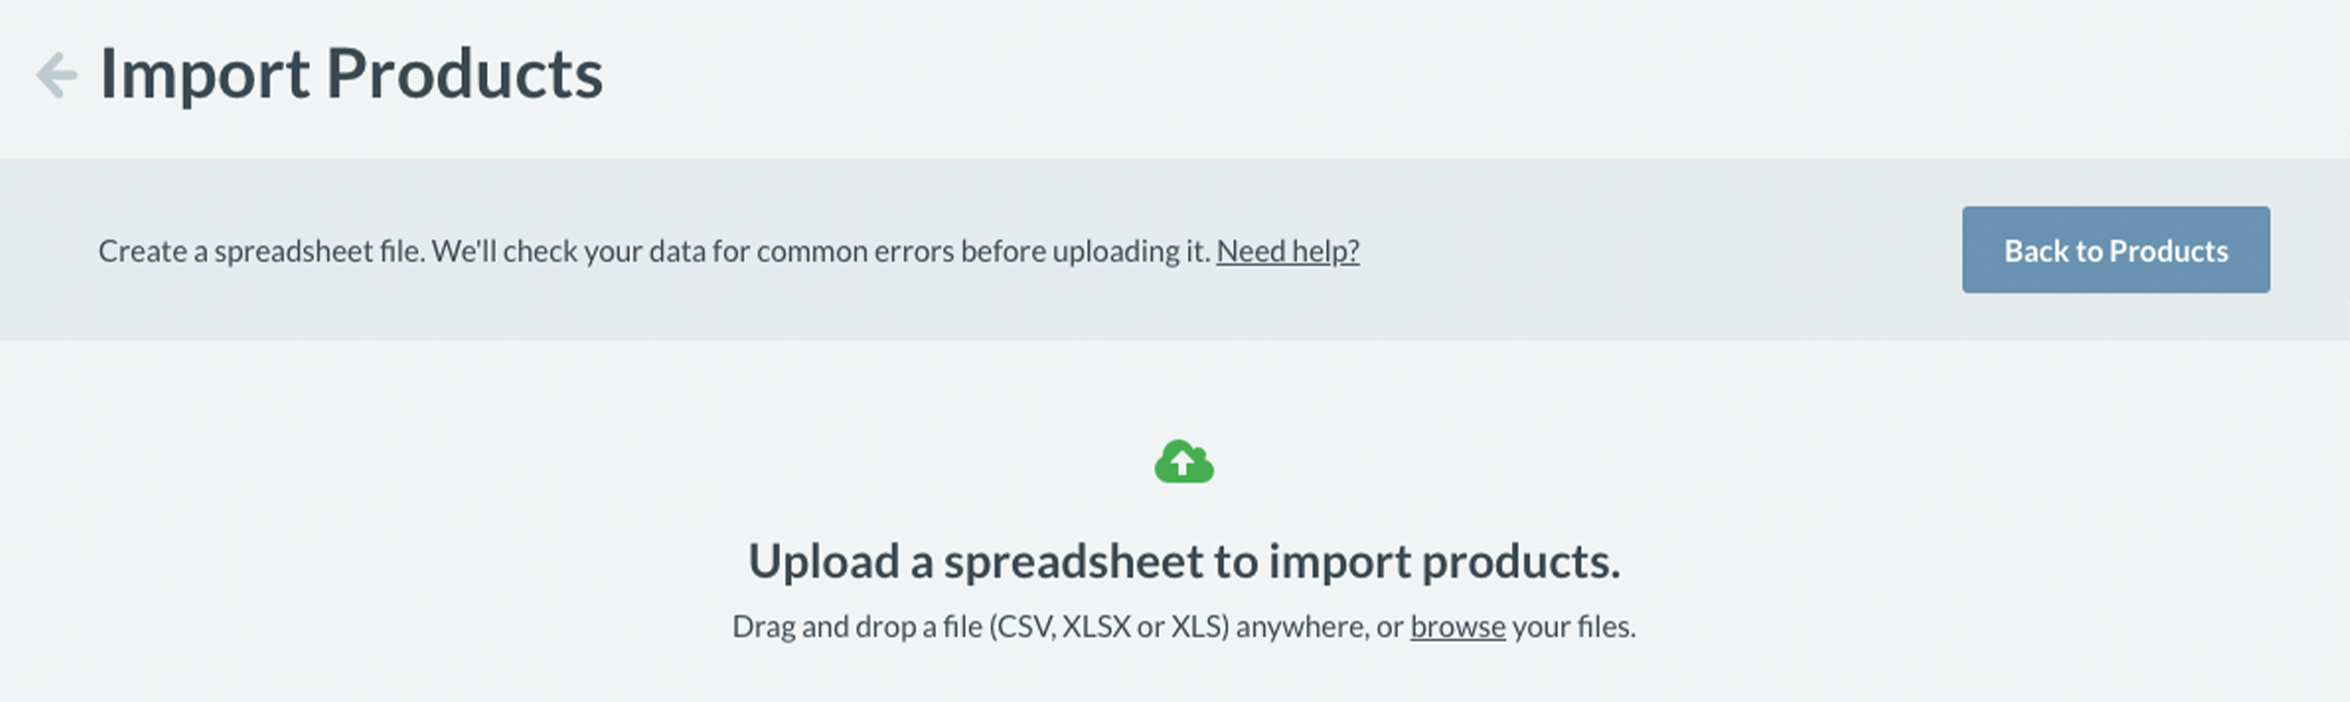
1. Either drag and drop your CSV file or click browse to search for and add the CSV file.
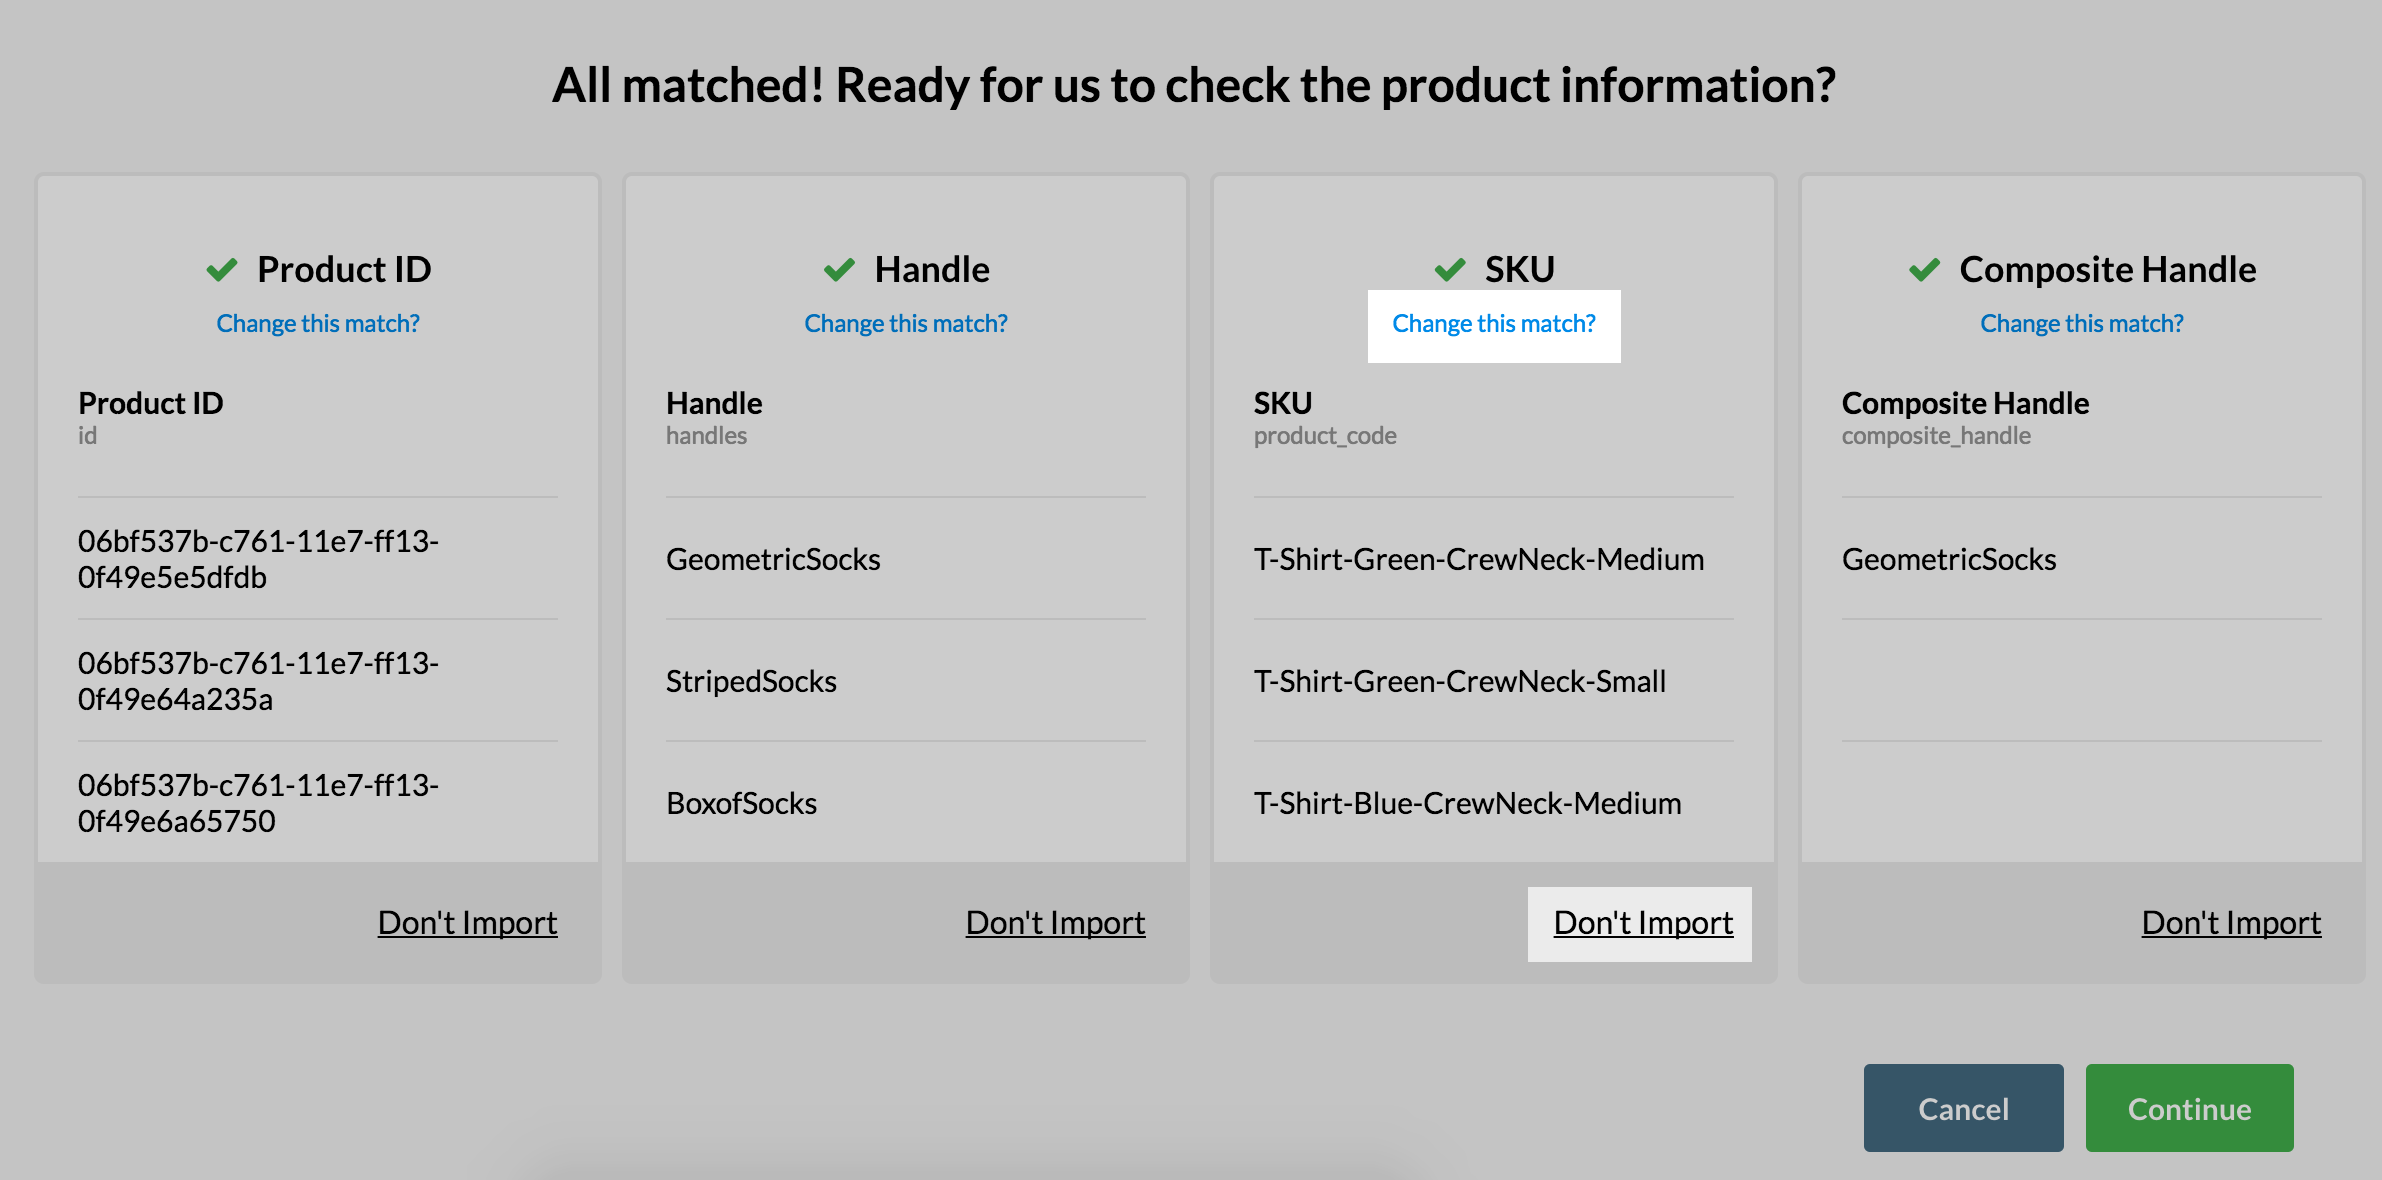
2. As soon as you place your CSV file here, Vend will immediately perform a quick check to make sure your CSV's columns match. If the validation is successful move straight onto step 6. If Vend detects any errors you will be taken to the 'column matching' screen below:
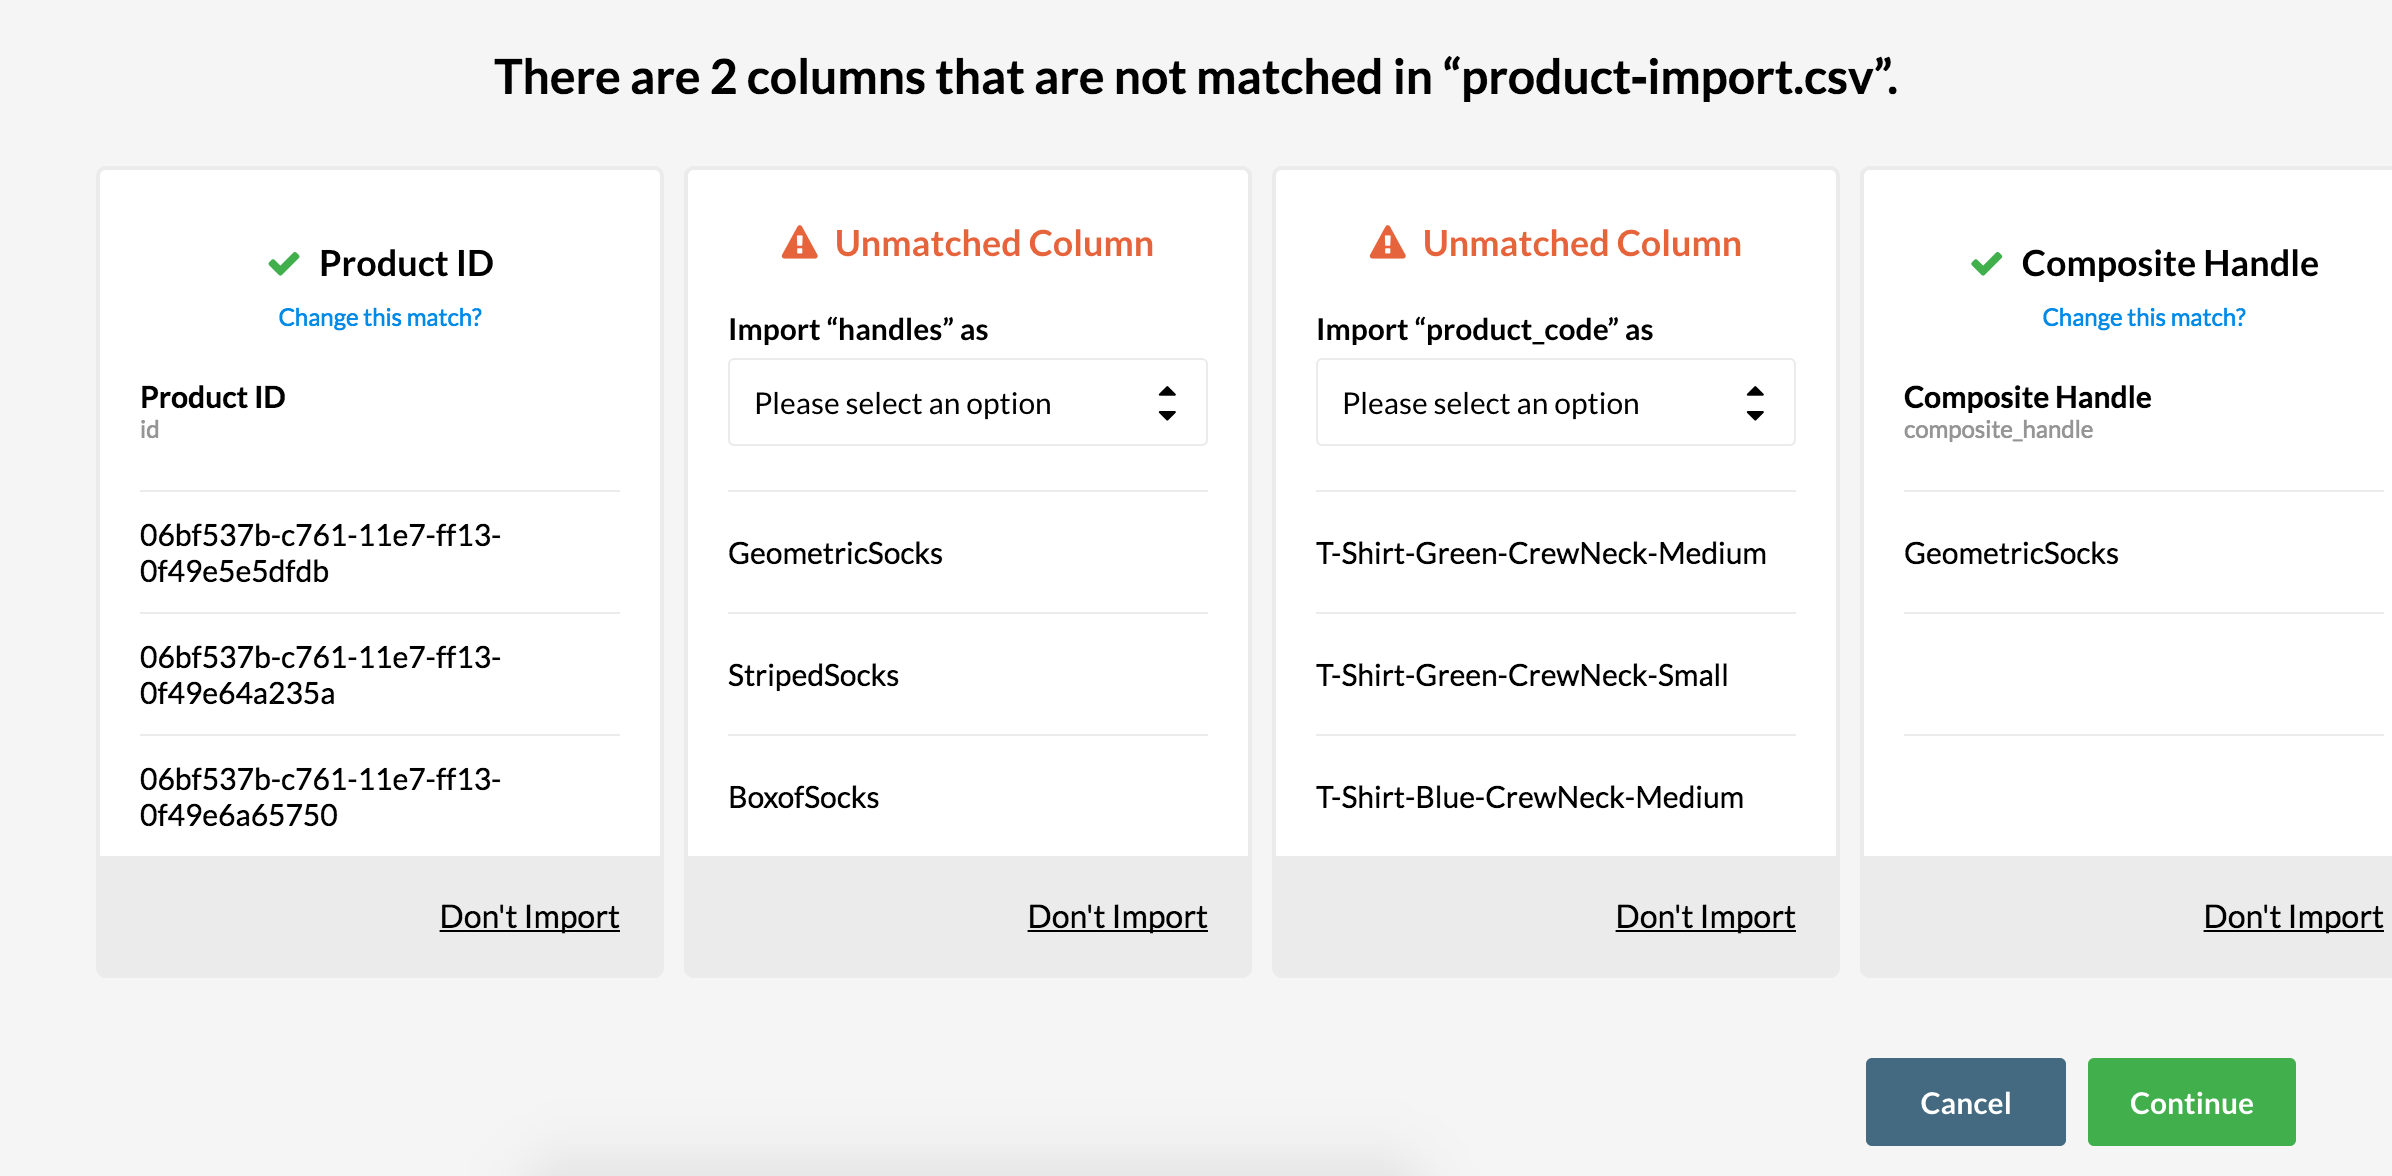
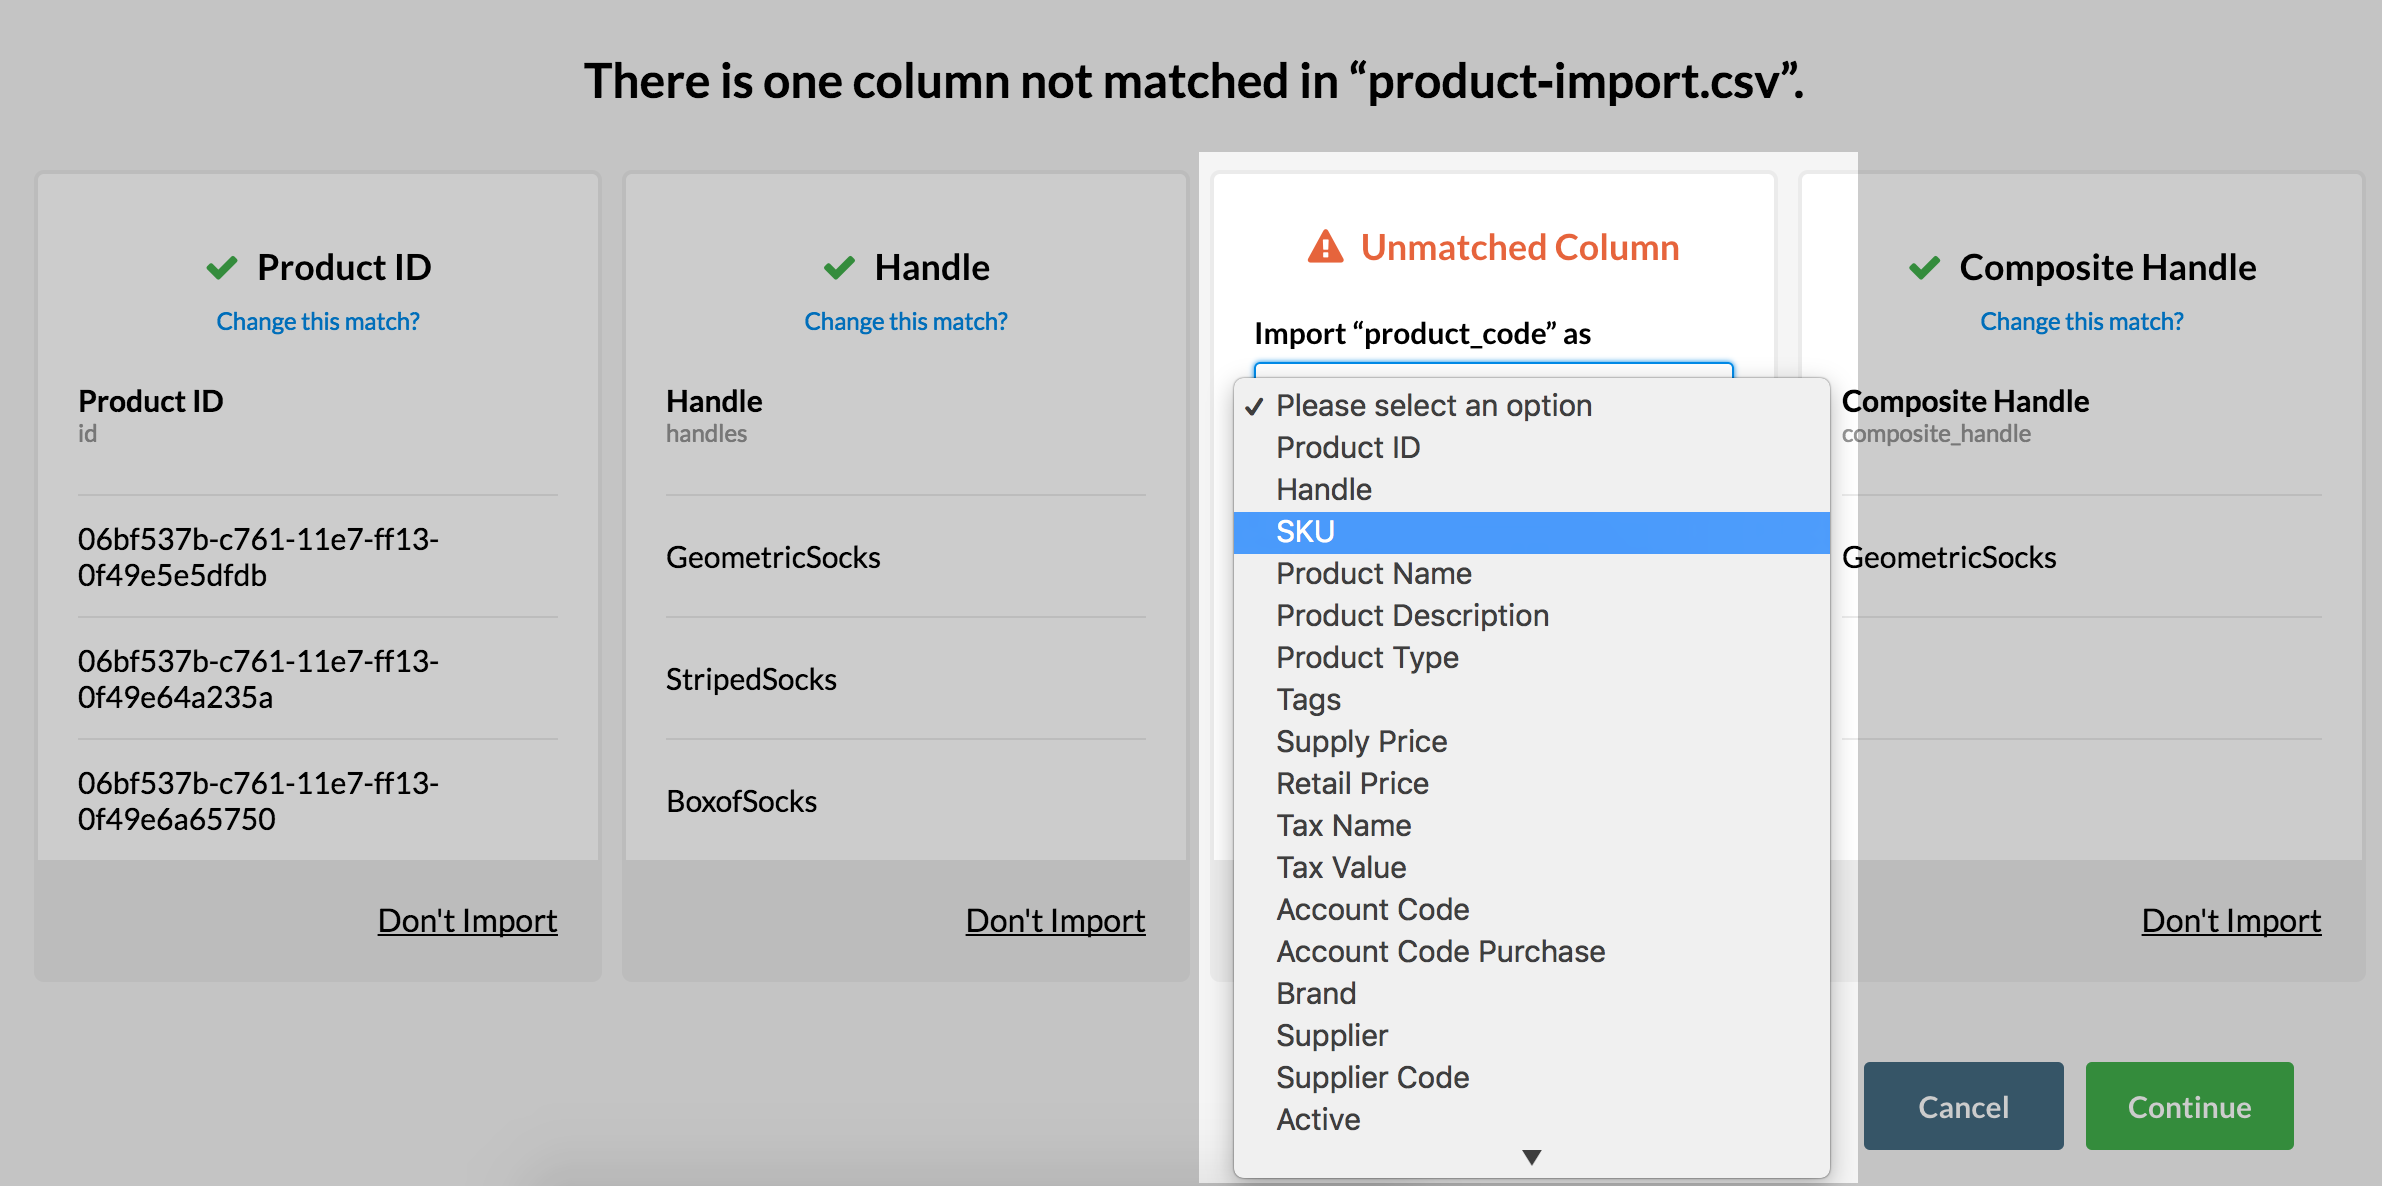
3. At this stage, you'll be able to view any unmatched columns and fix them by selecting the correct column from the drop-down menu.
You'll also have the option to change the matching of any other columns or choose not to import a specific column.
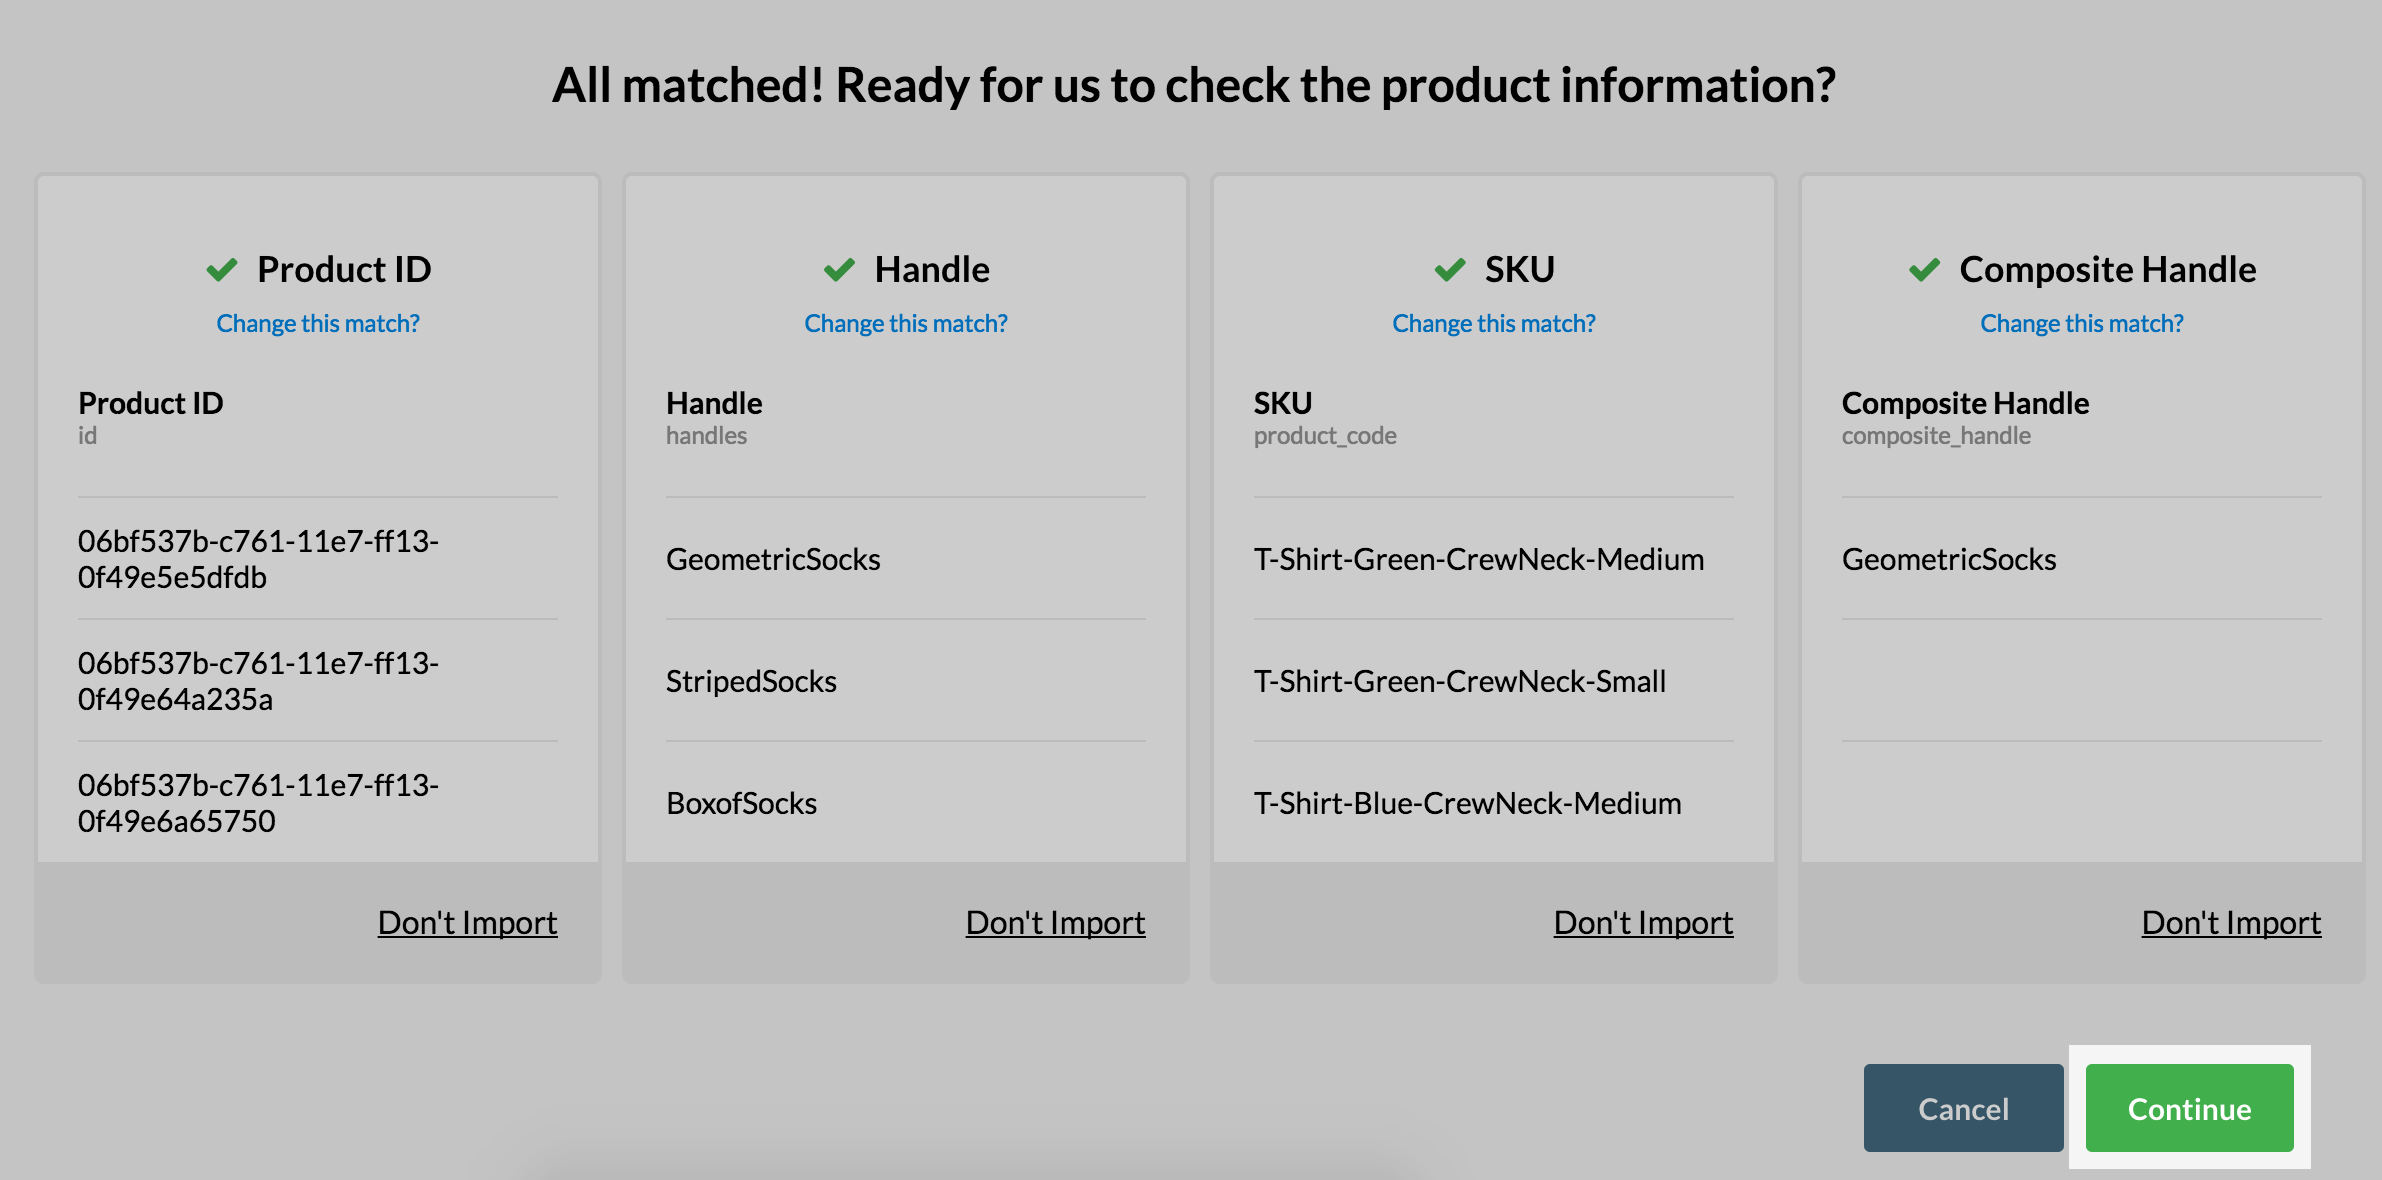
4. Once you've matched all the columns correctly, click continue. If there are no further column errors during this step move straight onto step 6.
5. If any mandatory columns are missing from your CSV an error screen will appear. From here, you'll be able to view the missing column(s) and download a new version of your CSV to make sure the missing columns are added.

Once you've made the required changes, reimport your CSV file by either dragging and dropping it into the Vend window or starting again from step 1.
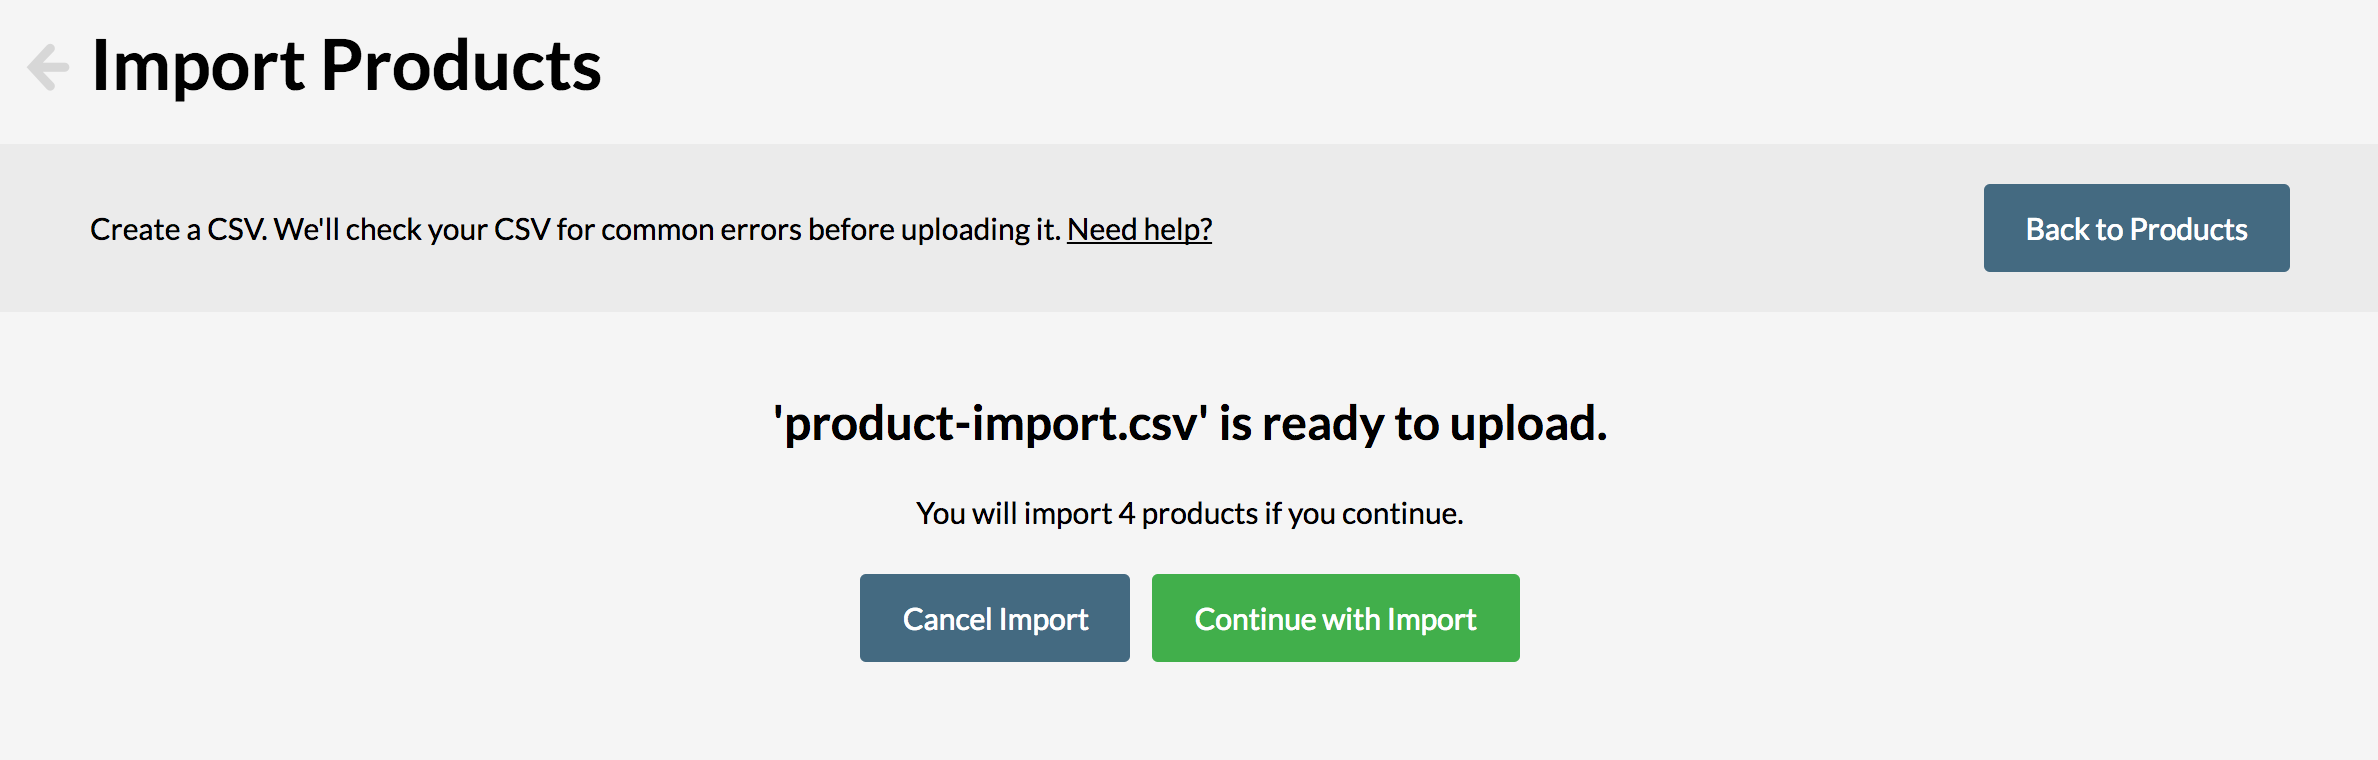
6. Once successful, you will be taken to a confirmation screen. From here, click 'continue import' to import the products into your store.
Warning screen:
You may also receive warnings before importing. If your CSV contains duplicate SKU's for example, you may receive a warning message. If you receive a warning message, you can still proceed with the import, but we recommend you make a note of the warnings you receive and fix them if necessary.
Troubleshooting:
If you've received one of the following errors when trying to import your CSV, check out this information below:
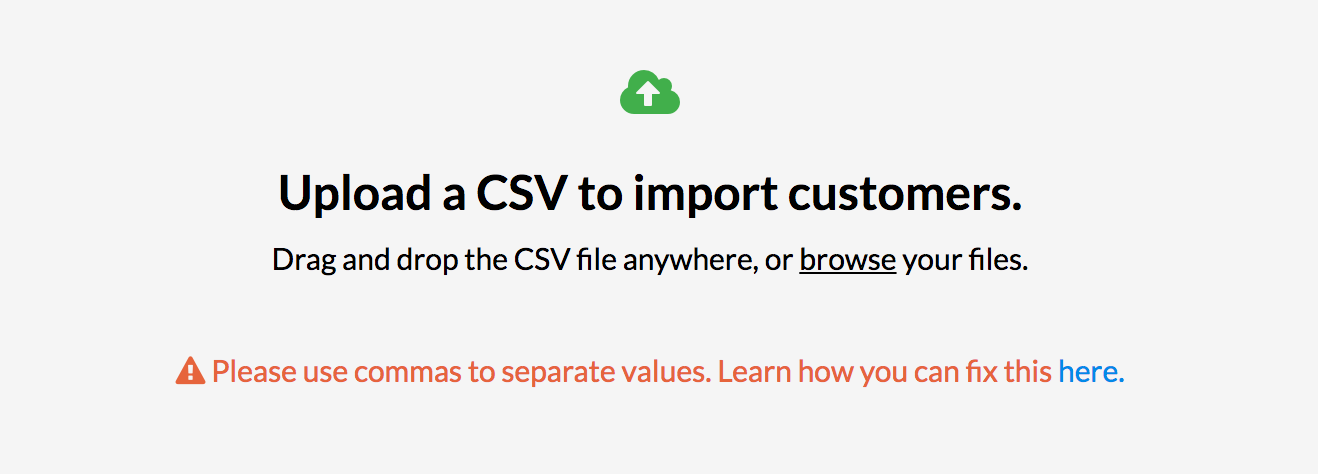
Please use commas to separate values:
If you see the screen below, the contents of the file you have tried to import may not be separated correctly. The best way to fix this up is to run through the steps for creating your CSV using our premade template. To find these steps, click here. If you're still unable to upload the file correctly, get in touch with us here.
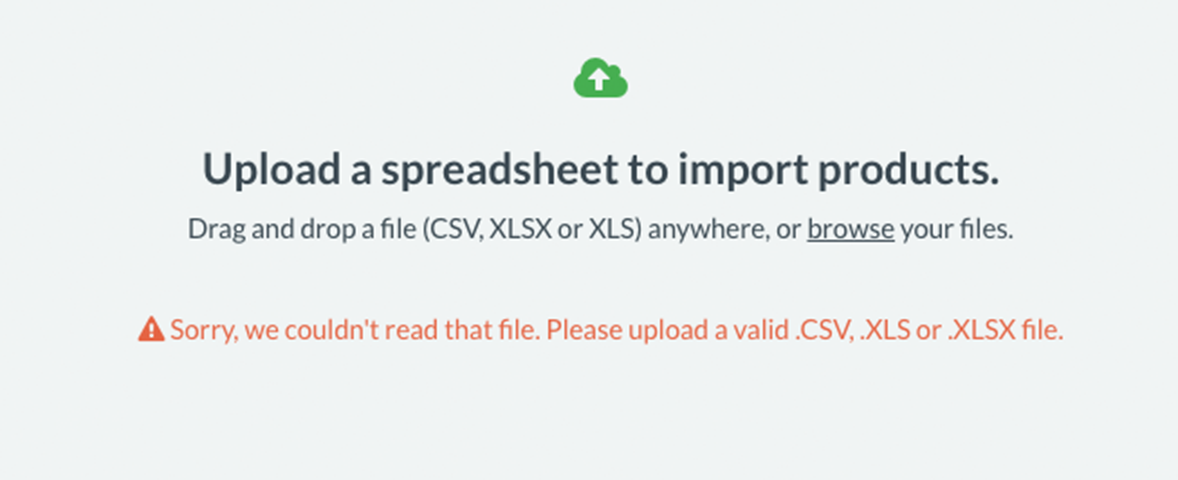
Please upload a valid CSV file:
If you see the screen below, the file type you have tried to import may either by incorrect or corrupt. Double check that this file is a .csv file and reimport it.
Related Articles
Running Sales and Promotions using Price Books
Price books are a feature in Vend that enable you to offer special pricing and loyalty amounts. These can be restricted to certain customer groups or outlets, enabling you to have sophisticated pricing strategies for your store. You can also automate ...Vend Integration Guide
Important notice These details are accurate at the time of writing this Help file. However, from time to time Vend may make further changes that are unknown to Unleashed.When importing products from Vend, Unleashed will also pull across Stock On ...Managing Variants in Vend
Product Variants are an important part of working with Vend for many retailers. Many products work best as variants. A blue t-shirt, for example, might have variants of Small, Medium, Large and X-Large. If you have questions about how to create ...Reporting in Vend
This article includes: Creating a Report in Vend Report Groups Sales Reports Payment Reports Inventory Reports Gift Card Reports Store Credit Reports Tax Reports Report Types Measure Date Range Filters Advanced Reporting Options The Retail Dashboard ...User Roles and Permissions in Vend
User roles Viewing user permissions Customising your user roles with advanced user permissions Available customisation options In Vend, you have three different roles to assign to your users. The admin, the manager and the cashier. By default, the ...