How to use the Scanner by Vend app for iOS
Signing in to Scanner by Vend:
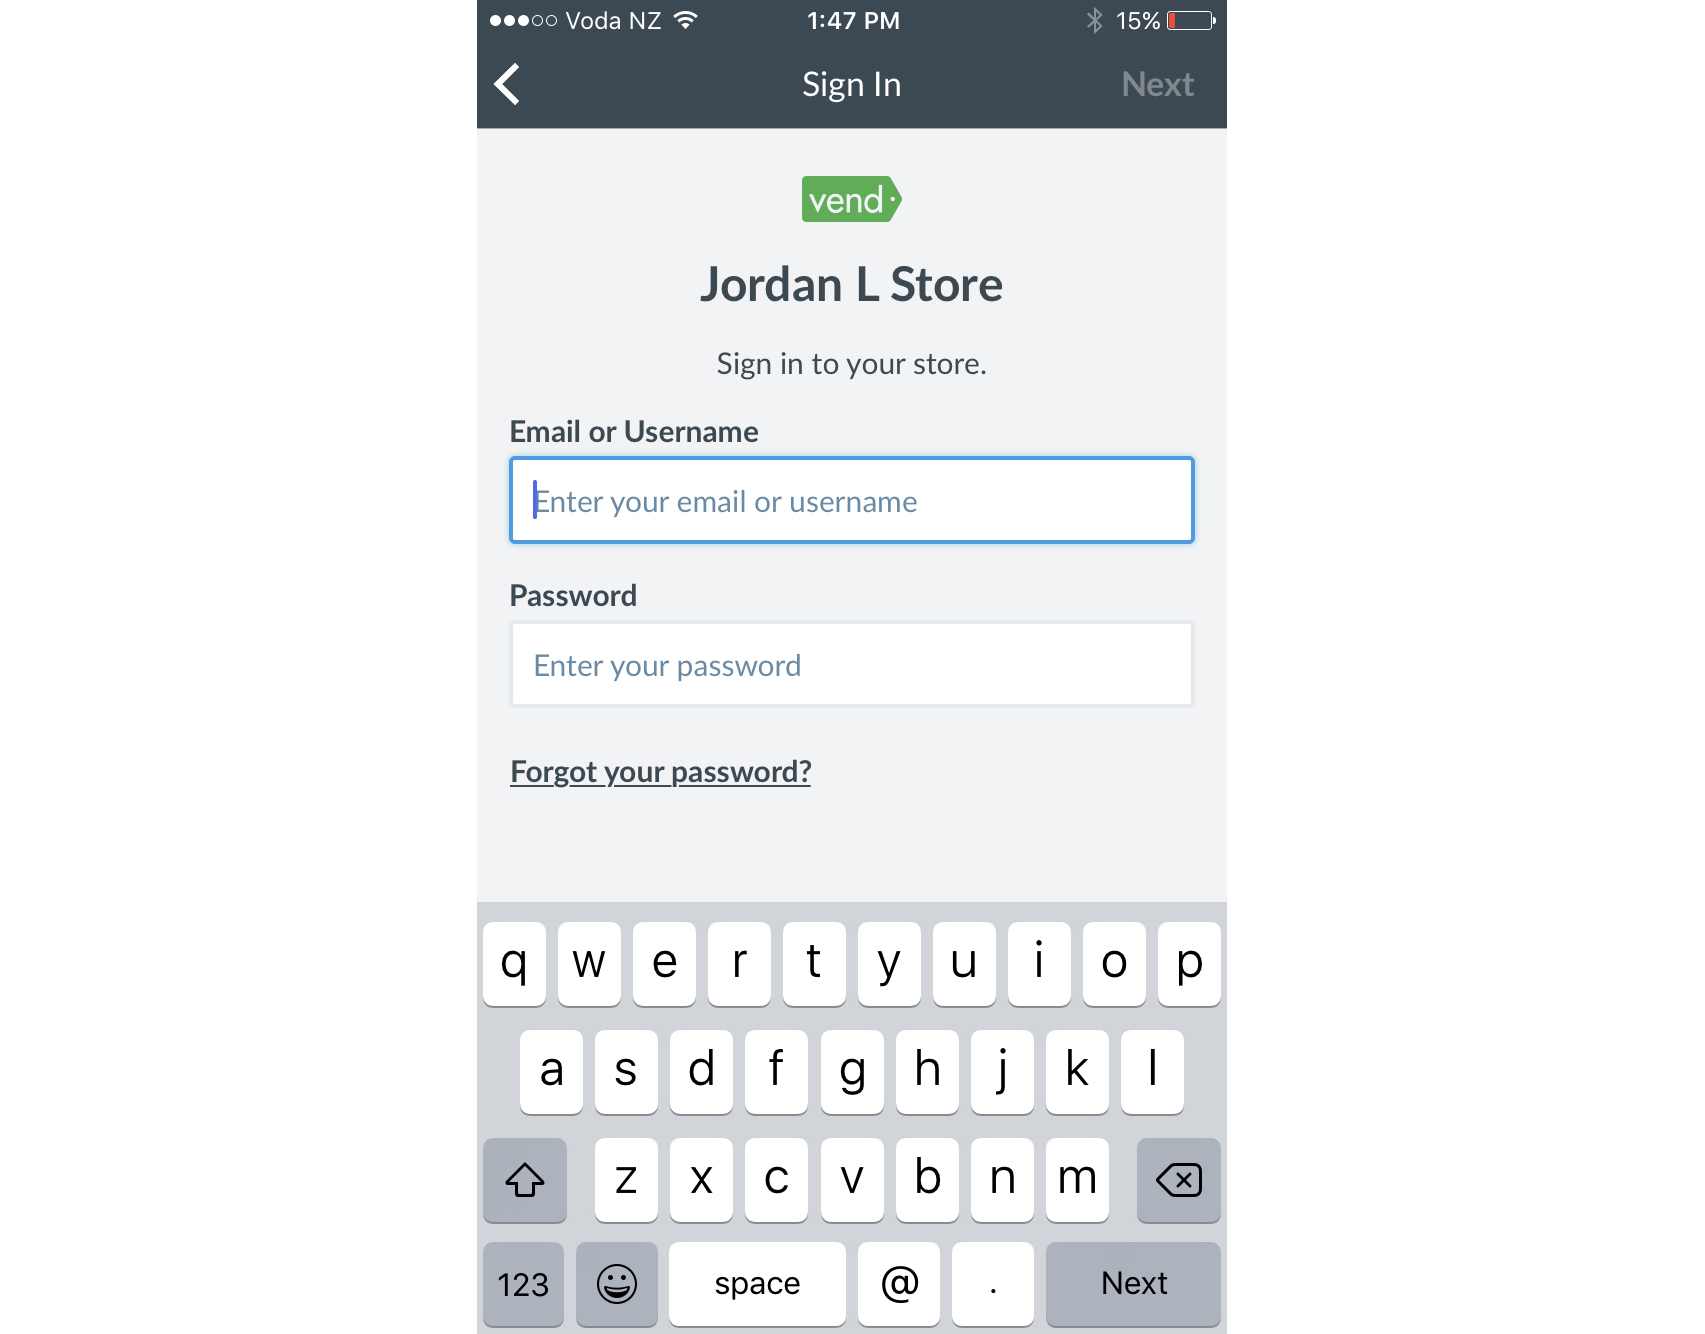
To sign in to Scanner by Vend using your Vend Account details follow the steps below:
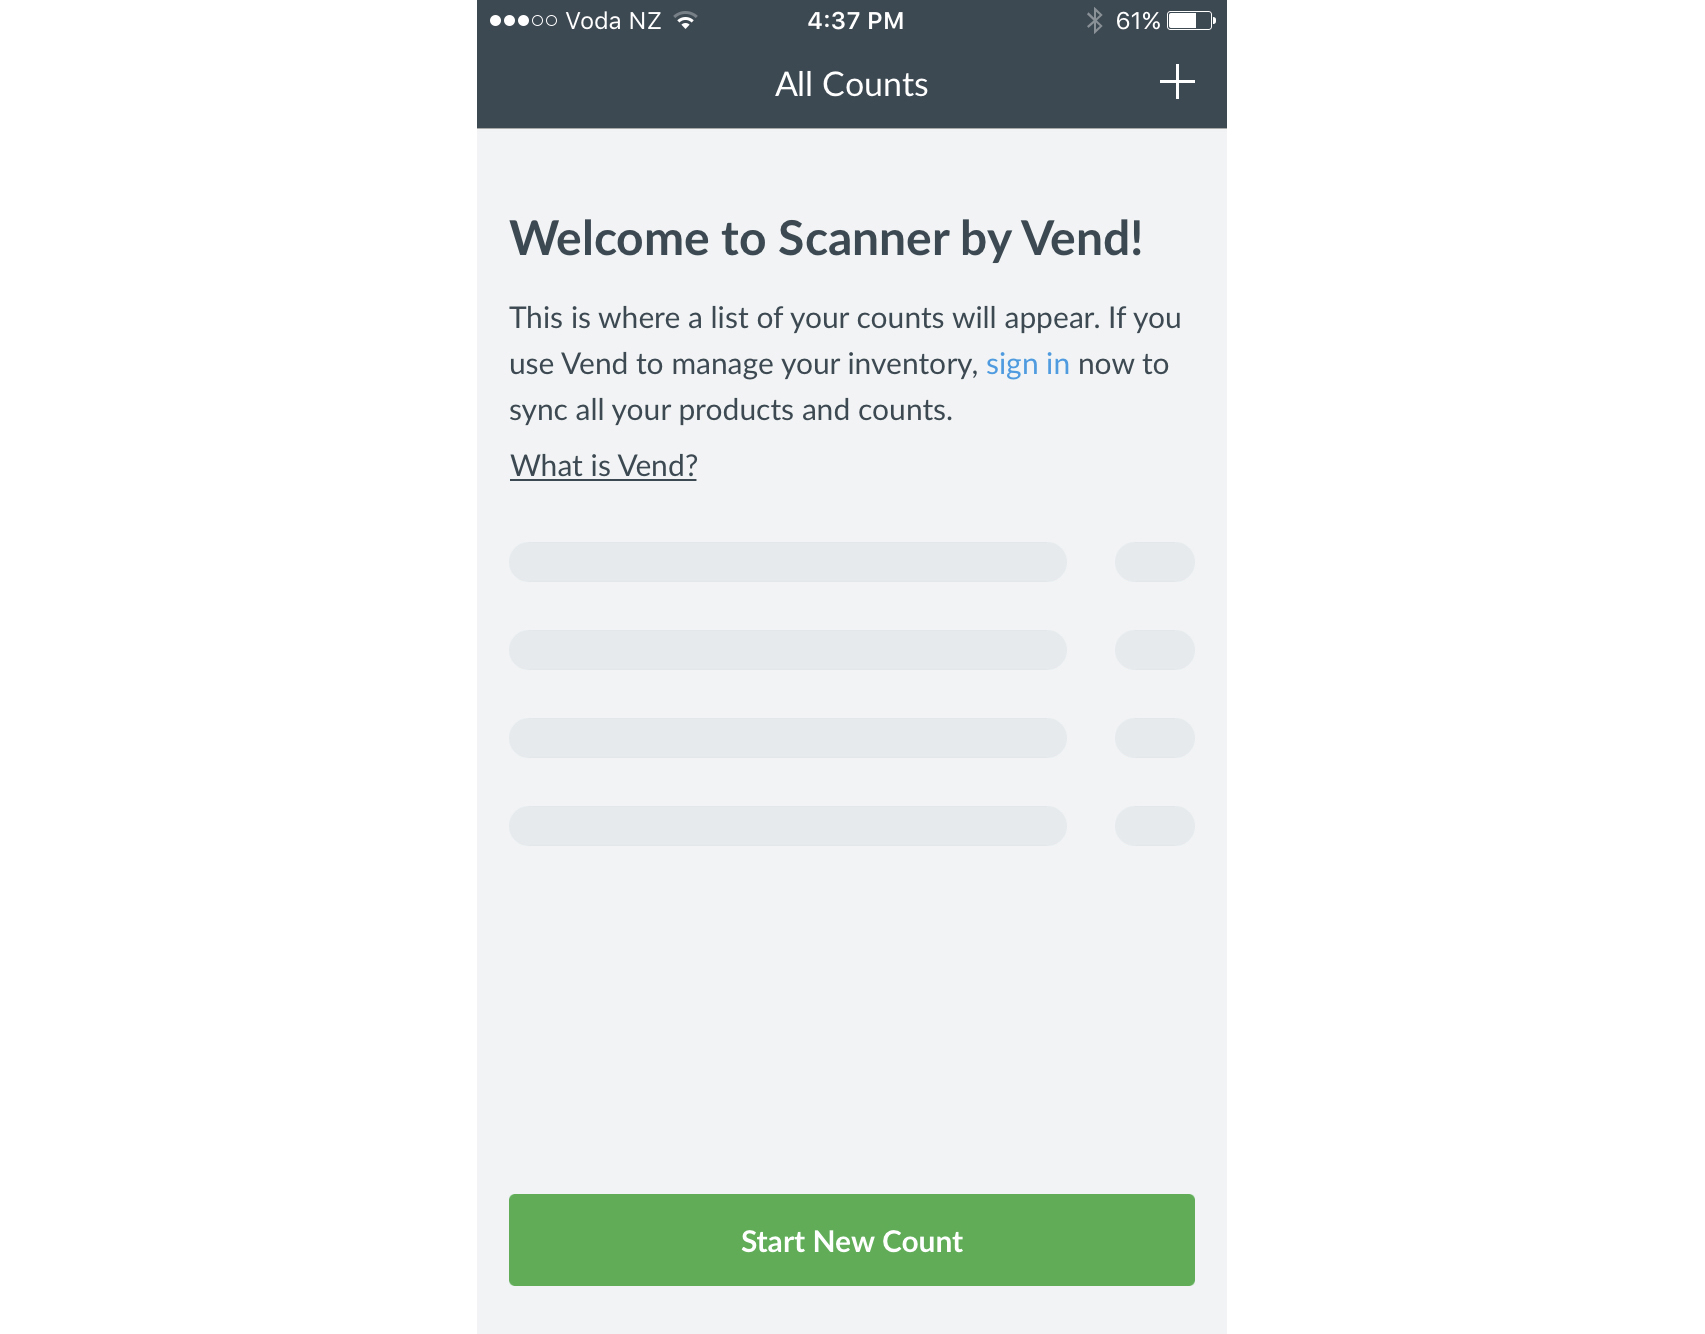
1. Click the sign in link on the welcome screen, or if you've already used the app before, the Sign Into Vend button on the All Counts screen.
2. Next, enter your Vend store URL followed by the email/username and password you use to sign in to your Vend store.
Starting a Count in Scanner:
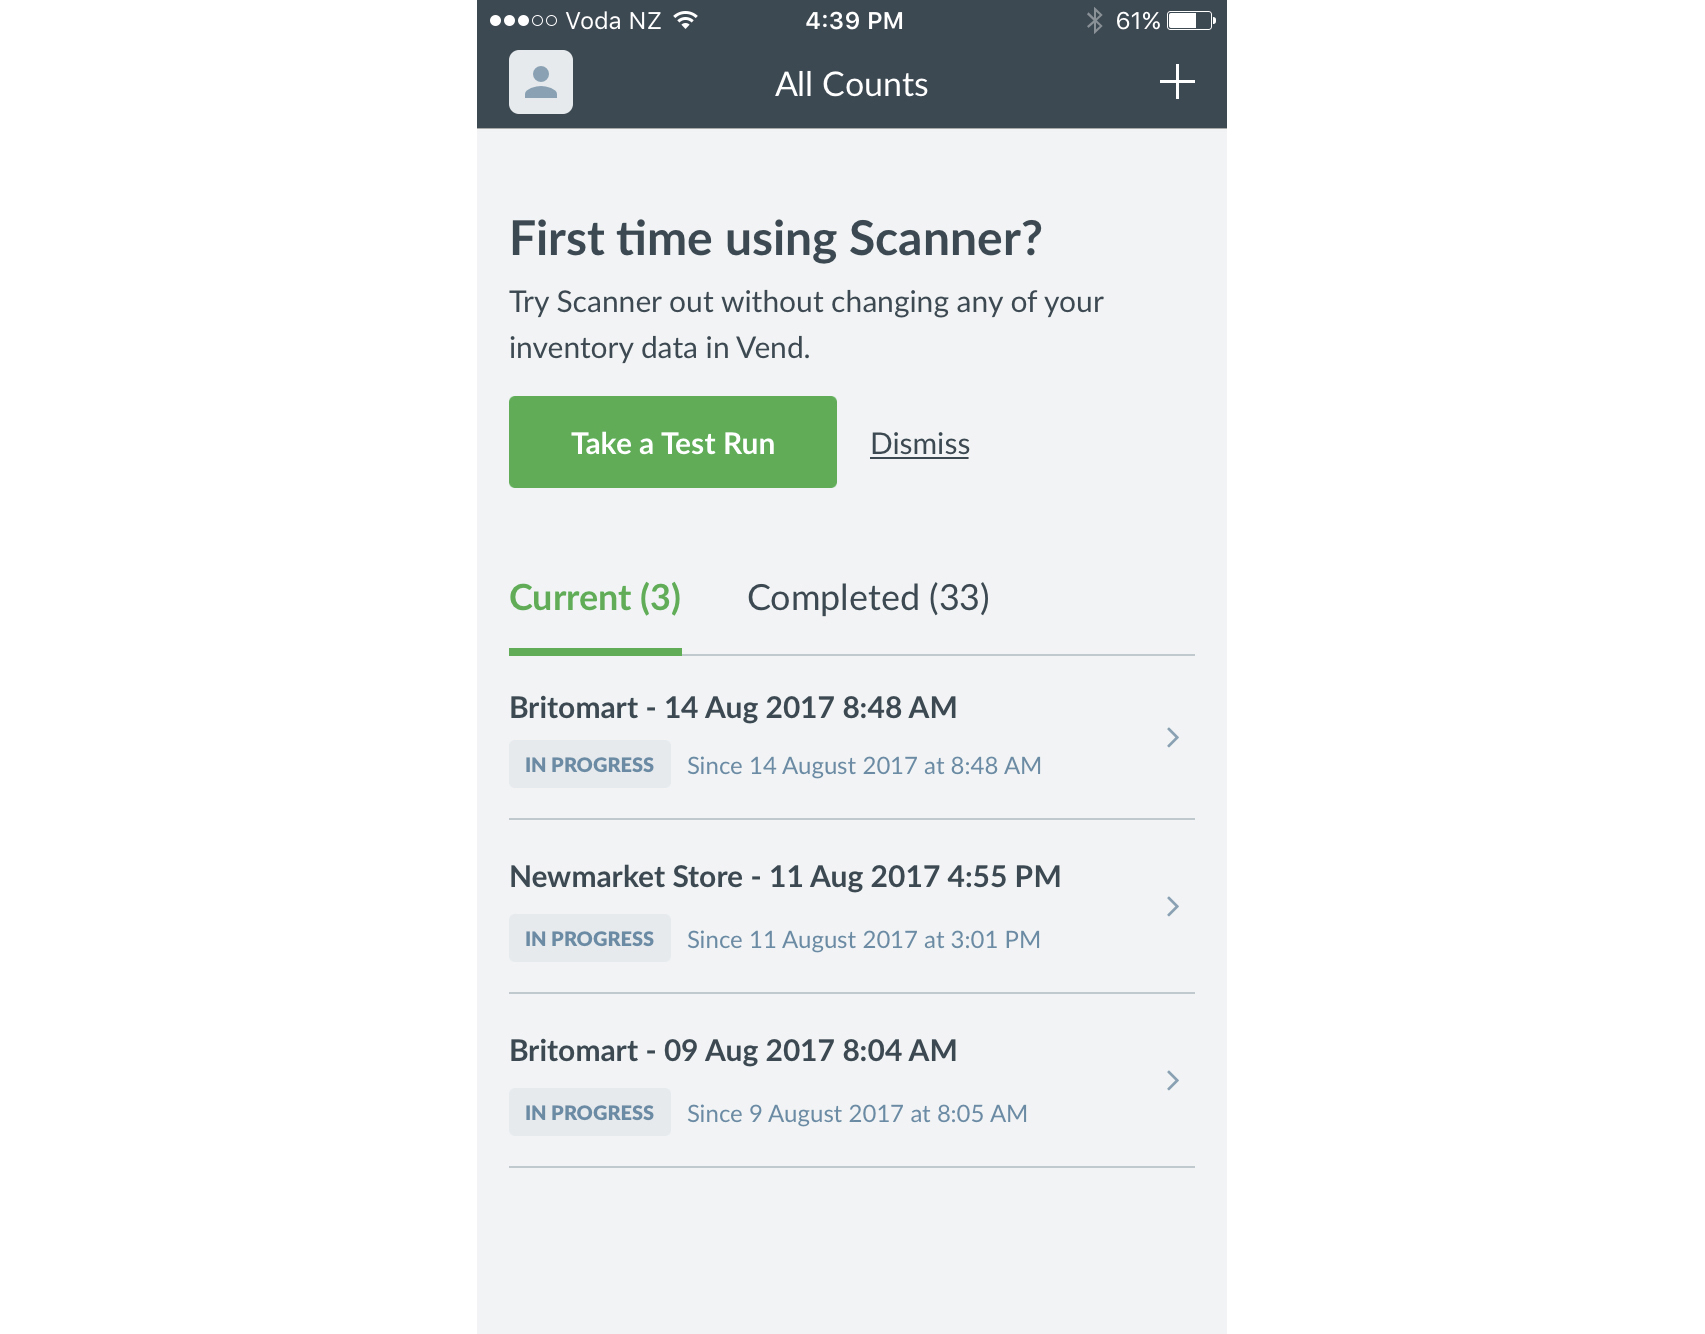
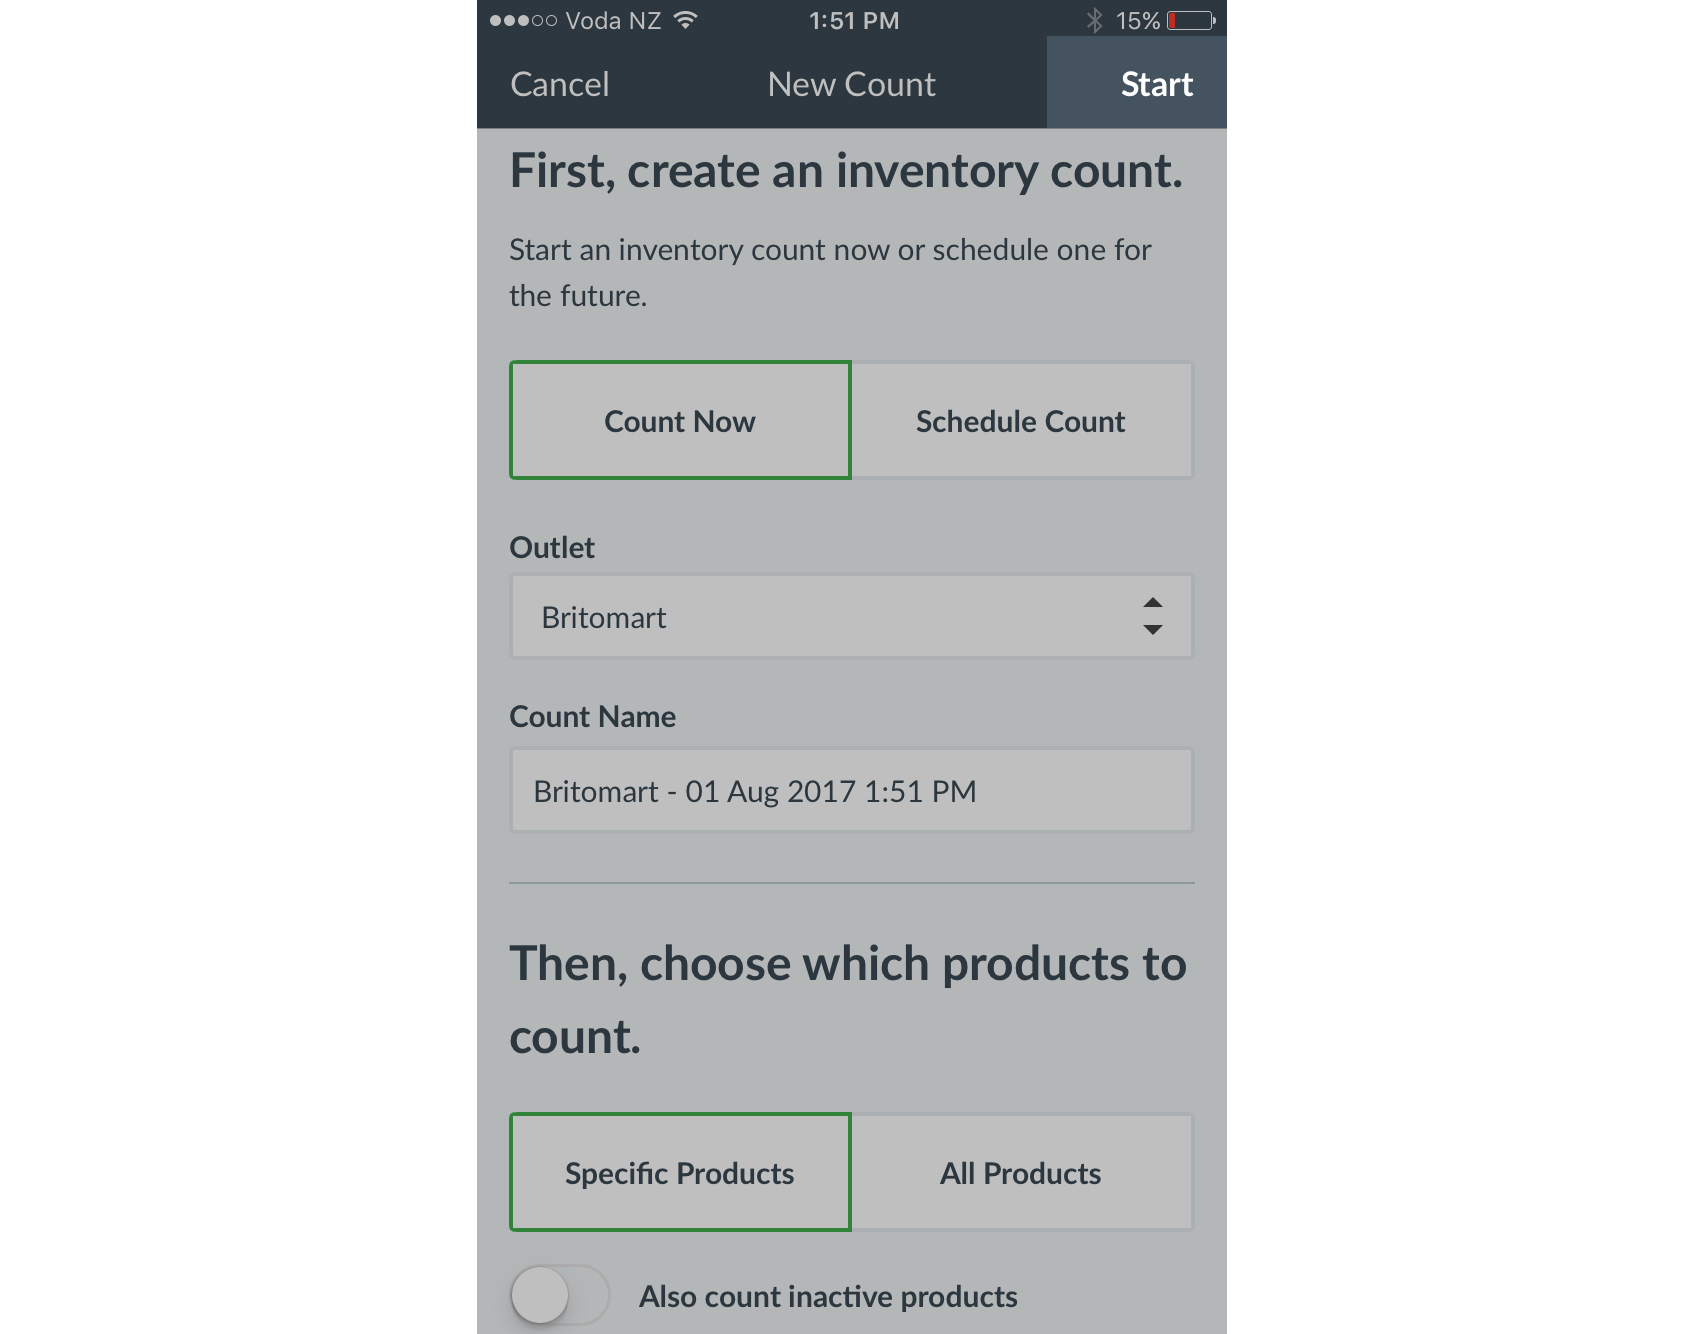
Just click on any existing counts shown in the Current view to get started OR, to create an Inventory Count in Scanner, click the + button in the top right corner of the screen.
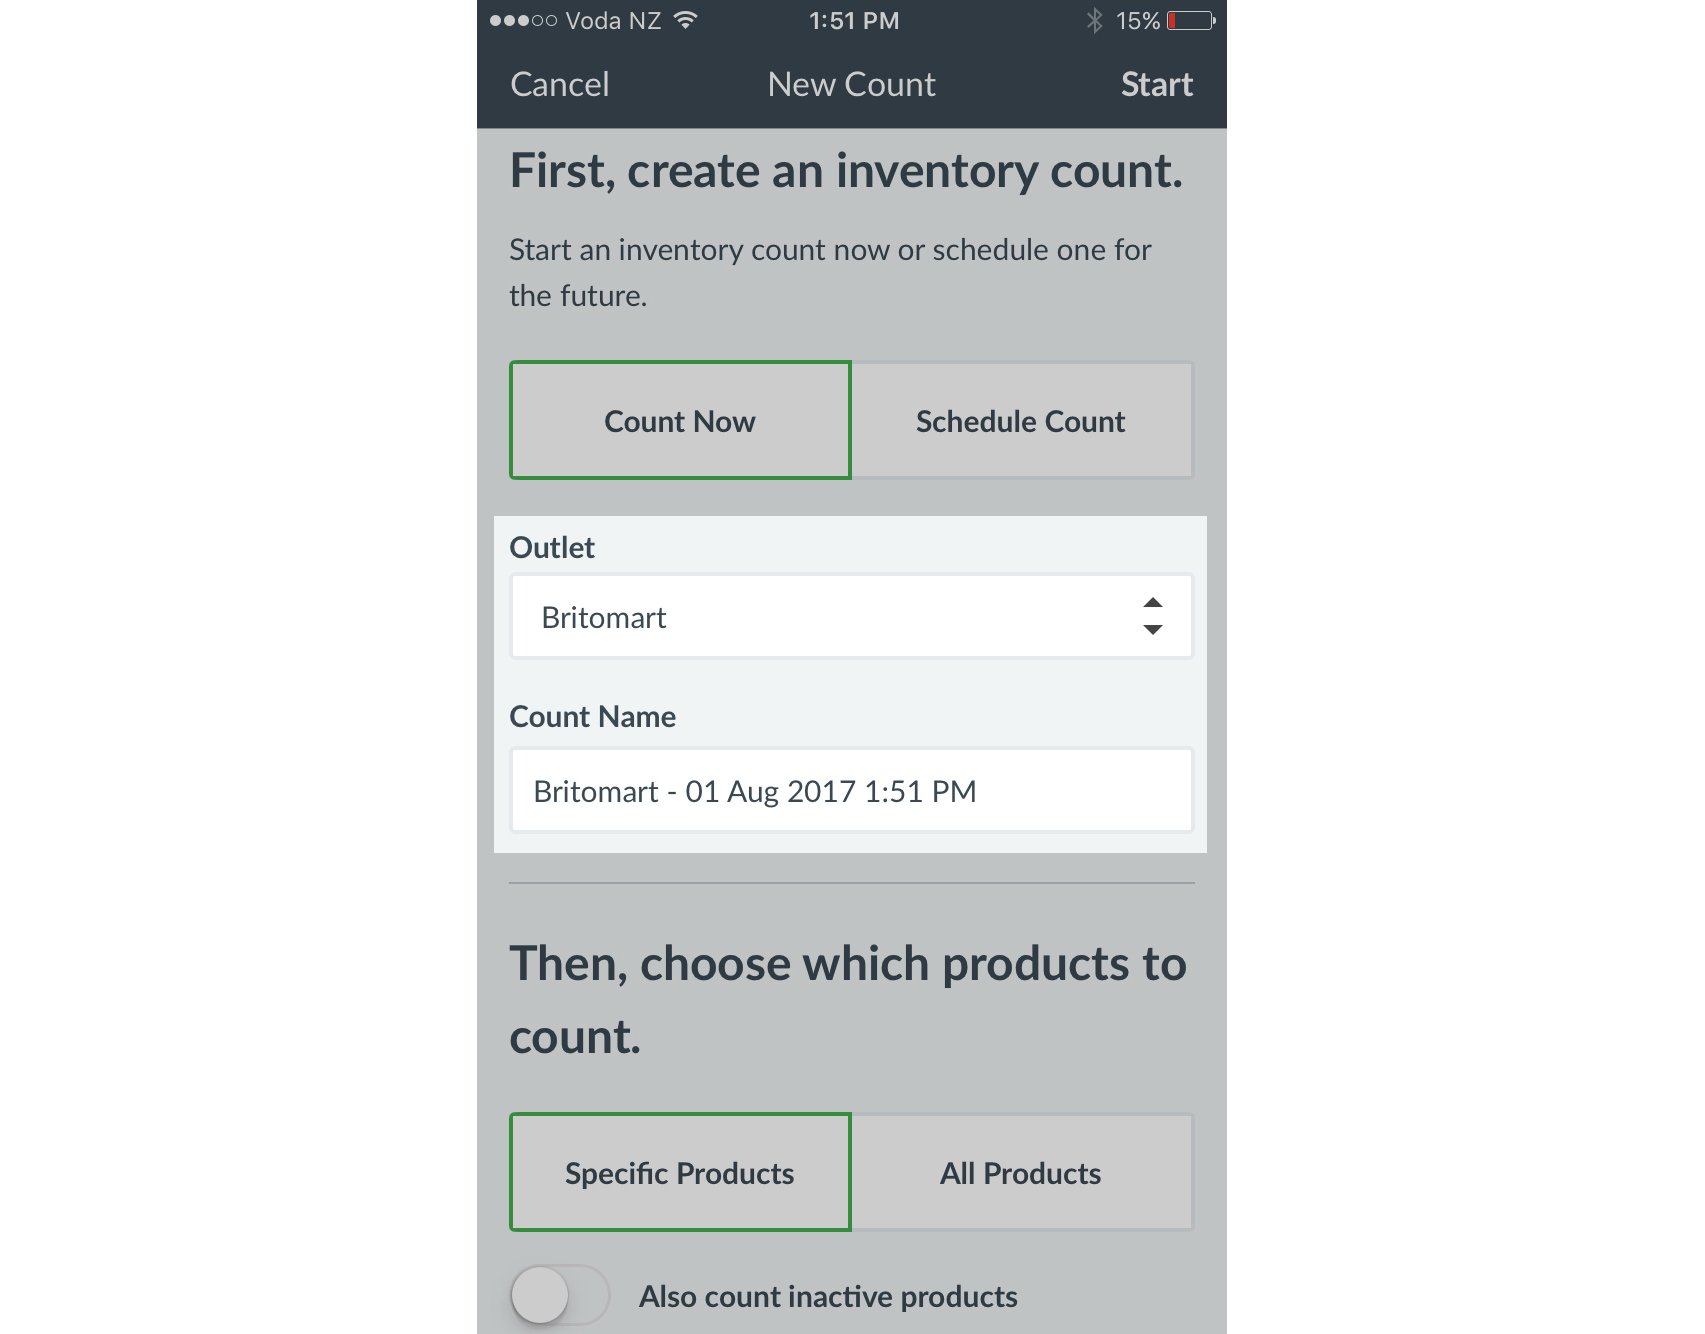
Choose whether to Count Now or Schedule Count for a later date.
If you choose Count Now you will be asked to name the count and specify which outlet the count will be taking place in.
If you choose Schedule Count you will need to specify the future start date and time for this count.
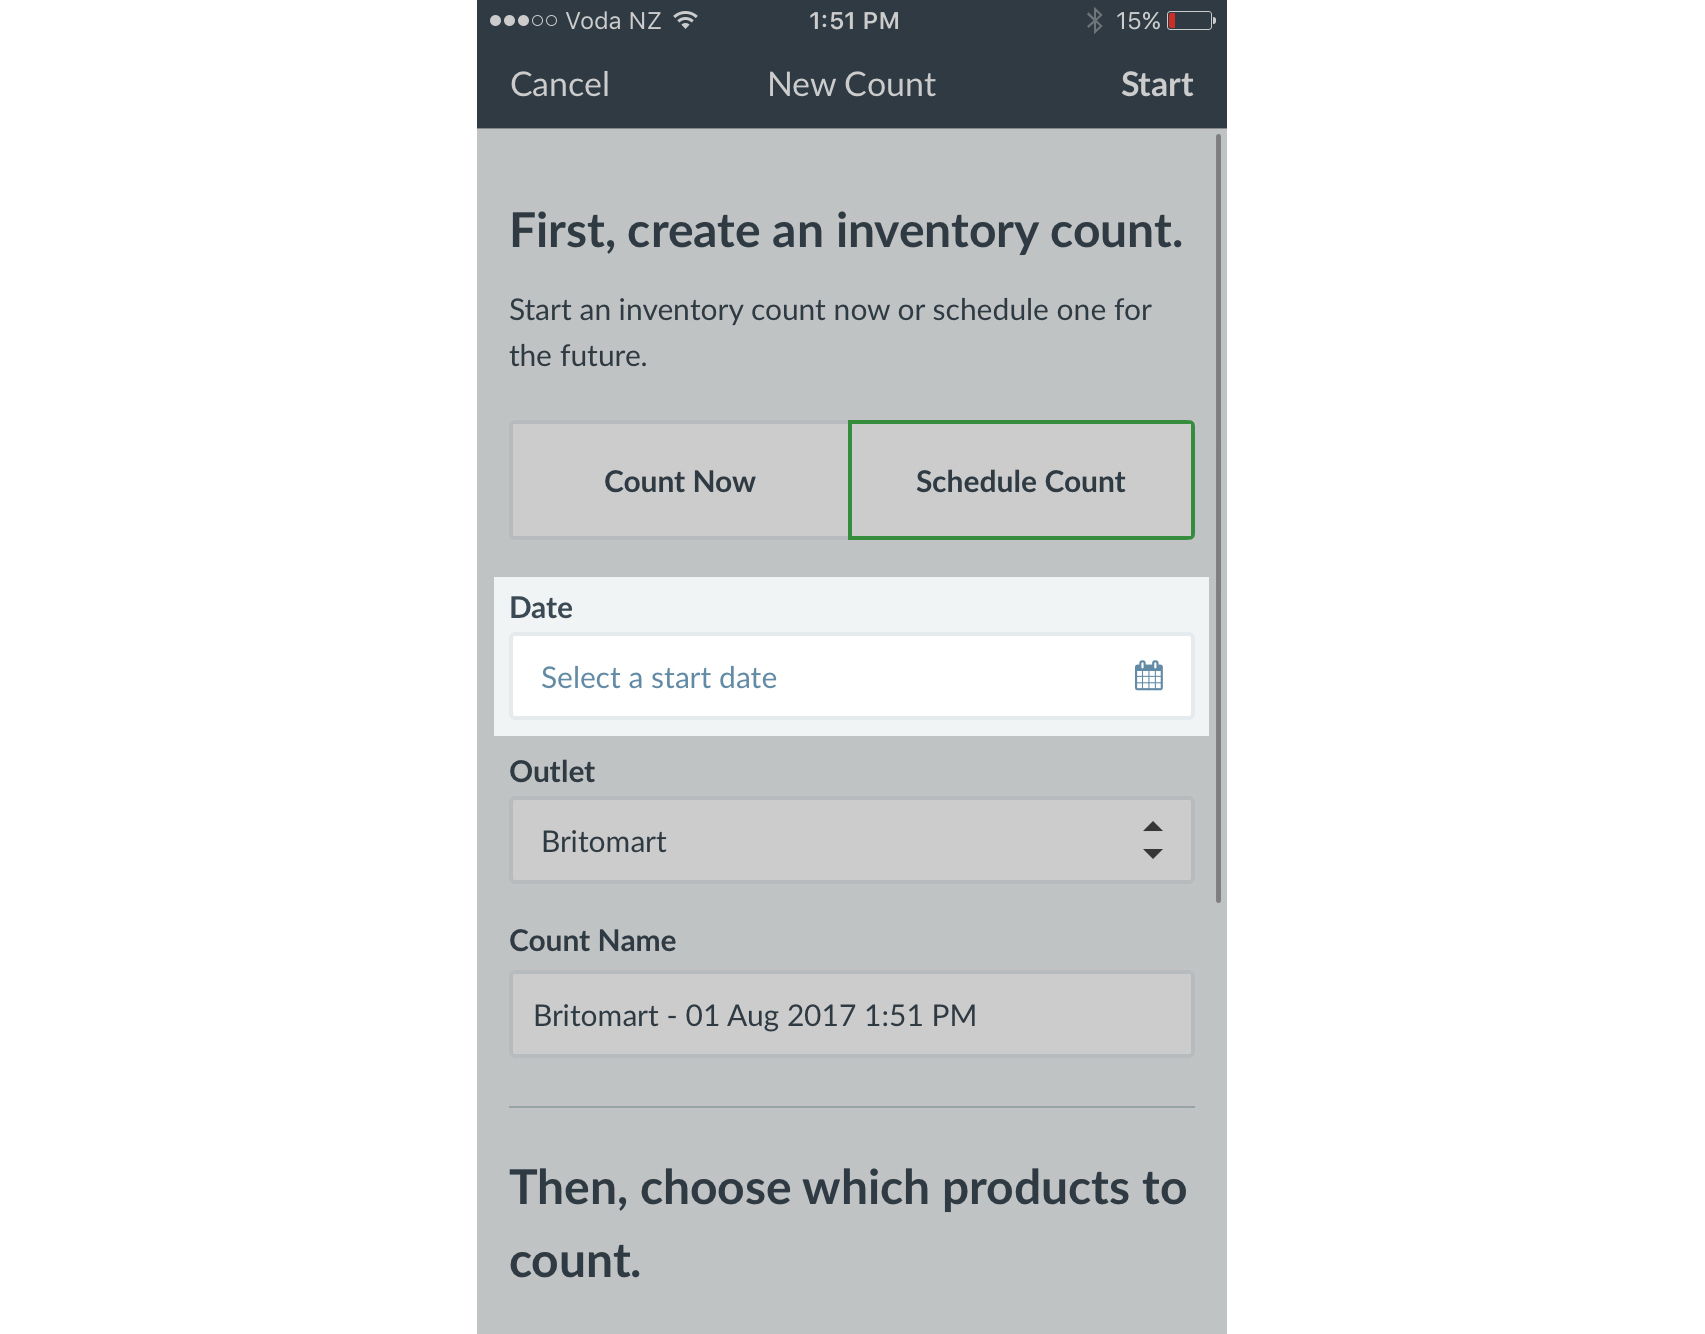
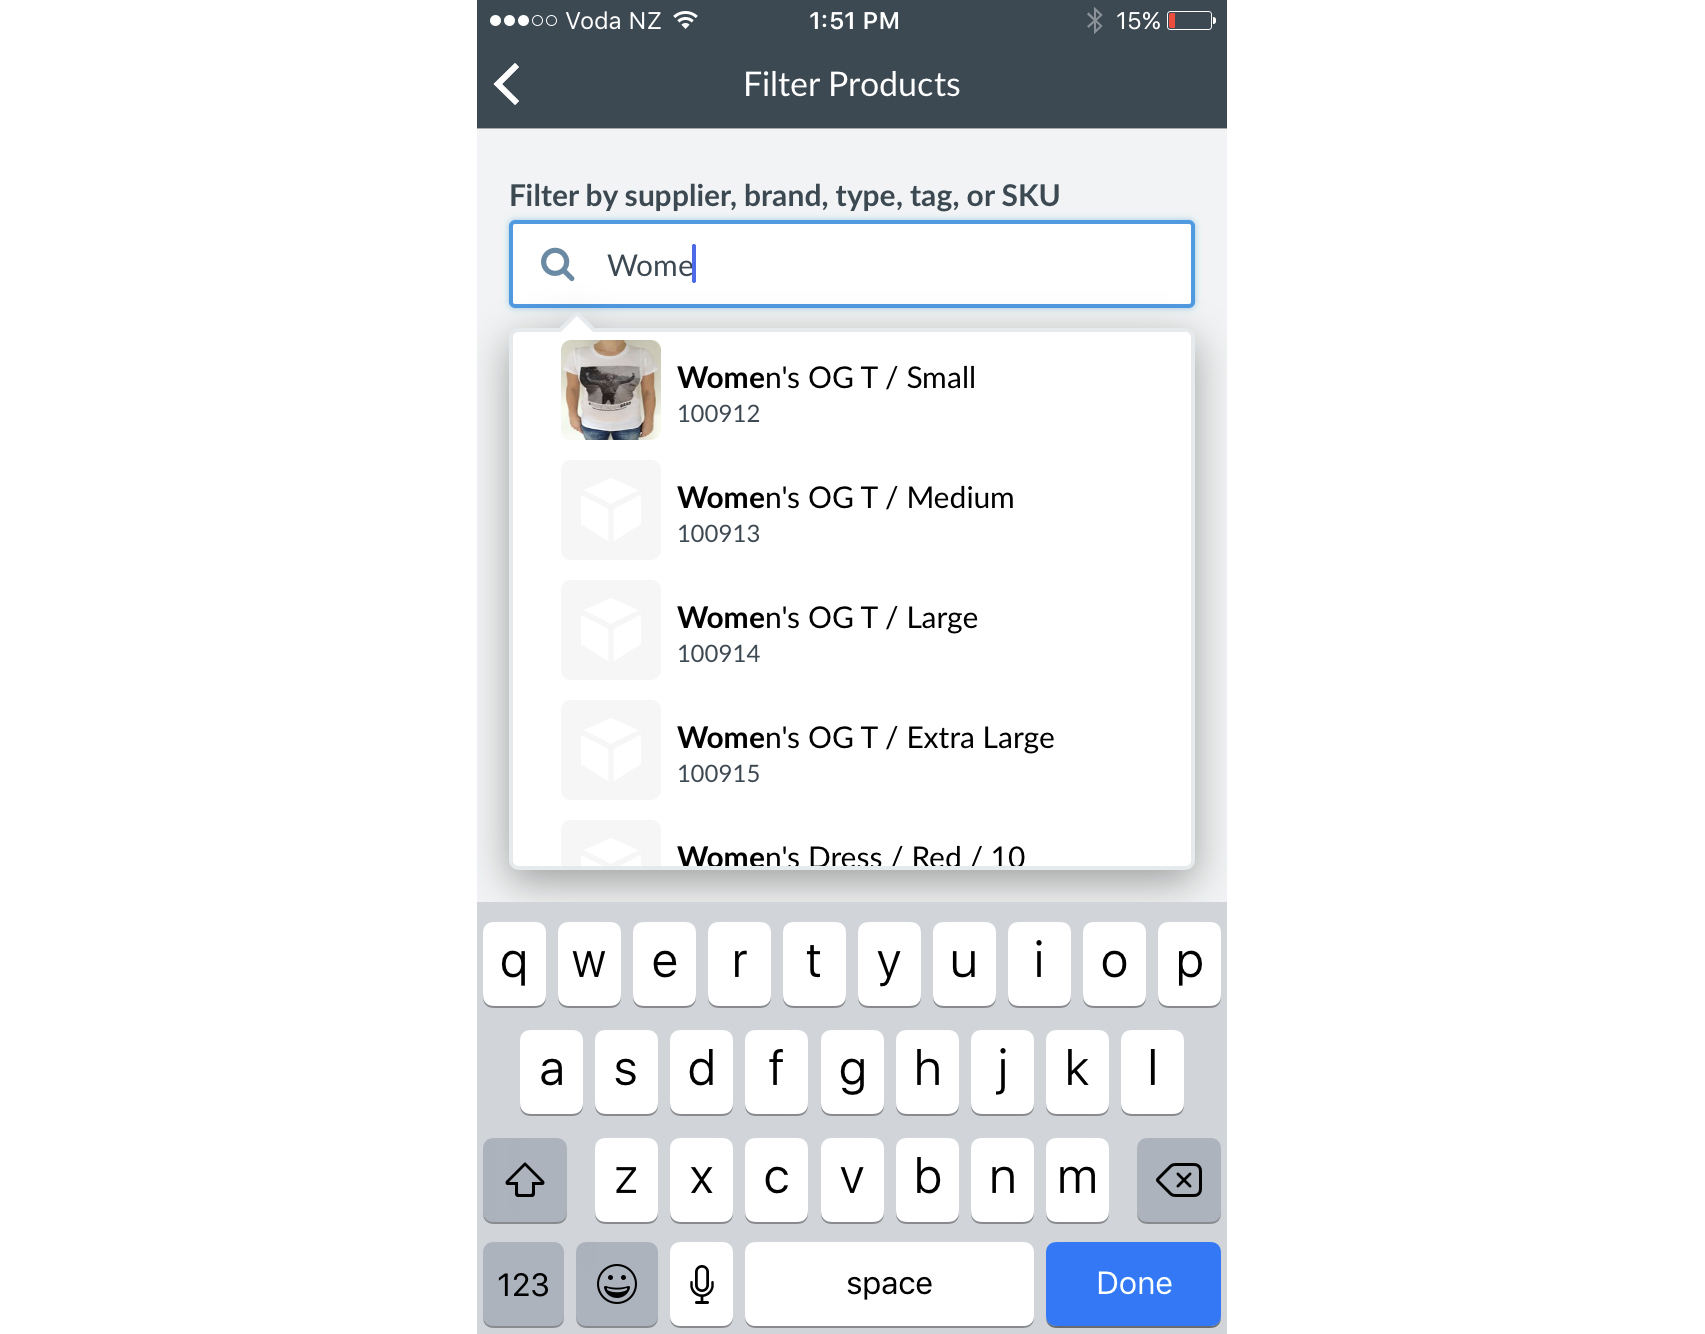
Once you have made one of the above selections, you will then need to choose which products to include in your count. You can either choose to include All Products or Specific Products. If you choose Specific Products you can specify which products you'd like to include in the count by filtering by product name, supplier, brand, type, tag or SKU.
Click Start at the top right to start counting now or Save if you have scheduled this count at a later date.
Important: The first time you start a count in Scanner, Scanner will need to process a full sync of your product database. This can take some time depending on the size of your product catalogue but will only need to be performed once.
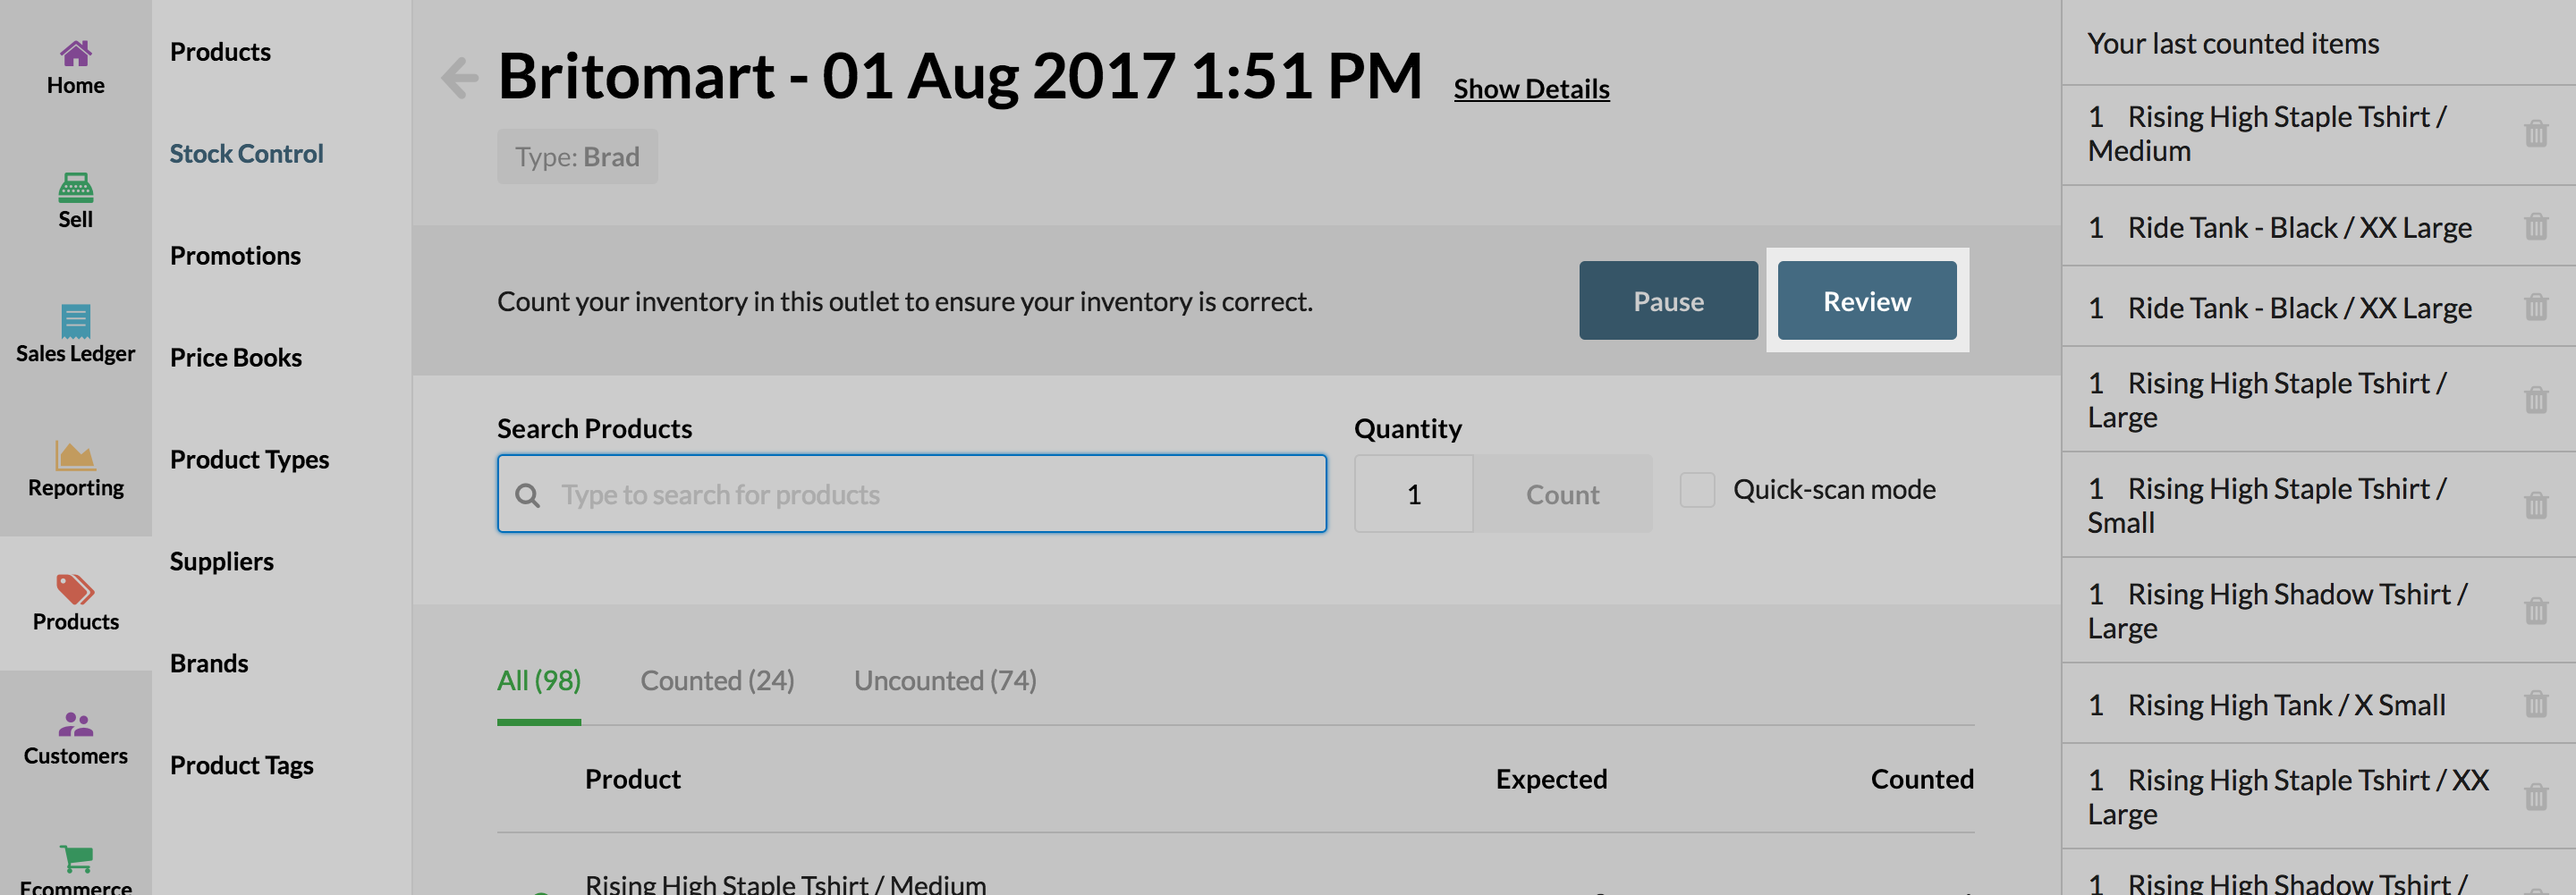
Counting Products with Scanner:
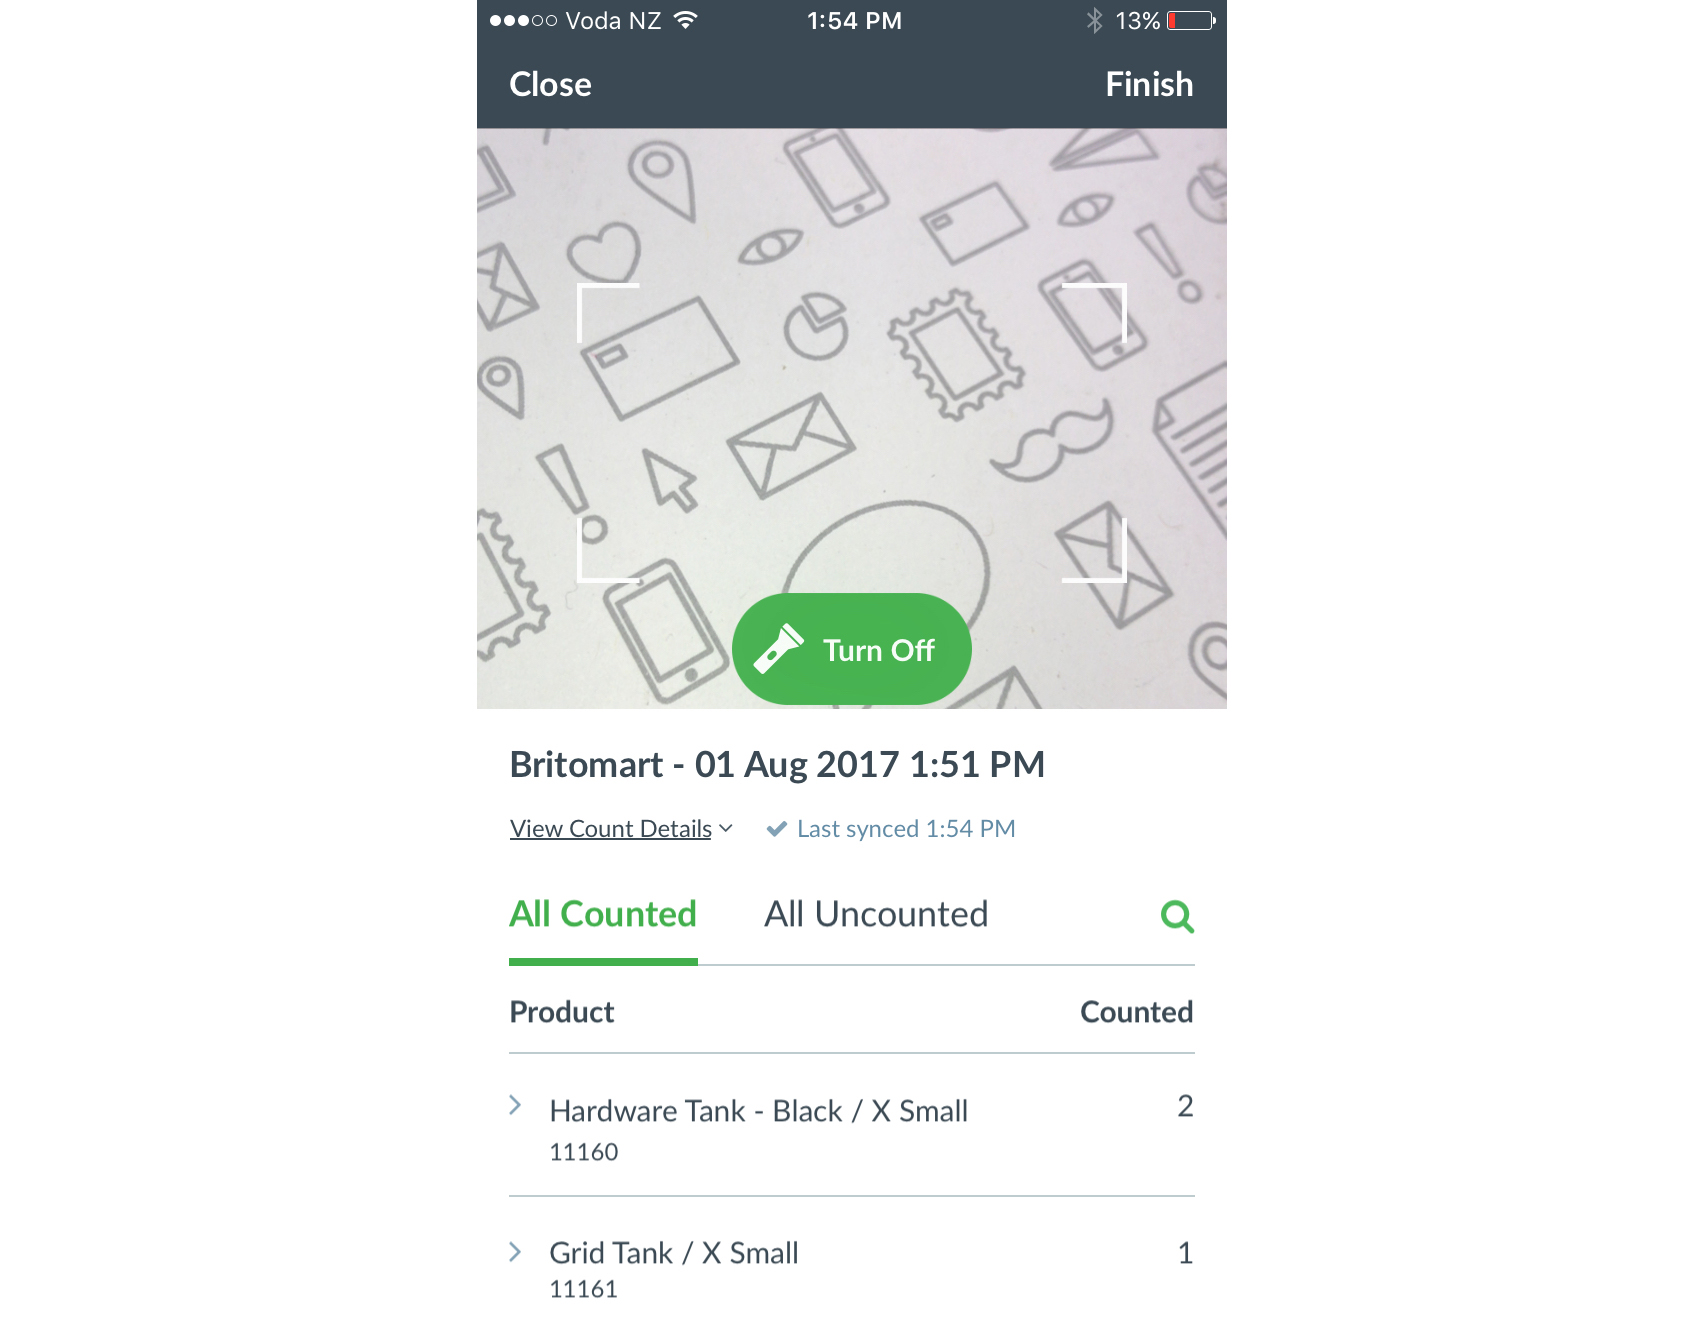
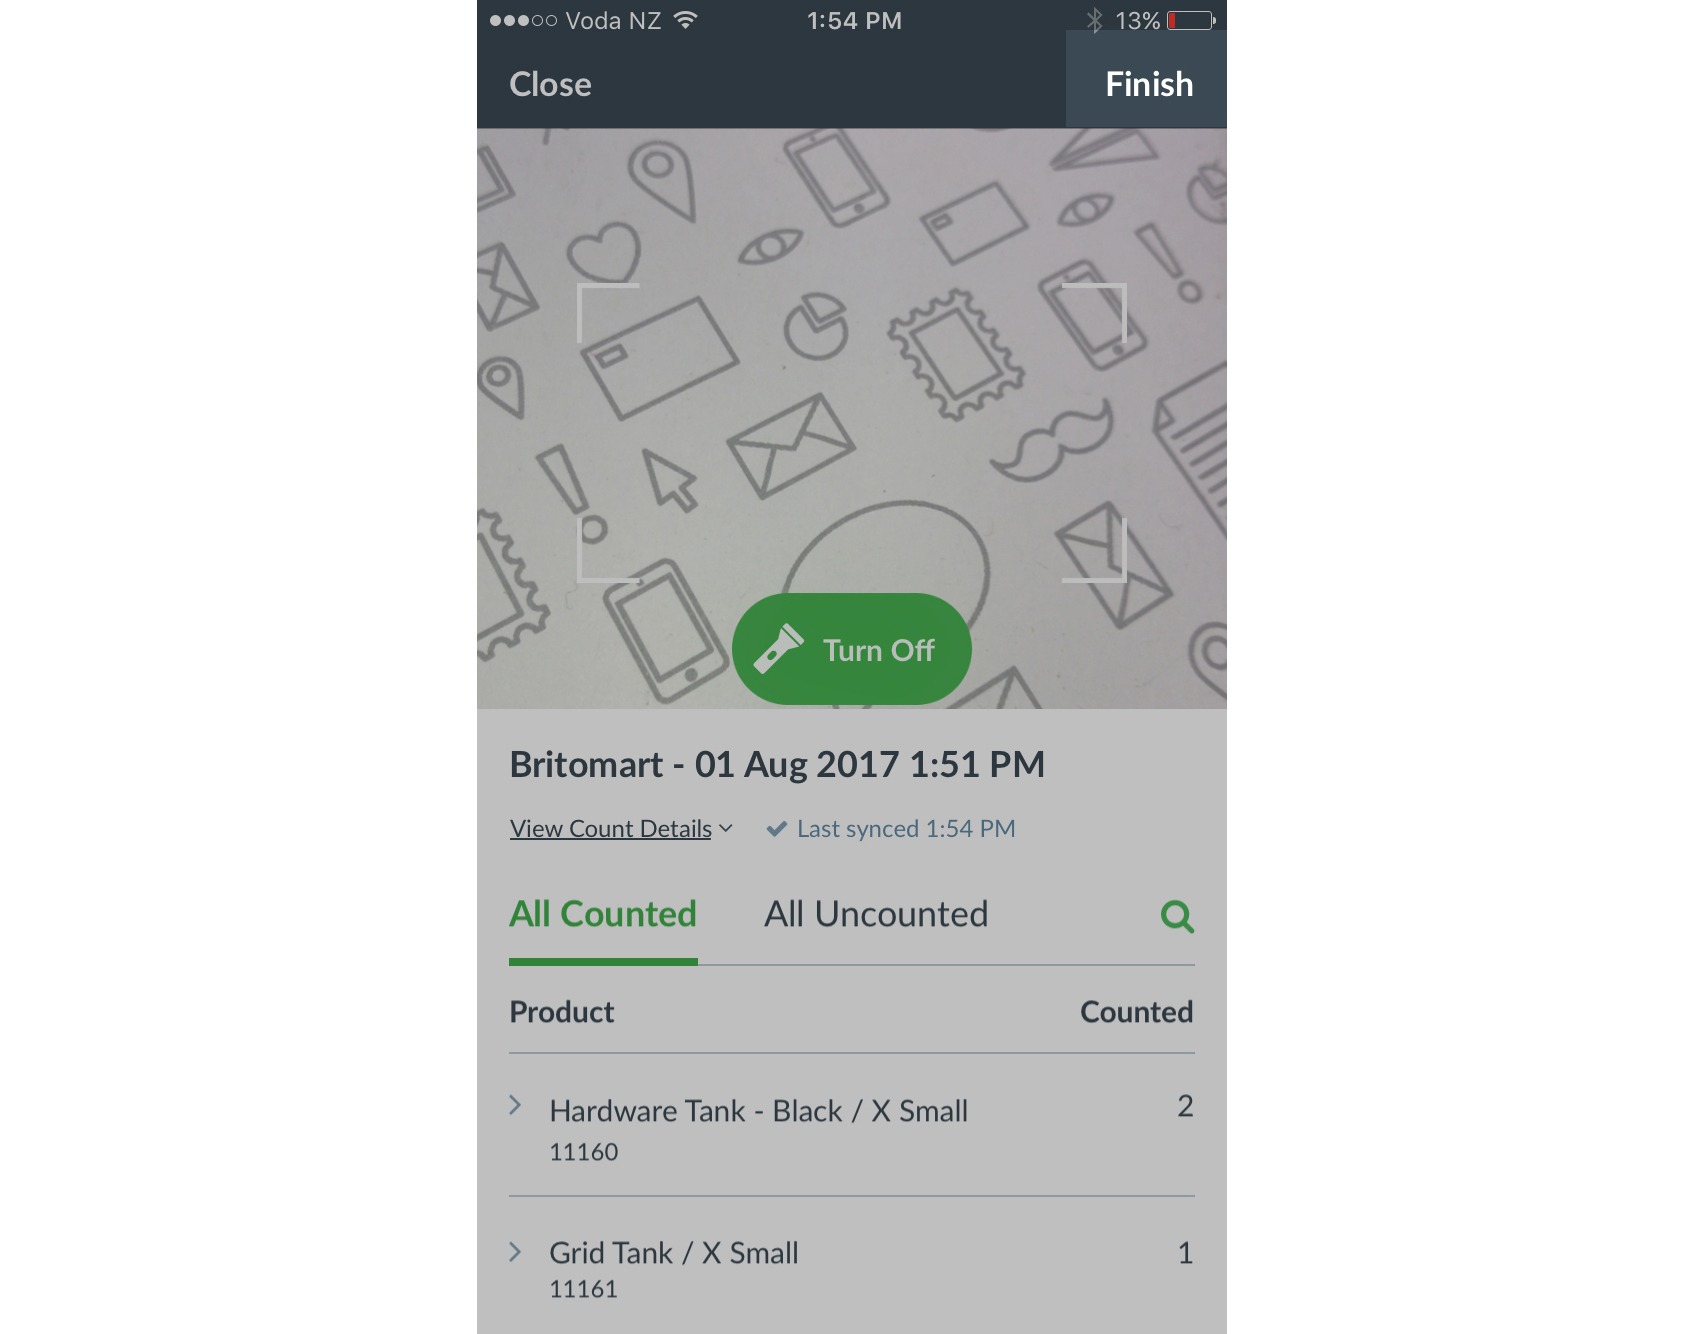
To begin counting products use the in-app camera to scan a product barcode.
OR
search for the product manually using the search icon.
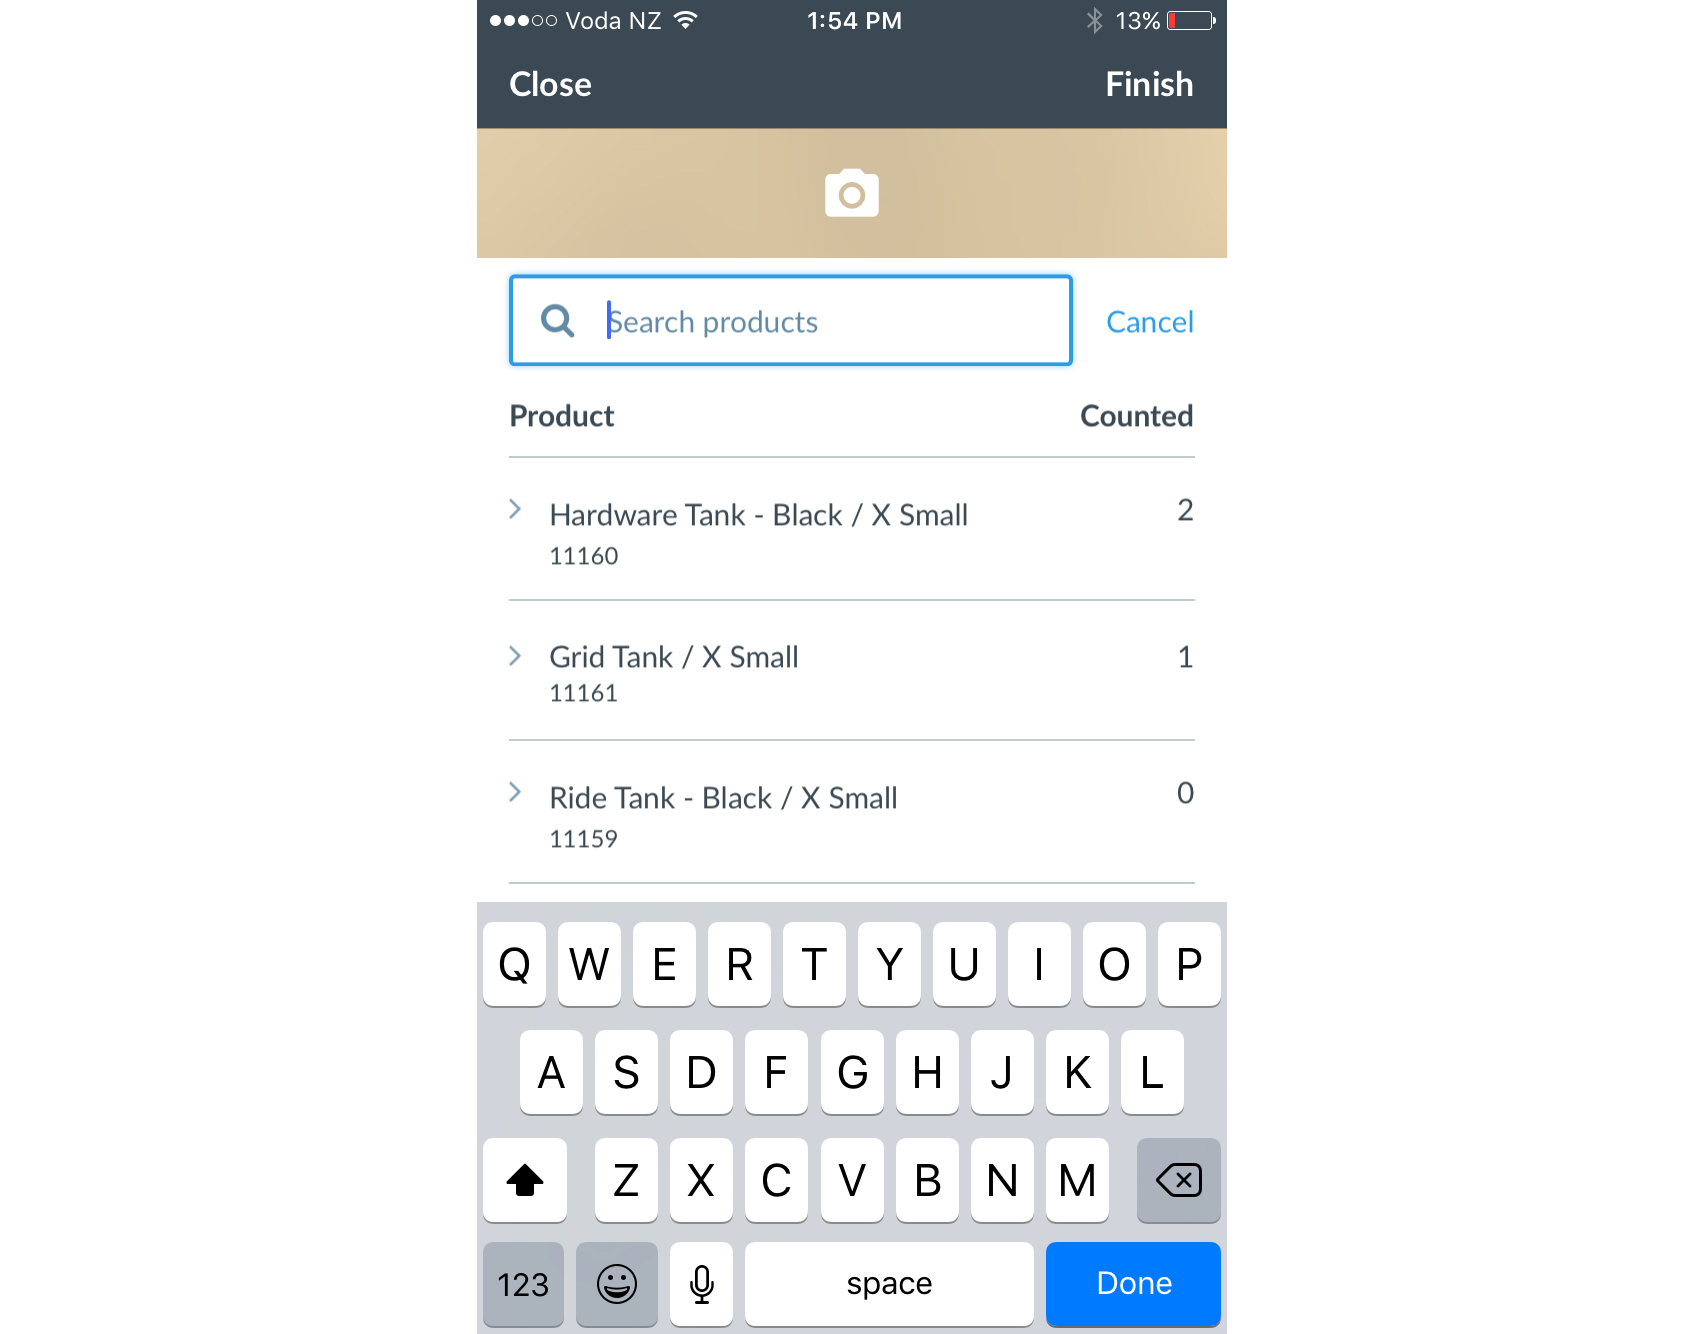
You can also manually input the quantity of a product by clicking on it from the list.
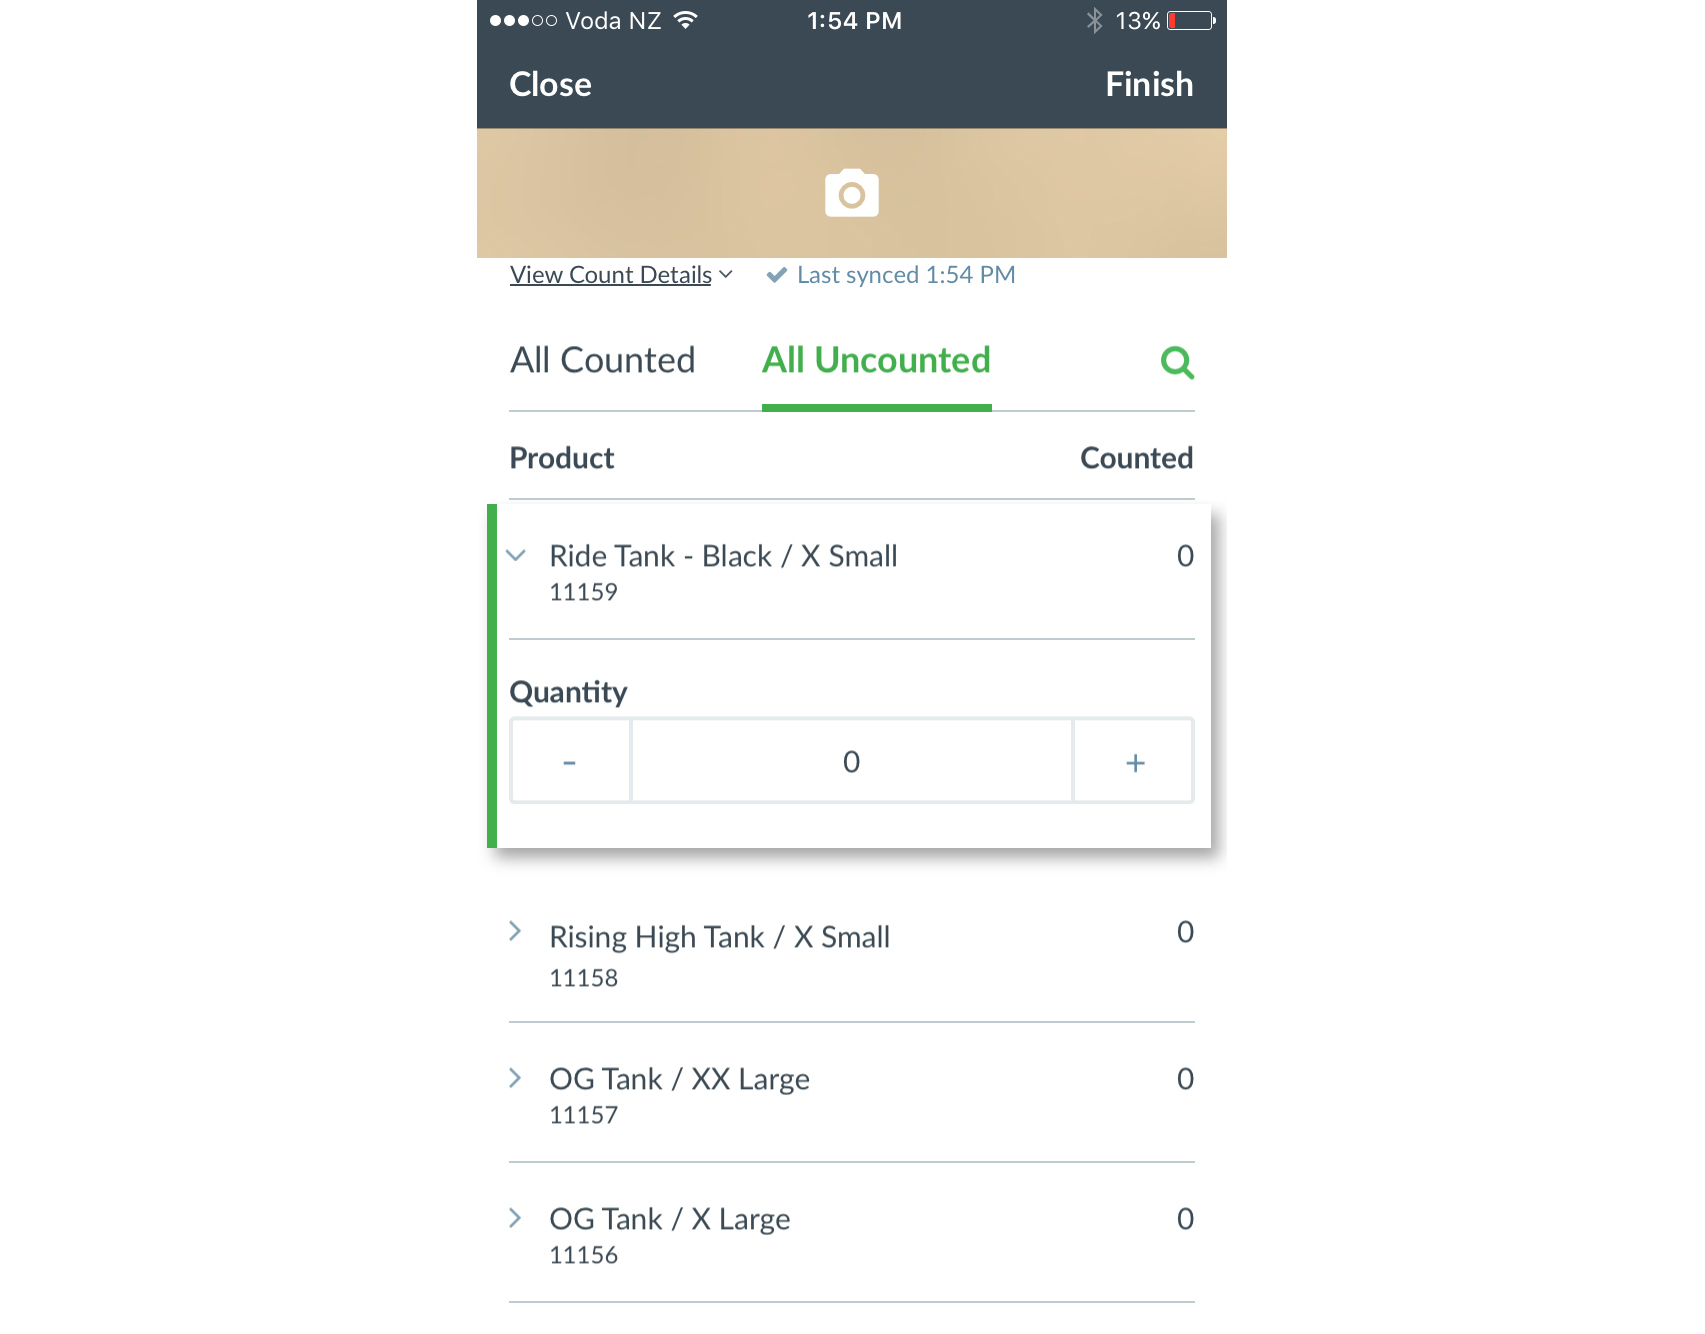
Once you have finished counting all your products, click Finish in the top right of the app. Your count will now be ready for review and approval in Vend.
Review and Approve your Count in Vend:
Reviewing your count
Once your count is submitted, you'll need to review your counted items in Vend on a Mac or PC.
To do this, open Vend on your computer and navigate to Products -> Stock Control -> Inventory Count. Once here, find the in-progress count from the list.
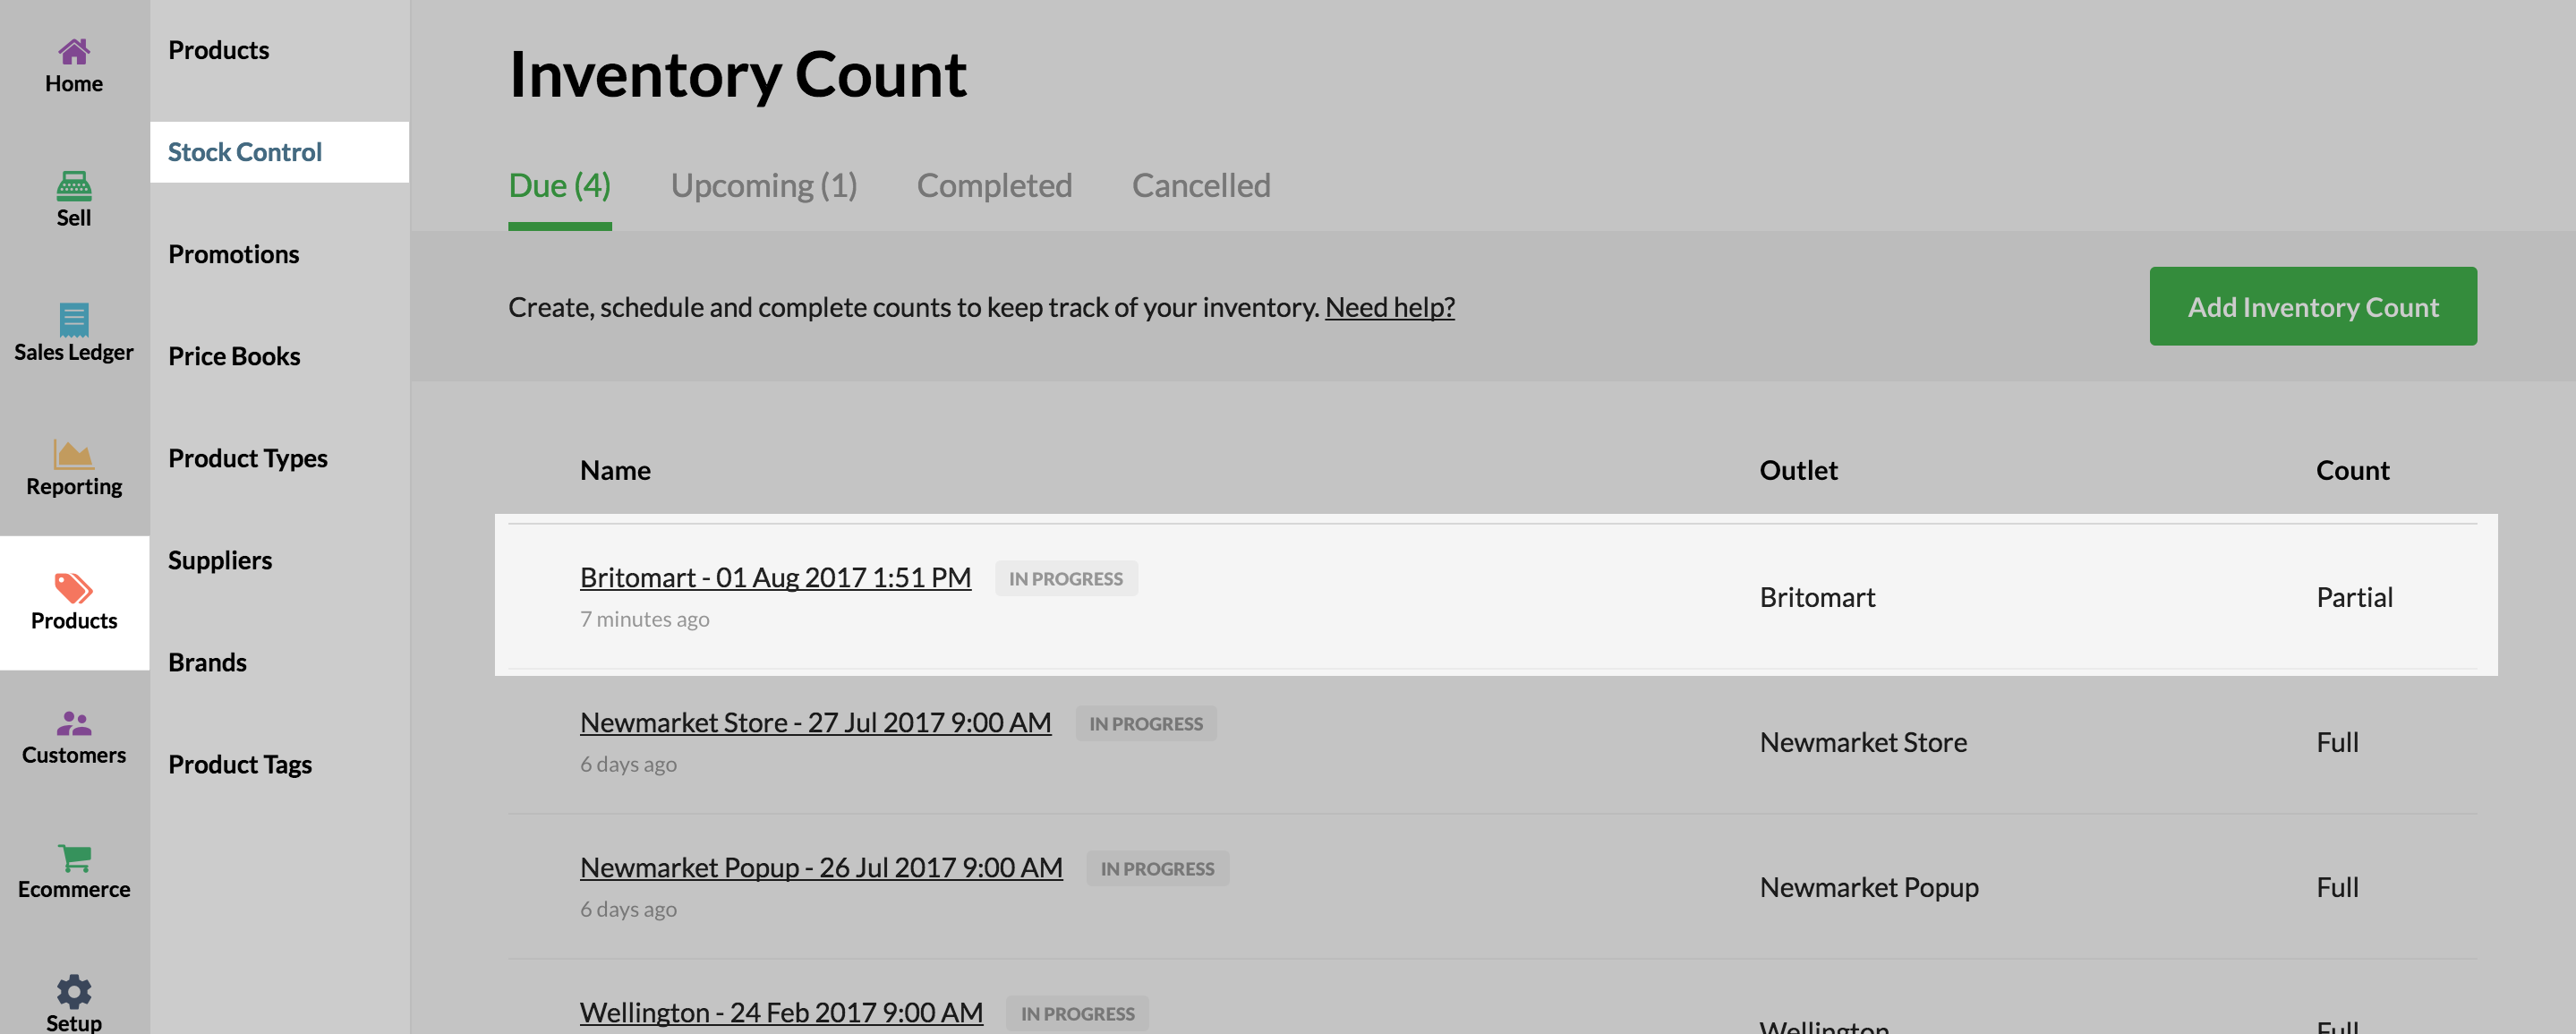
Click this count and click review.
When you open the review page, you will see five tabs along the top:
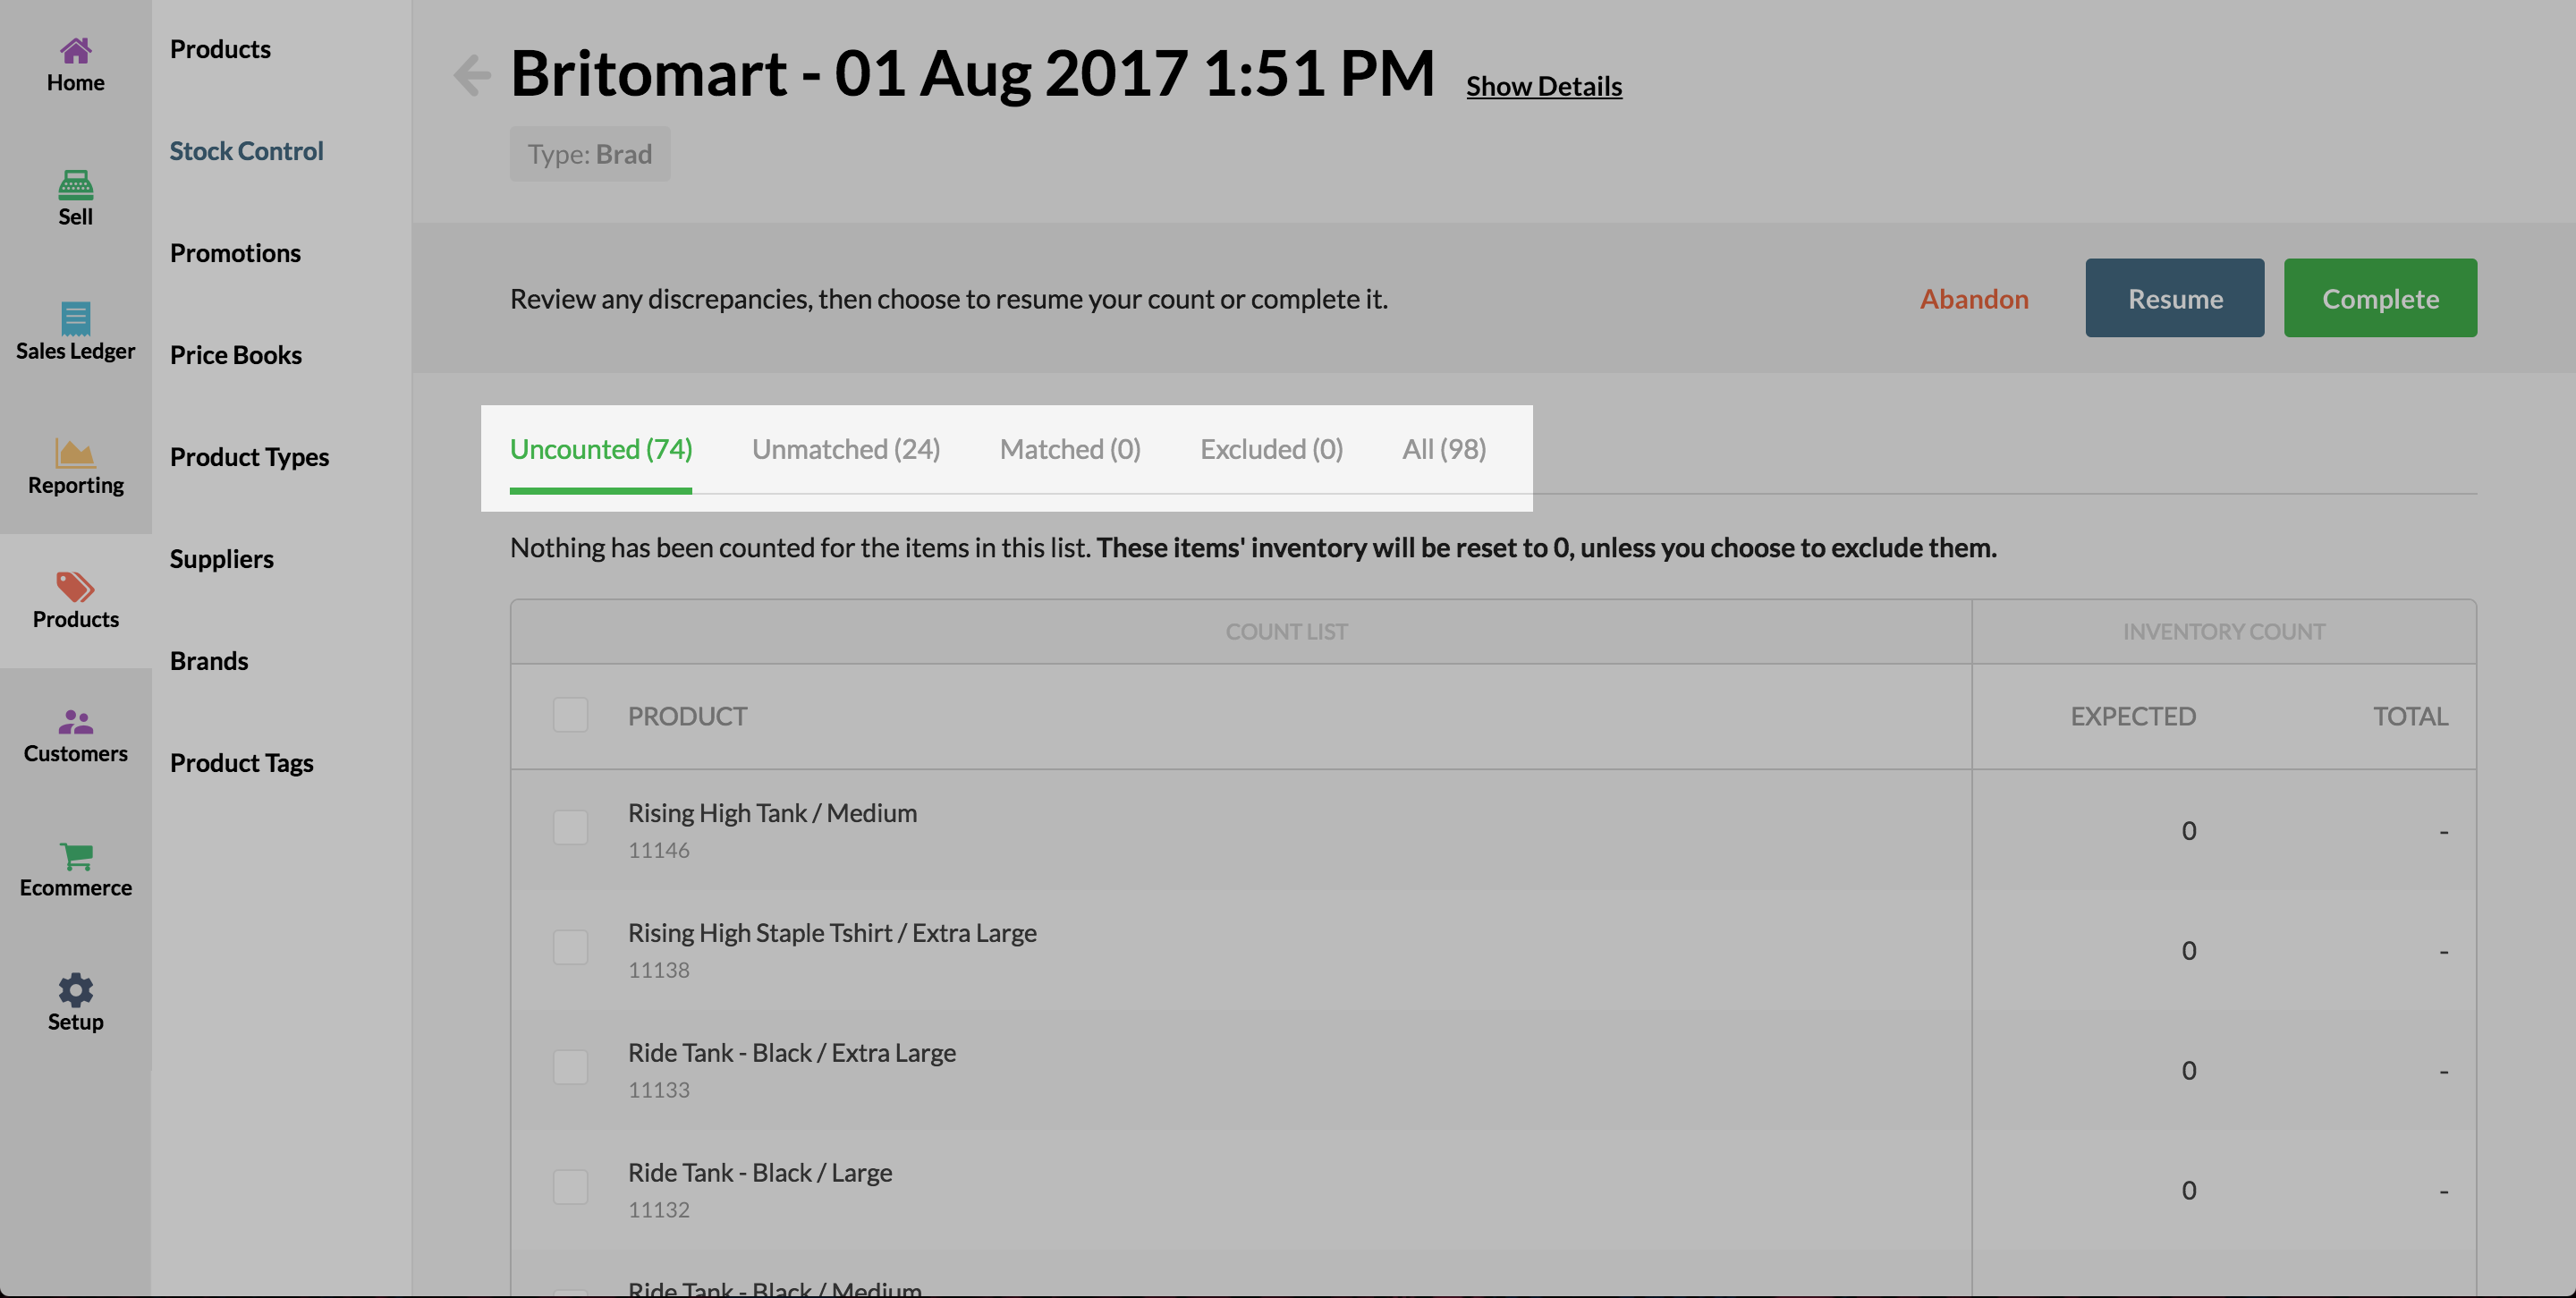
- Unmatched: This lists all items that had a count greater or less than the expected amount. This includes items where you expected a negative amount and counted 0.
- Matched: This lists all items you've counted where the total counted equals the expected amount.
- Uncounted: This lists all items where the total count is 0. This includes items with an expected count of 0.
- Excluded: Any items you manually exclude from your count.
- All items.
Review the items in your count, especially the unmatched and uncounted items. If you have discrepancies, you can:
Tick the box next to an item, and choose to exclude the item from the count, OR
Tick the box next to an item, and choose 'Recount items'. This will set the count for these items to zero, so you can count the items again.
Click 'Resume Count' at the bottom of the page, and count the items again.
At the bottom of the page, you will see the overall unit gain and loss as well as the cost totals.
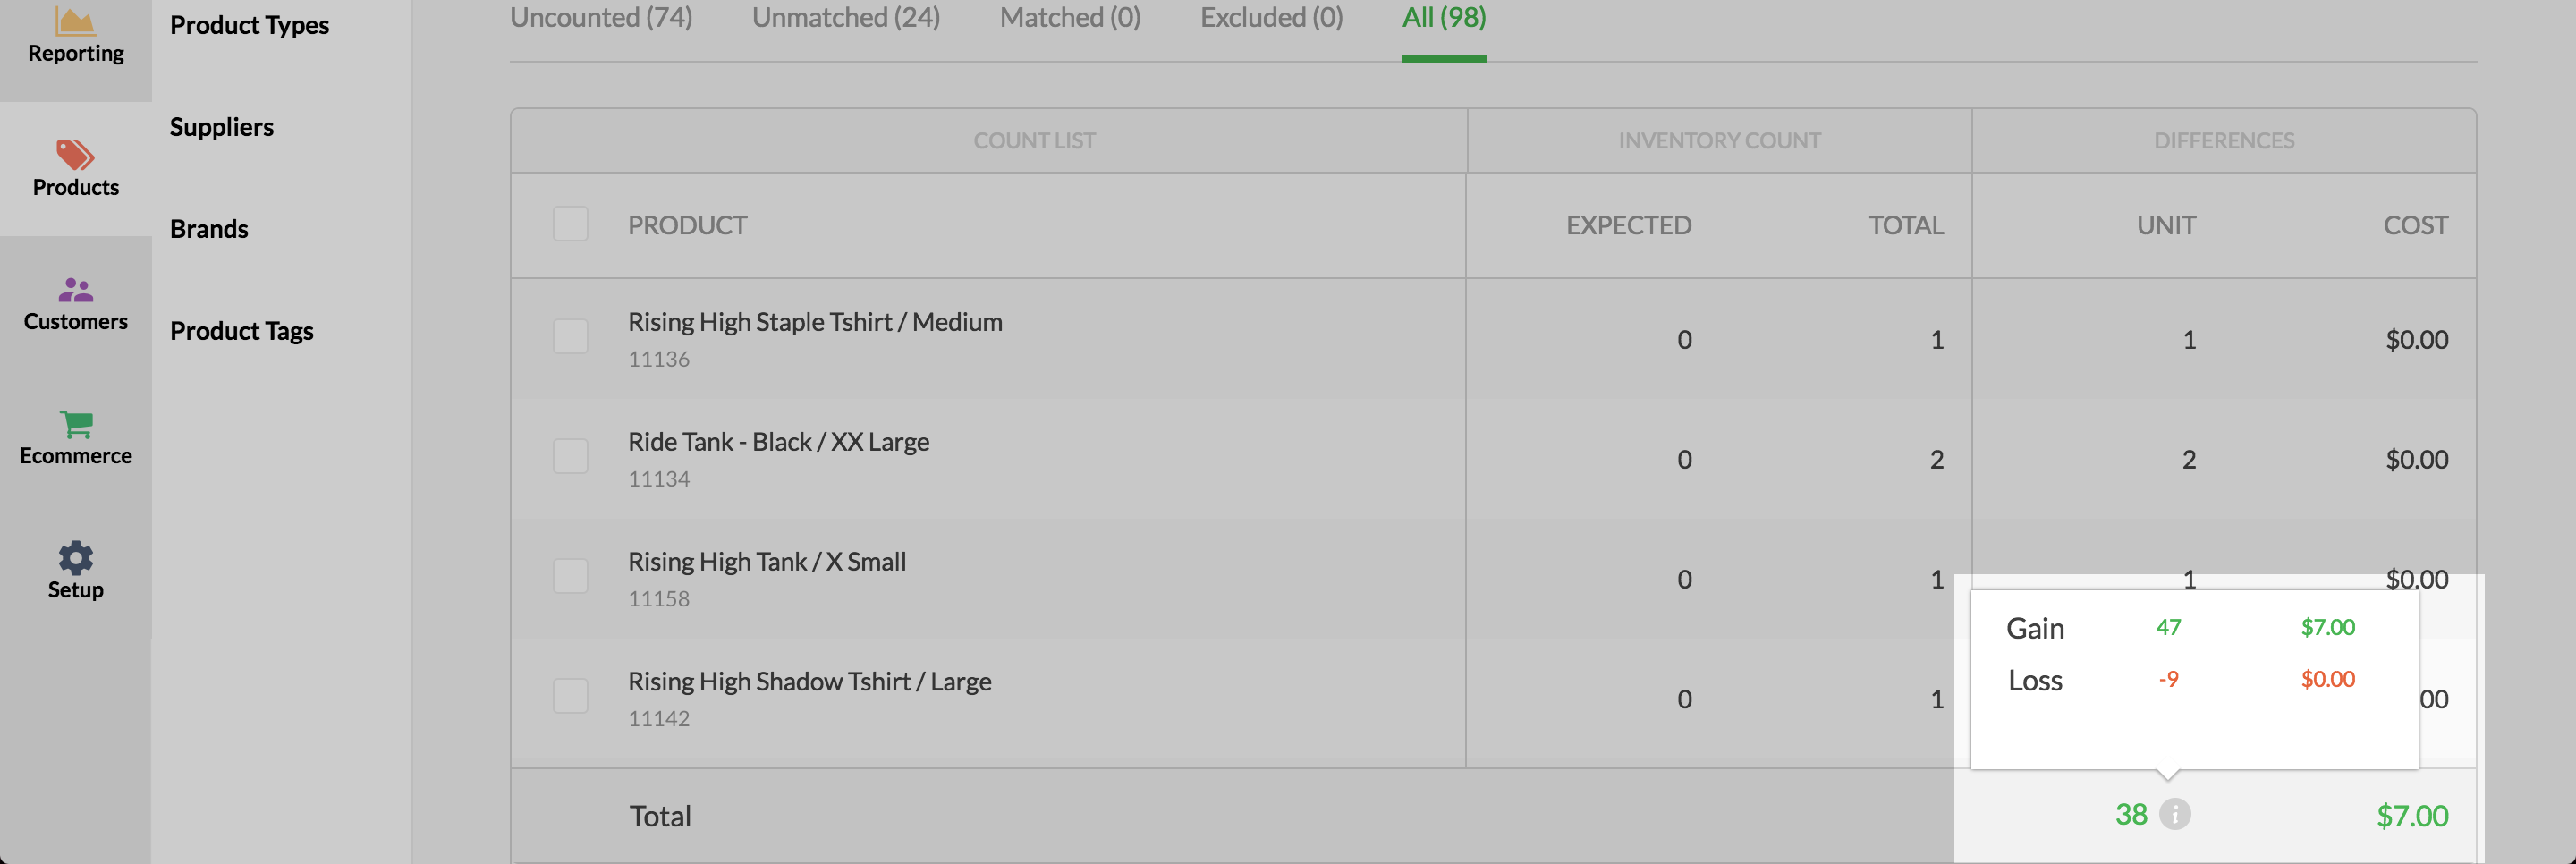
Once you've checked and confirmed your count, and are satisfied all items are accounted for, click 'Complete'.

Remember, don't do this until ALL of your staff have completed and saved their counts on their iOS devices.
Note: If you have any uncounted items, we'll alert you, as the inventory count for these items will be set to 0 when you click submit.
Once you've clicked complete, the count will now show in the completed list in both Scanner and Vend.
Can I use Scanner by Vend without Signing in?
If you use Scanner as a guest user (not signed in to your Vend account), your inventory counts, and product lists will not be synced between Vend and Scanner. You will, however, be able to create and add new products as well as create inventory orders, transfers, and returns and export them as CSV files.
Related Articles
Set up and use Vend customer-facing Display
What is Display? Vend Display is the perfect companion for Vend Register, offering you a customer facing display using a secondary iPad or iPad Mini. Display also allows a customer to enter their own email address for email receipts or customer ...Receipt Templates for the Vend Register iPad App
Receipt Template Sync for Vend Register on iPad What do I need to know if: I also use Vend on my Computer or used to use the old iPad app I've only ever used Vend Register How do I? Set up and edit my receipt template Create a new receipt template ...How to use the Customers Page in Vend
Vend's customer page allows you to create and manage customers and track your customers activity in your store. From this screen you can import and add customers, search for specific customers and groups, view a list of the customers in your store ...Vend Integration Guide
Important notice These details are accurate at the time of writing this Help file. However, from time to time Vend may make further changes that are unknown to Unleashed.When importing products from Vend, Unleashed will also pull across Stock On ...Reporting in Vend
This article includes: Creating a Report in Vend Report Groups Sales Reports Payment Reports Inventory Reports Gift Card Reports Store Credit Reports Tax Reports Report Types Measure Date Range Filters Advanced Reporting Options The Retail Dashboard ...