Importing Customers in a CSV file
When setting up a new Vend system, customers can easily be imported as a CSV file. This means you can transfer customers from an existing system (such as MYOB, Outlook or Sharepoint), by exporting them from that system as a spreadsheet or CSV, renaming the columns to match Vend, then importing the CSV file directly into Vend.
Note:
- 'Walkin' is the default system customer for all non-customer sales on Vend, and cannot be deleted
- If any of your customer fields have 'commas', they may break the import file if not properly 'enclosed' in quotes when creating a CSV file
- For information about importing customer loyalty balance's check out this article here.
1. Creating your Customer CSV
To do this, we recommend following these steps:
1. Create a customer file from your existing database:
If you are using MYOB, Outlook, Sharepoint or another system, you'll need to export your customers to a universal format that you can work with, such as an Excel spreadsheet or CSV file.
2. Create a sample customer in Vend:
If you are on a trial system, we recommend adding one or two test people to Vend manually, completing all the fields, which will populate your export file.

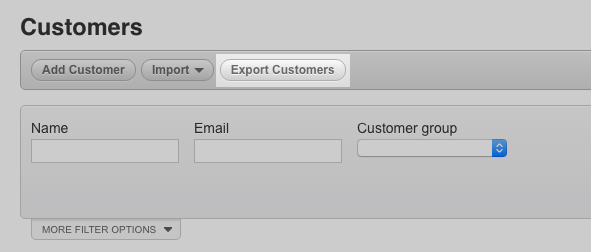
3. Export your Vend customers as a CSV:
[]()
Under the customer tab, click the 'Export' button, which will download any existing customers as a CSV.
4. Merge customer data from your old system with Vend customer data:
Copy data from the matching columns in your old customer file (that you exported from Outlook or MYOB) into the Vend customer CSV export file ("First Name" -> first_name, "Last Name" -> last_name for example)
Important: Some of these customer fields are generated by sales activity in Vend and cannot be 'imported' through the CSV file, including YTD Balance and Loyalty Points.
2. Importing your Customer CSV
Once you have created your Vend customer CSV, you'll need to import it into your store.
Vend's CSV checker will look for some of the most common import errors in your CSV file before it imports into your store.
How does it work?
Now, when you choose to import or update customers using a CSV, your CSV will be put through our system so that Vend can run a quick check on your CSV file. It will check for any formatting issues or errors such as column headings and mandatory fields and let you know if any of these errors are present in your CSV file.
How do I do it?
To validate and import your customer CSV you must first navigate to the Vend customer page in the sidebar. Once here, follow the steps below:
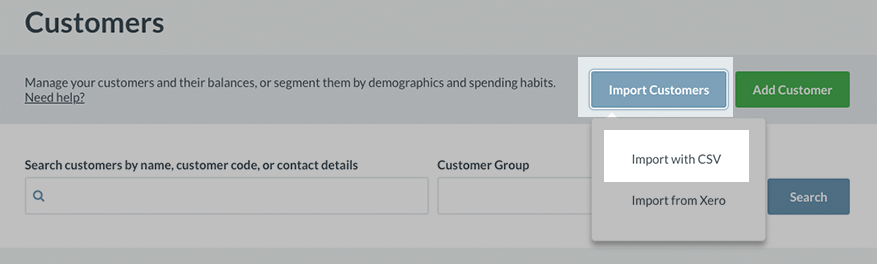
1. Click the Import -> Import from CSV under the Customer tab.
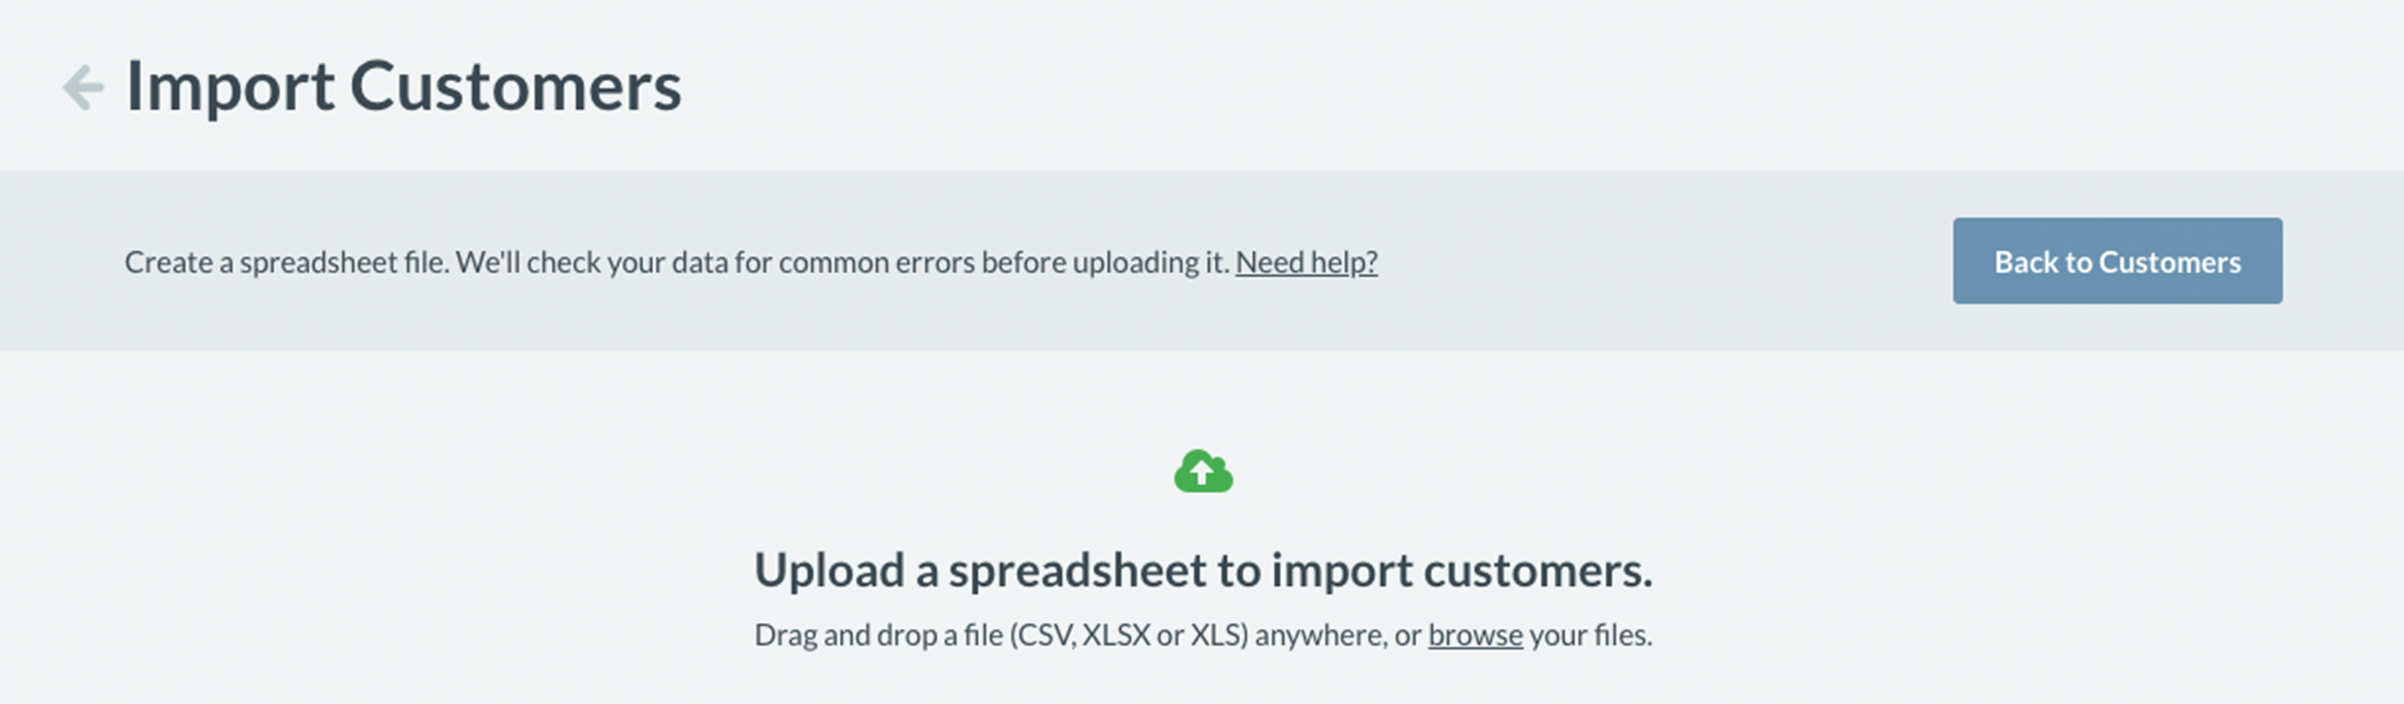
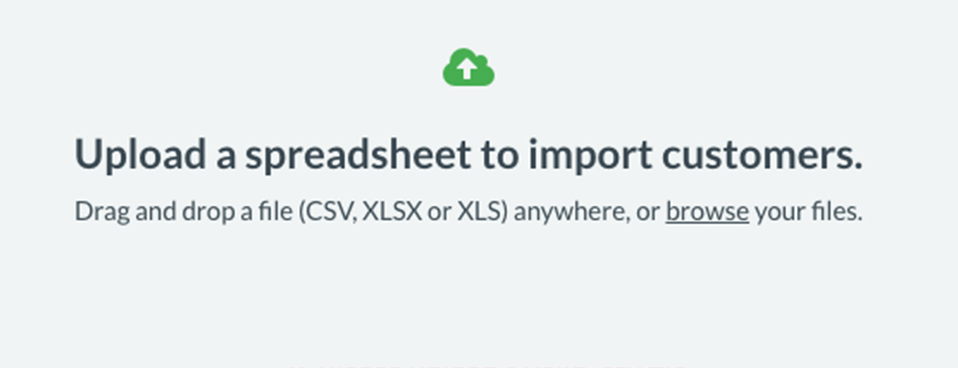
2. Either drag and drop your CSV file or click browse to search for and add the CSV file.
3. As soon as you place your CSV file here, Vend will immediately perform a quick error check. If the validation is successful move straight onto step 6, if Vend detects any errors, you will be taken to the error screen below.
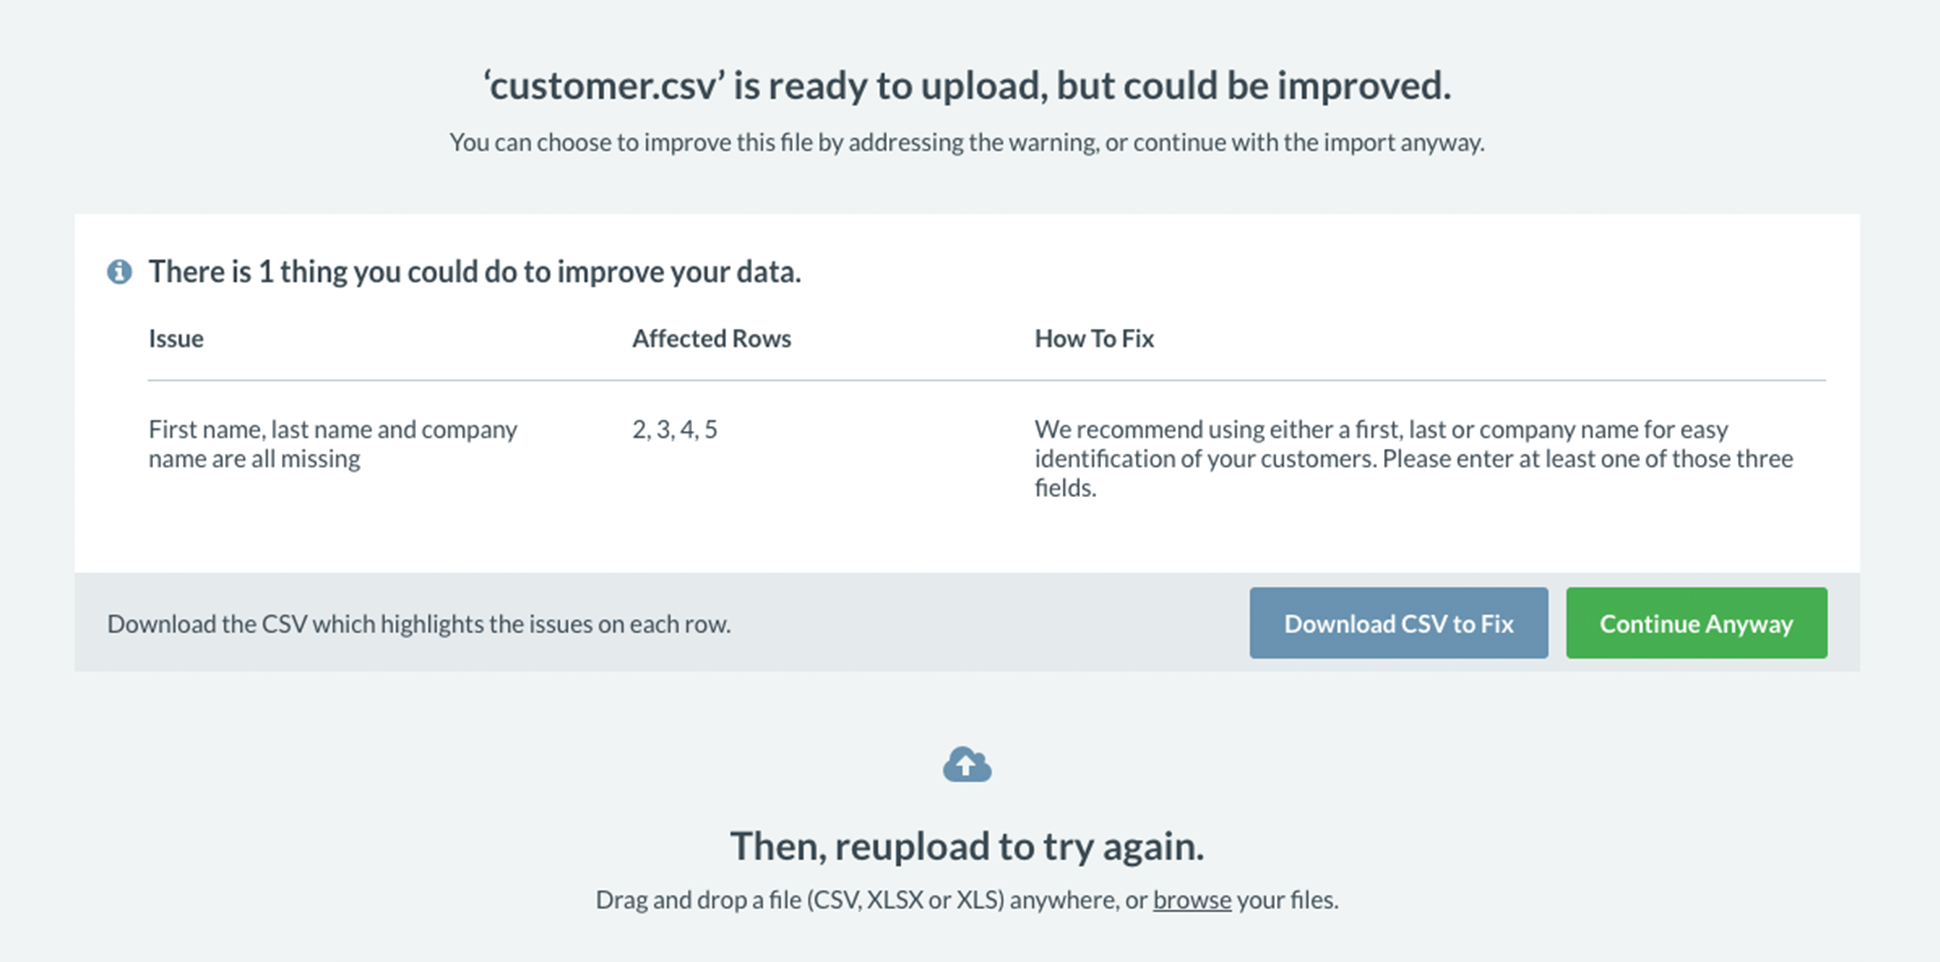
4. At this stage, you'll be able to review the cause of this error and download a new version of your CSV that includes notes of what to fix.
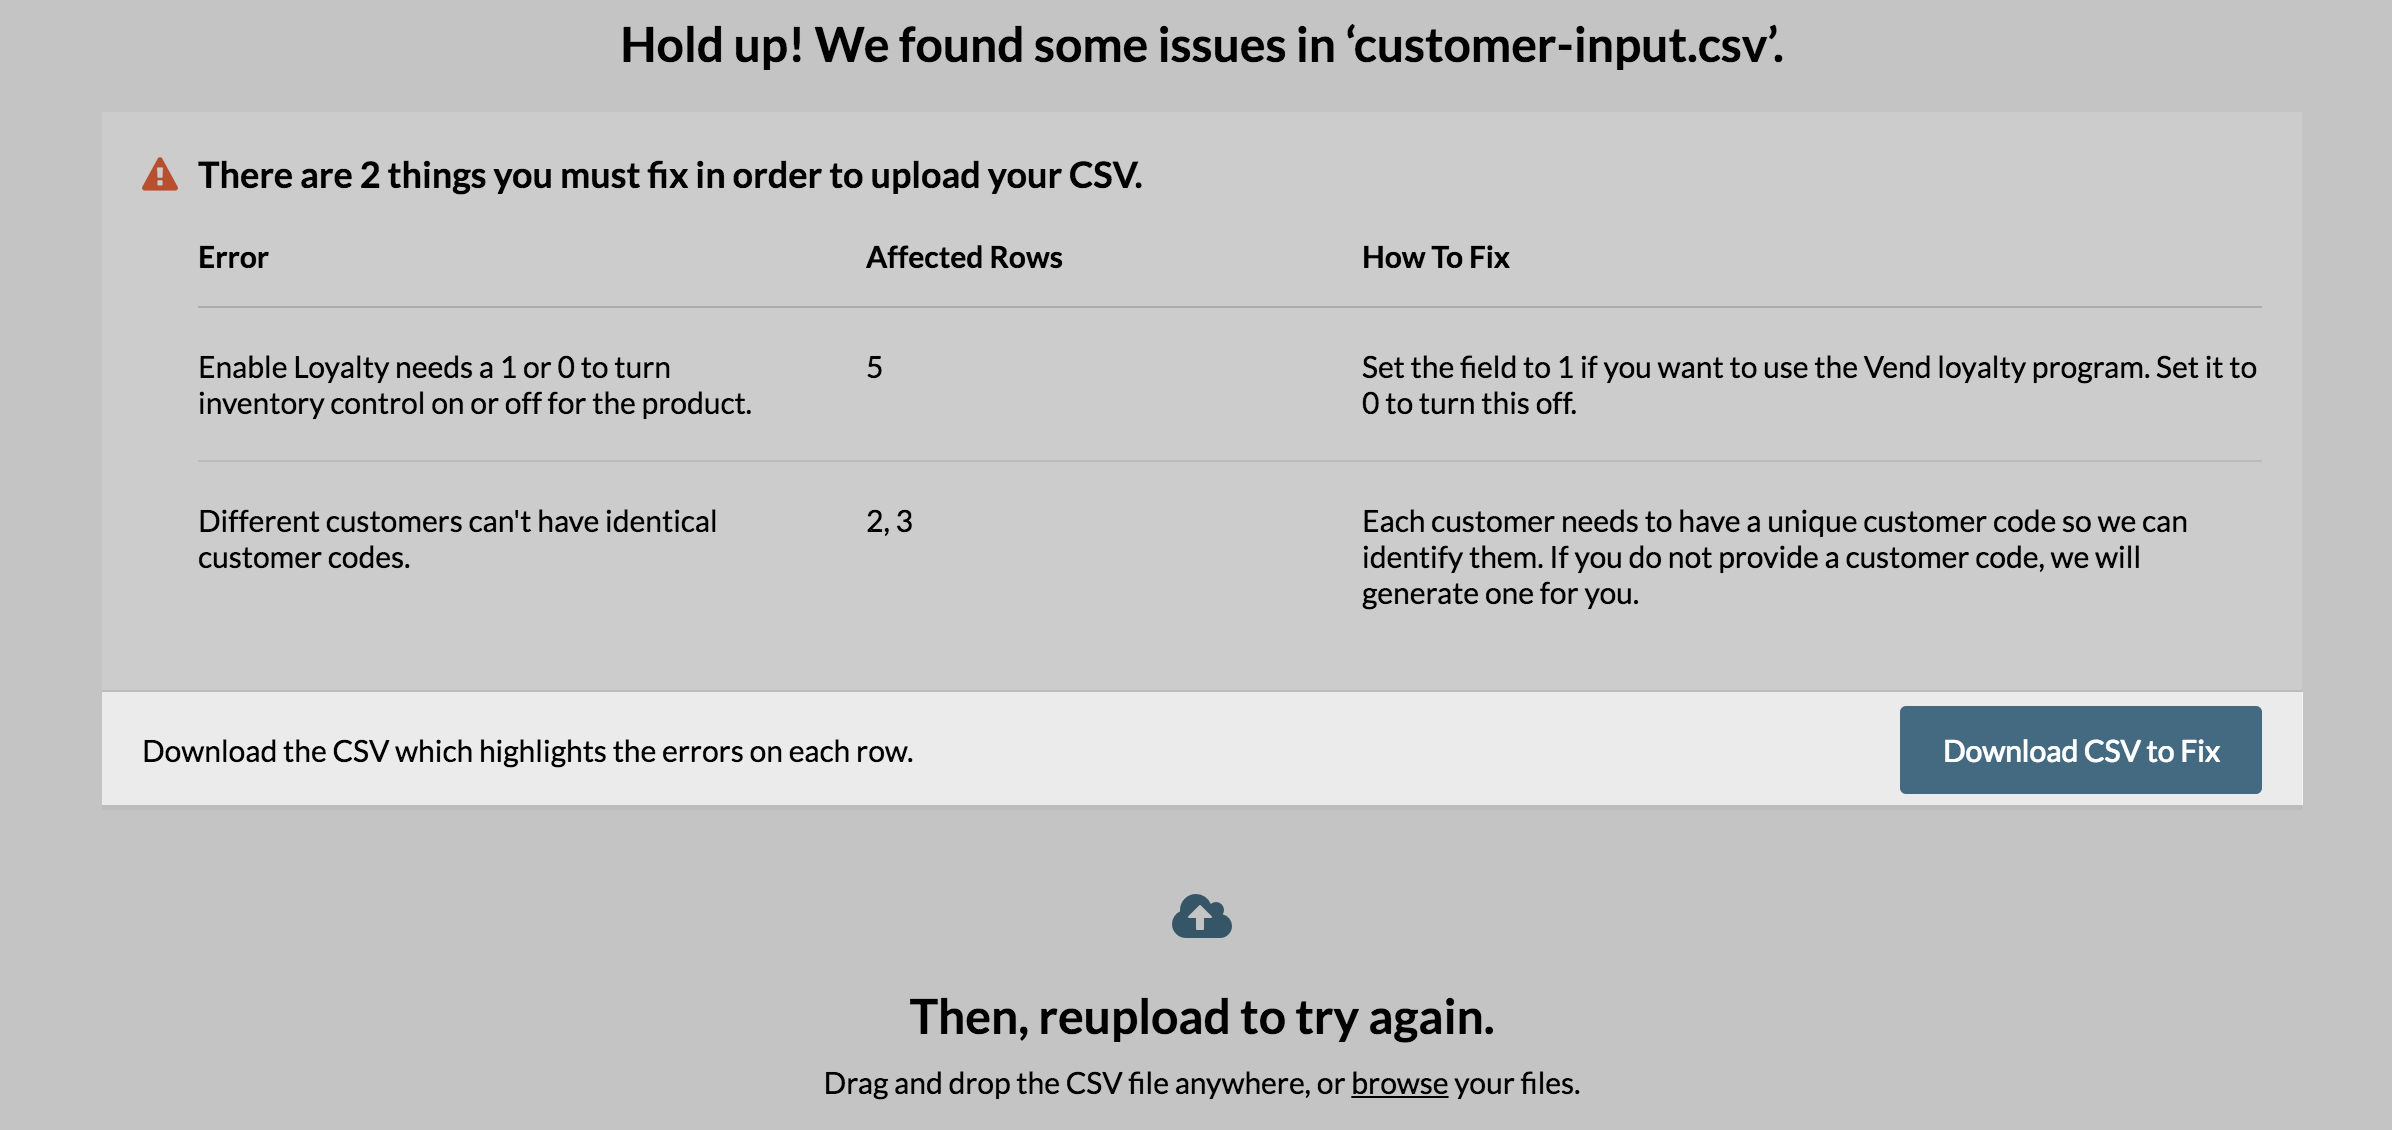
5. Once you've made any changes, remove any error notes from the CSV and reimport the file by either dragging and dropping it into the window or browsing for files again.
6. Once successful, you will be taken to a confirmation screen. From here, click 'continue import' to import the customers into your store.

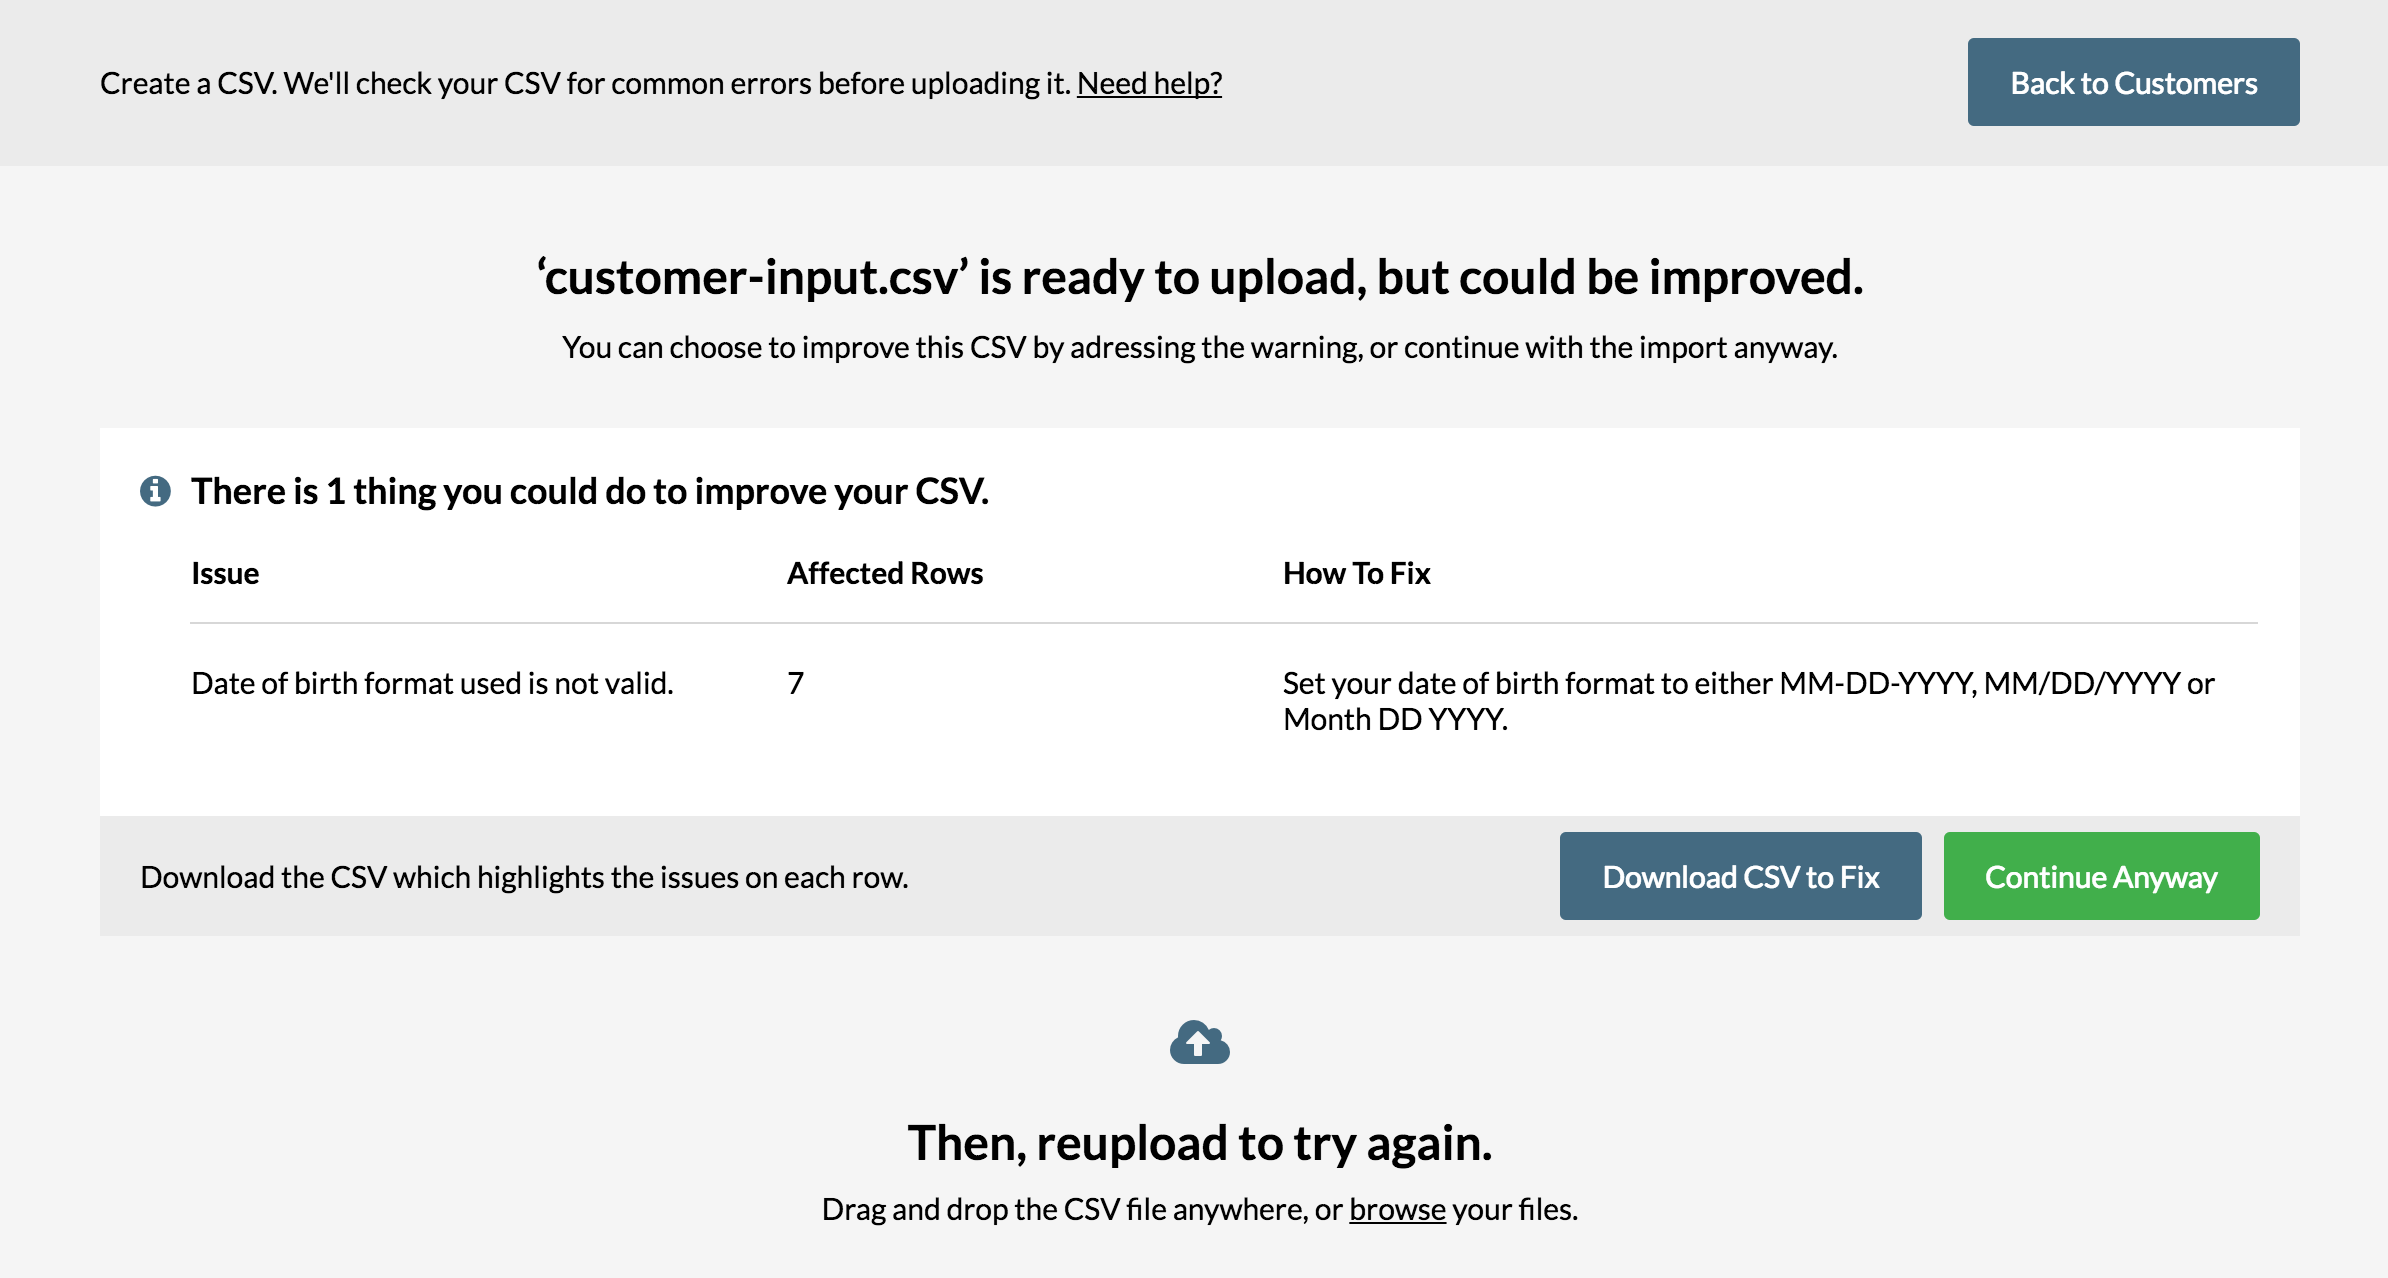
Warning screen:
You may also receive warnings before importing. If your CSV contains an incorrectly formatted date of birth for example, you may receive a warning message. If you receive a warning message you can still proceed with the import but we recommend you make a note of the warnings you receive and fix them if necessary.
Troubleshooting:
If you've received one of the following errors when trying to import your CSV, check out this information below:
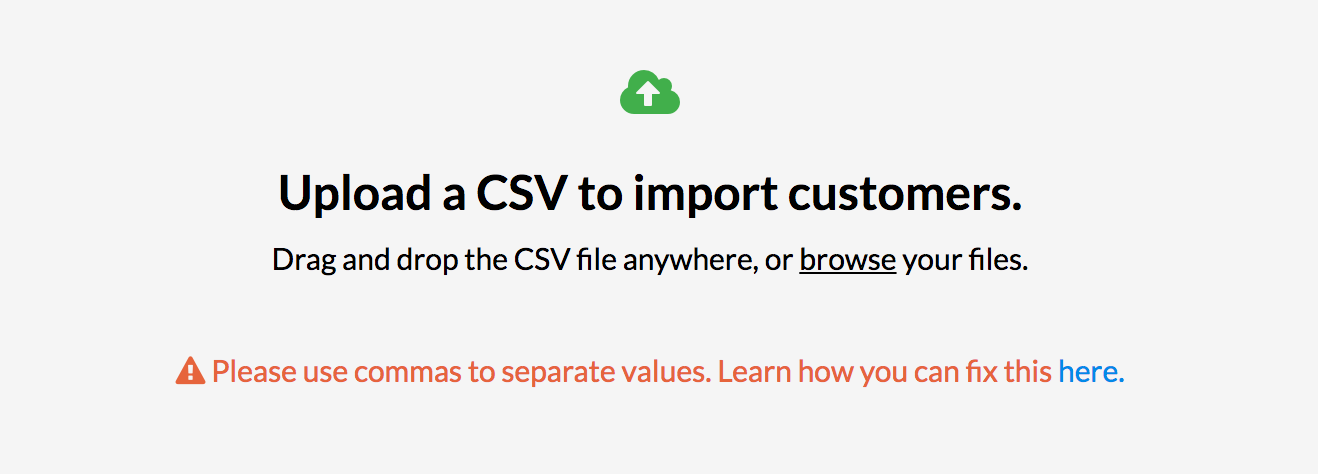
Please use commas to separate values:
If you see the screen below, the contents of the file you have tried to import may not be separated correctly. The best way to fix this up is to export an existing customer from Vend as a CSV and make sure you are following the same format in your new CSV. To find these steps click here or head back up to the top of this article. If you are still unable to upload the file correctly, get in touch with us here.
Please upload a valid CSV file:
If you see the screen below, the file type you have tried to import may either be incorrect or corrupt. Double check that this file is a .csv file and reimport it.
Related Articles
Importing your Products into Vend using a CSV file
What's New? CSVs are often used to bulk import and edit products in Vend. We've made some improvements to make this process even faster and easier to use. SKUs and Handles will now automatically populate if you do not include these as columns in your ...Customer Types
About Customer Types Customer Types can be used to group sales reporting by the types of customers you sell to. Every customer that is created can be given a type (i.e. Retail v.s. Wholesale vs Corporate etc.). They can also be used to cover anything ...Running Sales and Promotions using Price Books
Price books are a feature in Vend that enable you to offer special pricing and loyalty amounts. These can be restricted to certain customer groups or outlets, enabling you to have sophisticated pricing strategies for your store. You can also automate ...Vend Integration Guide
Important notice These details are accurate at the time of writing this Help file. However, from time to time Vend may make further changes that are unknown to Unleashed.When importing products from Vend, Unleashed will also pull across Stock On ...How do I edit my products using a CSV file?
Sometimes, you might need to edit a lot of your products at once. This might be because you're changing pricing, or it's the end of a season and you need to deactivate products, or you want to update your tags or product types. What do I need to know ...