Importing the file
Importing items
To import inventory items via our Retail Imports team, please refer to this article.
This article describes how to launch the Item Import tool and import or update your items. Before you begin, however, make sure you've:
To launch an import and import or update your items:
- From the main menu, click Inventory > Import Items.
This displays the ITEM IMPORTS page, which lists all import operations for this account, including completed imports or imports that are in progress or awaiting validation. You can open an existing import or view a detailed report for it by clicking the corresponding entry on the page.
- Click the New Import button on the top-right to launch the import operation. The New Import button is disabled if an import operation is currently In Progress or if a previously launched import is Awaiting Validation.
When launching the Item Import tool for the first time (or if you haven't yet specified that you don't want to see this screen), the Welcome to Import Items! screen displays. This screen provides some general guidelines about the import process. You can also download the sample CSV file from this screen, if you haven't previously done so.
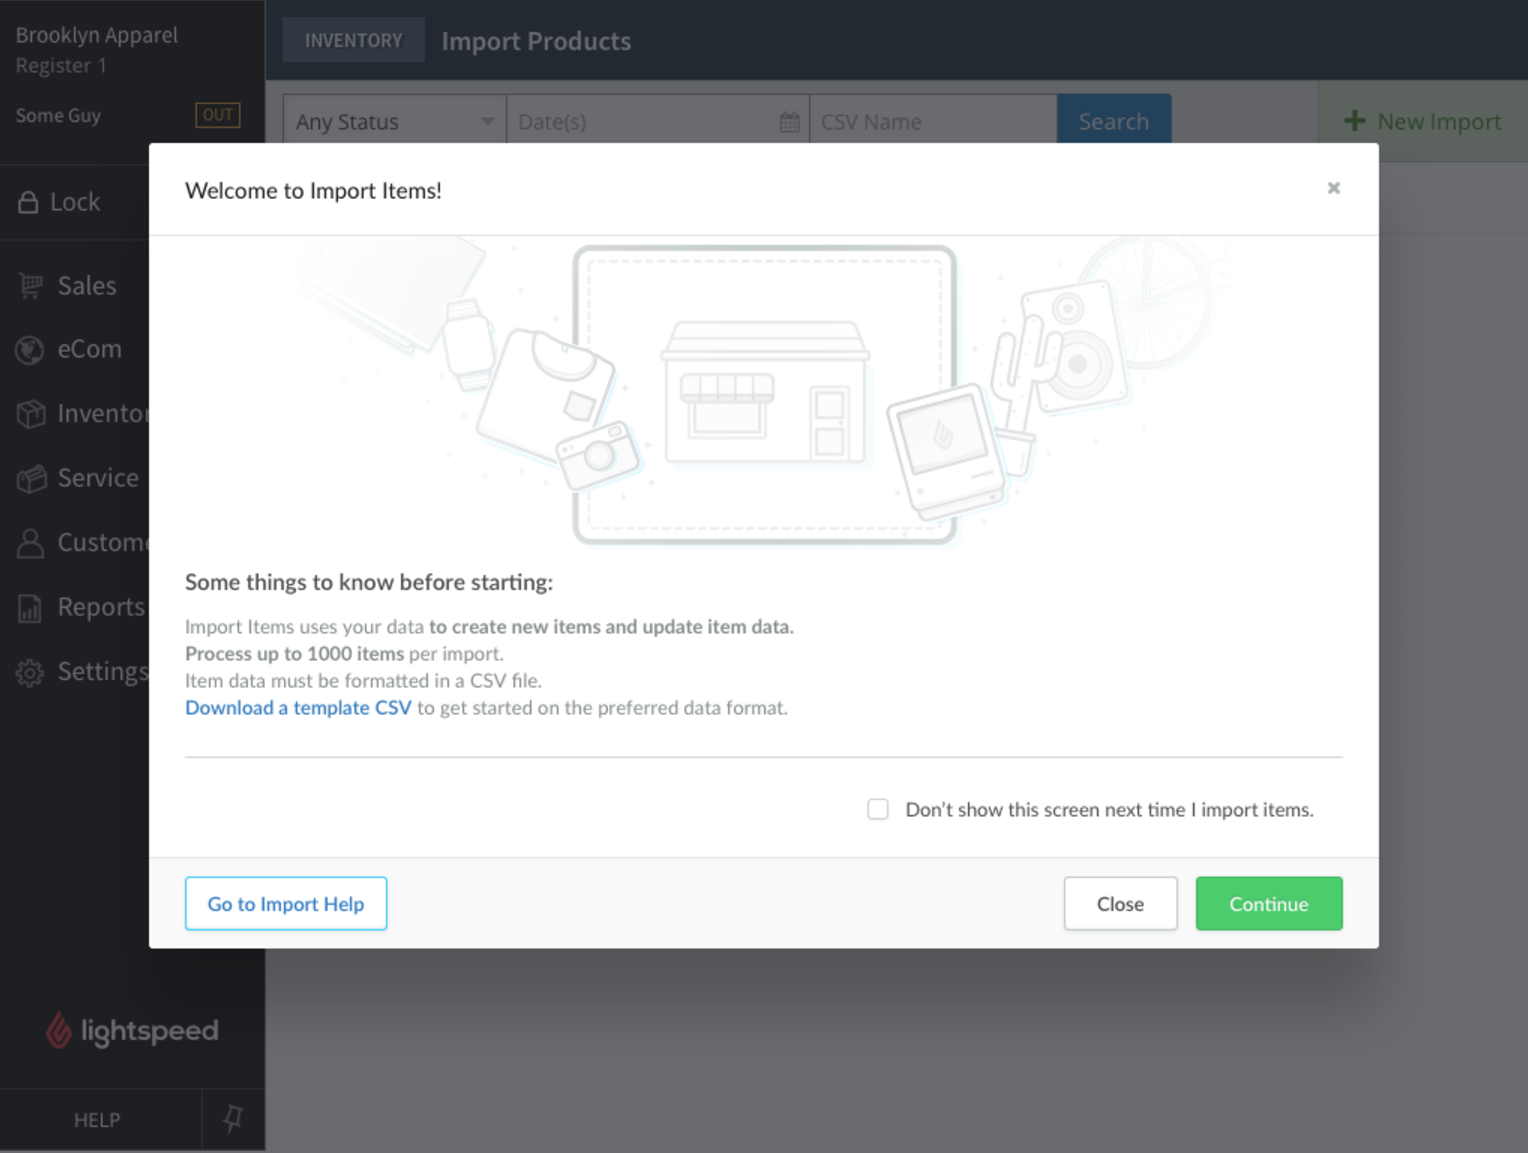
- Click Continue on the Import Items Help Screen.
The ITEM IMPORT: NEW page displays. From the Behaviour drop-down, select one of options below:
- Create new Items & update Item data
- Only update existing items
- Only create new Items
If you are updating existing items, the Match on field drop-down is the unique identifier that the Item Import tool will use to ensure the item information included in your import file updates the correct item in your inventory. Select one of the options below:
- System ID (recommended)
- UPC
- EAN
- Custom SKU
- Manufacturer SKU
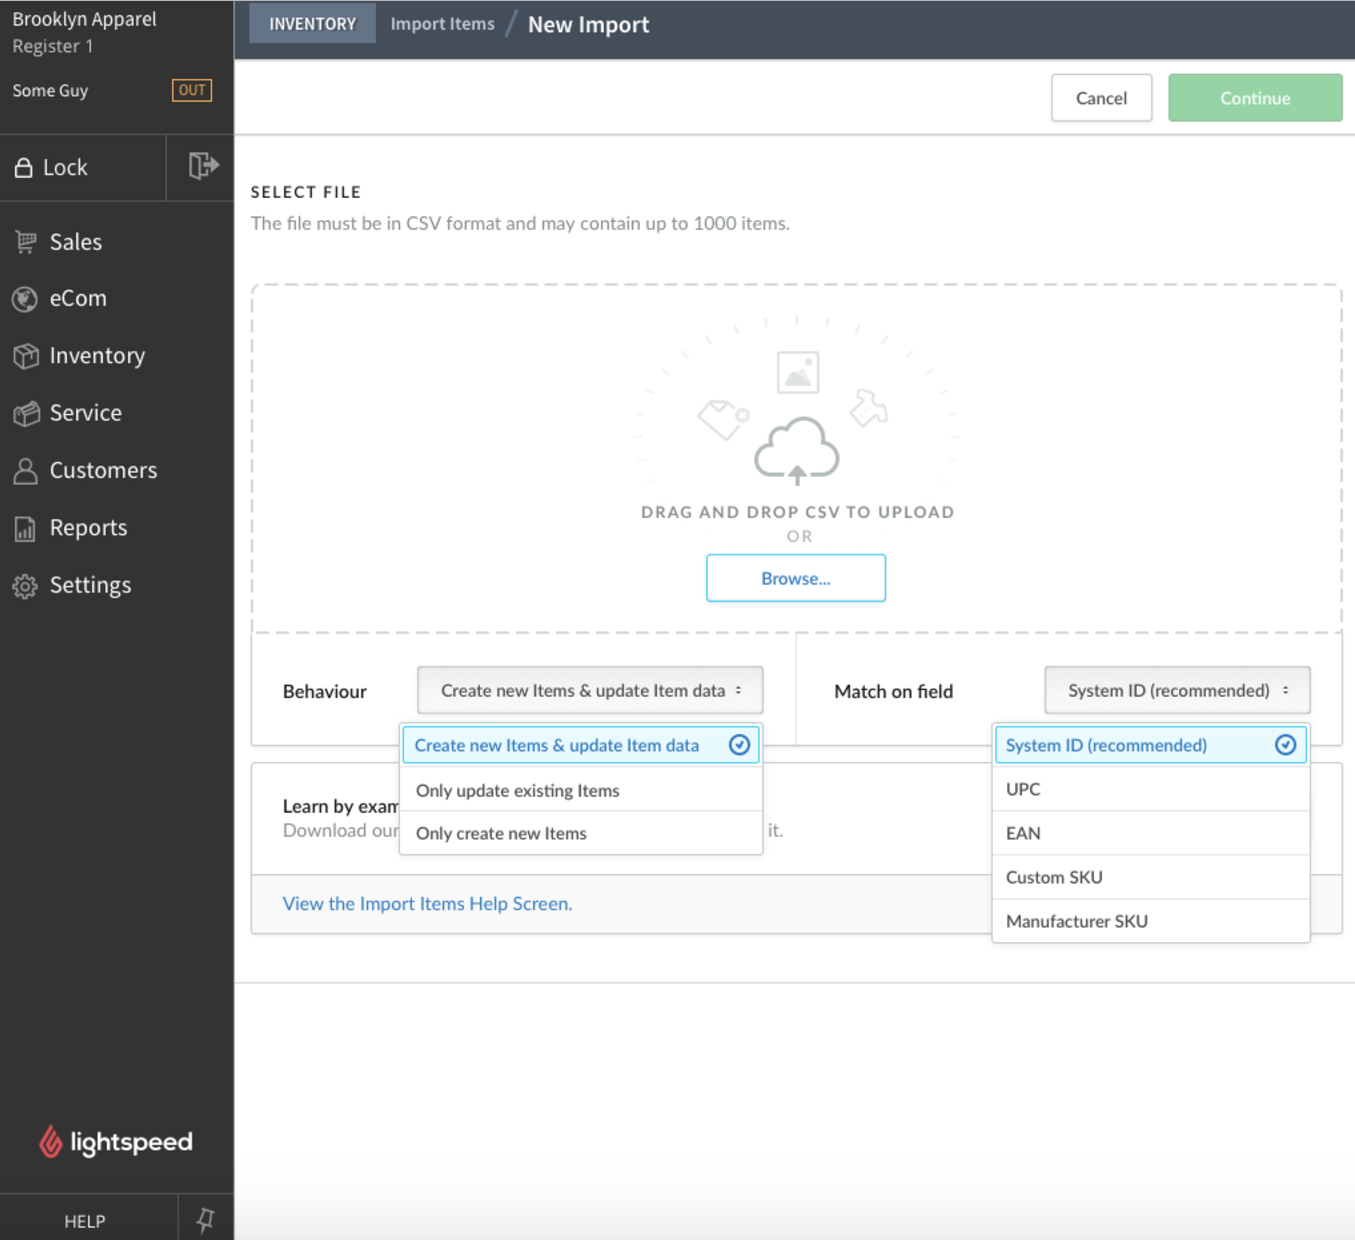
Drag your prepared import file to the drop area indicated on the page, or click Browse... to open the file.
- Once your file has uploaded, click the green Continue button. The Item Import tool will parse the file for formatting errors, missing or erroneous data and other inconsistencies. The validation process takes only a few seconds to complete.
NOTE: If your import file has errors, their total count will display in the ERRORS TO FIX section. To address and fix these errors, go to the 3.1 Fixing item import file errors before continuing.
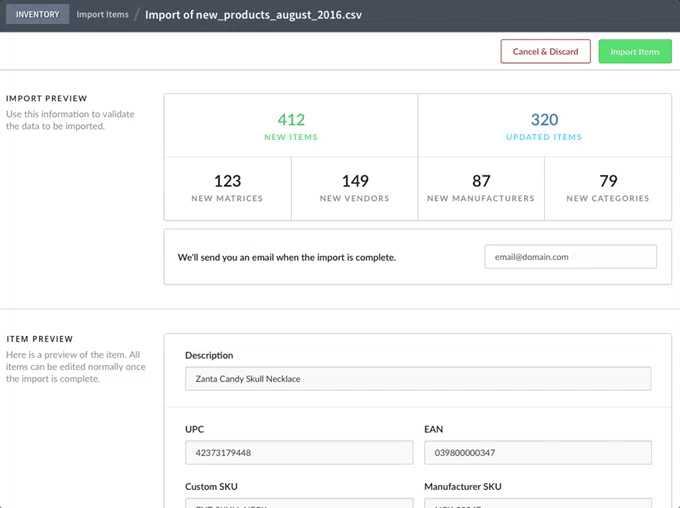
- After the validation completes and if there are no errors in the file, the Item Import tool displays a summary of the following data contained in the import file:
- NEW ITEMS: Number of items to be created.
- UPDATED ITEMS: Number of items to be updated.
- NEW VENDORS: Total number of new vendors to be created.
- NEW BRANDS: Total number of new brands to be created.
- NEW CATEGORIES: Total number of new categories to be created.
- ITEMS WITH INVENTORY: Number of new items to be created and with inventory to be added.
- TOTAL QUANTITY: Total quantity of inventory to be added to these new items.
- TOTAL COST: Total cost of the inventory to be added to these new items.
In addition, the Item Import tool shows you a preview of all the fields to be imported for the first item in the import file.
Review the summary and preview information for the import. If you're satisfied with the preview, click the Import Items button at the top-right to import the new items.
The import process can take several minutes to complete depending on the number of items to import, the number of import operations currently in progress, and/or the number of import operations currently queued for processing. Once the operation completes, the Item Import tool displays a summary of the operation, including a list of all imported items. From the Advanced search drop-down, you can use the helpful Created / Updated filter to sort your items. You can also click the Add Labels to queue for Items with Inventory button to create a label queue for your items with a Quantity on Hand. This way, you can simply print your label queue from Inventory > Print Labels and start selling your items!
You've successfully imported products into your store!
Related Articles
Lightspeed R Series | Importing Matrix items
Importing matrix items To import inventory items via our Retail Imports team, please refer to this article. In Lightspeed Retail (R Series), a Matrix item is used to manage products that come in different variations, such as size, color, or material. ...Bulk importing items via CSV
Adding a single item is simple. But adding 100s of items manually will be time cosuming. To quickly add many items, Lightspeed retail provides with a template file. This video will show how to fill this template file and what all columns are ...Lightspeed R Series | Inventory Count
Accurate inventory counts are crucial for maintaining proper stock levels, reducing discrepancies, and ensuring your business runs smoothly. By following the steps outlined in this video, you can efficiently conduct an inventory count using the ...Creating Lightspeed R series account
If you are looking for a POS that will help you with growing your business than Lightspeed Retail R series is for you. It has so many features that every retailer wishes to have. You just need to provide some basic information to create an account. ...Lightspeed X Series | Inventory Count
What are inventory counts? Inventory counts (also known as stock takes in some countries) help you to keep track of your inventory. During an inventory count, you and your staff count and record each item in your store. When the inventory count is ...