Switching Outlets and Registers in Vend
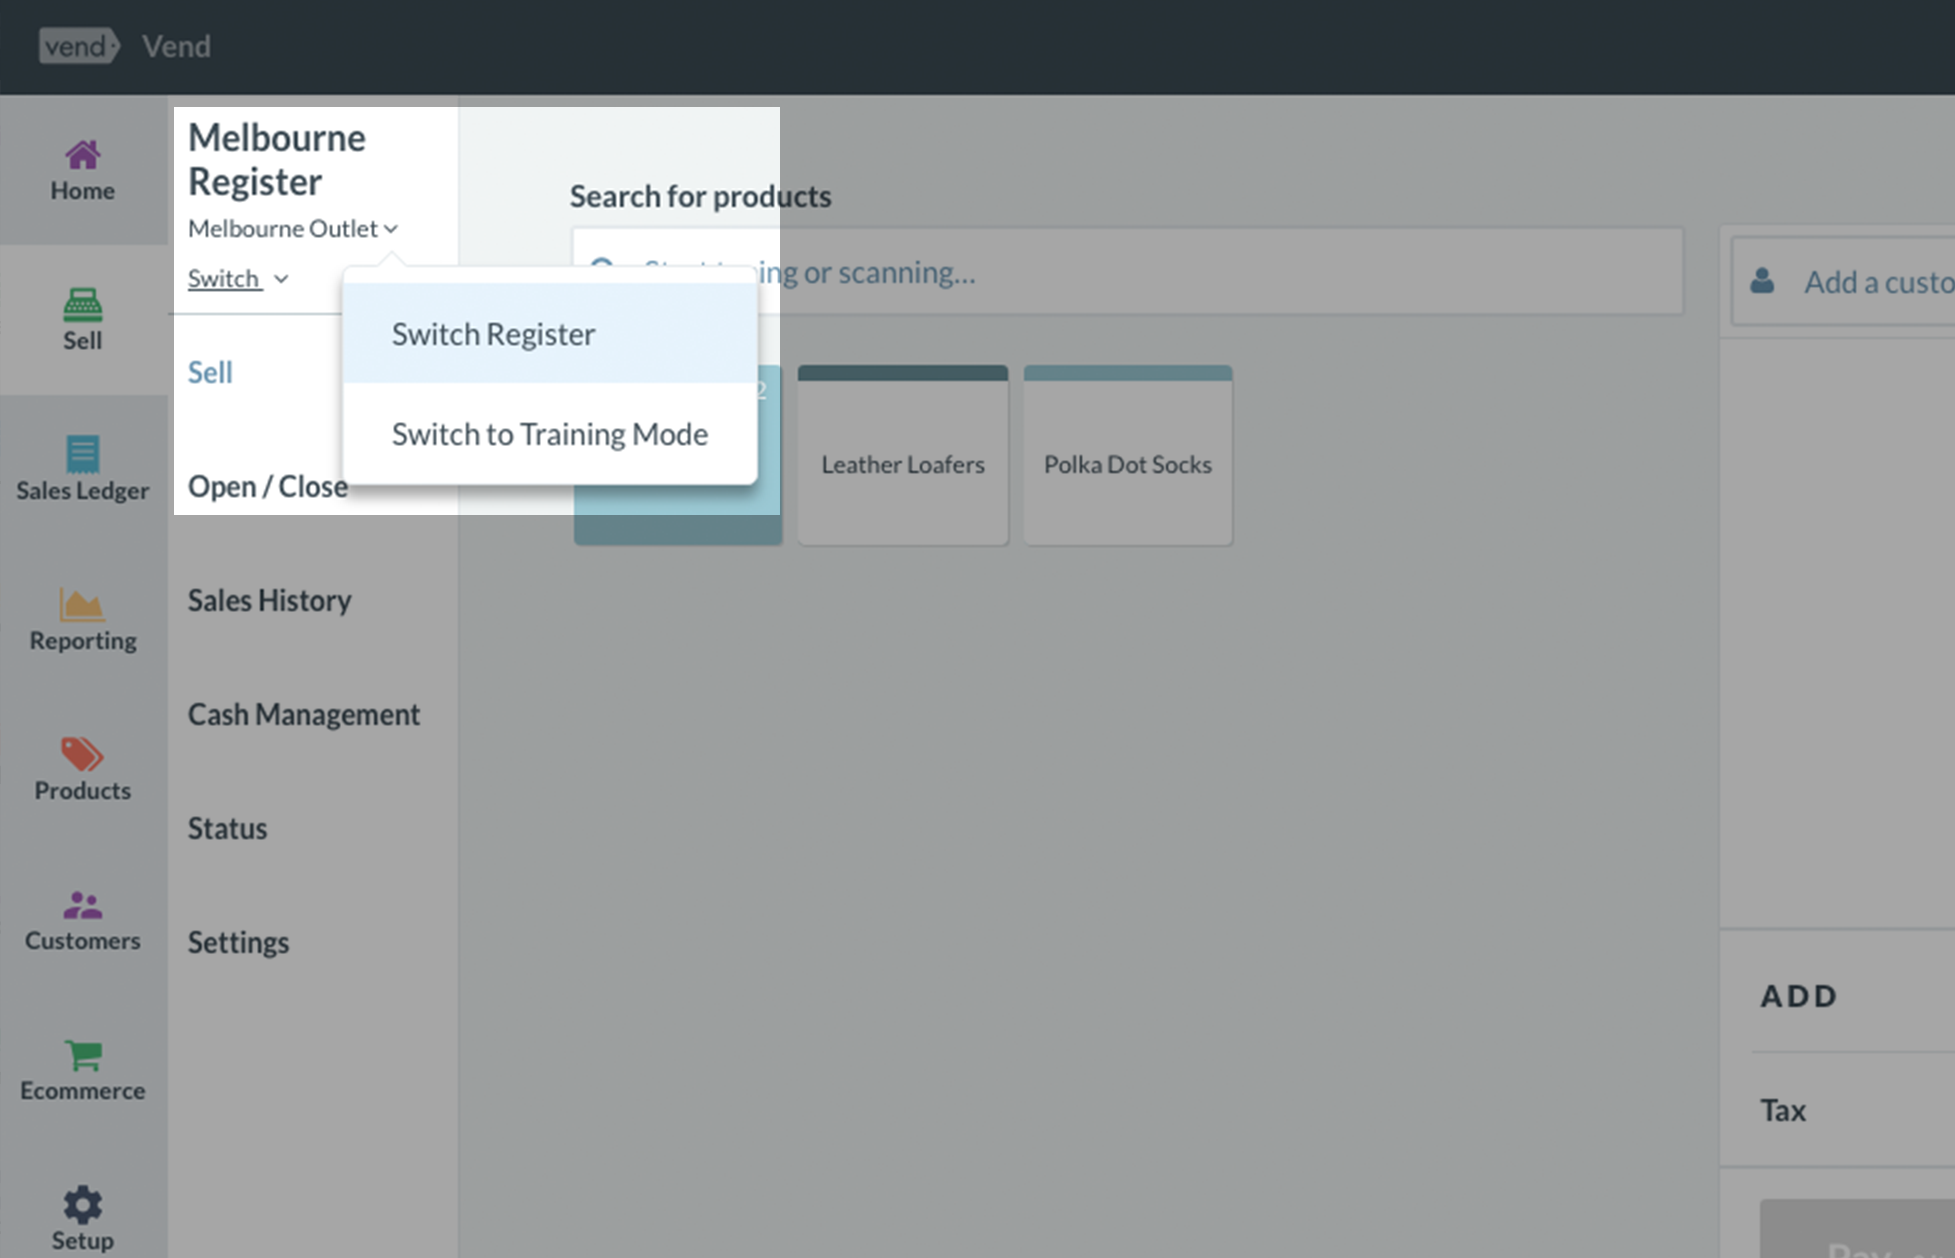
Switching Register on the Vend sell screen for Mac or PC:
To switch to a different register on the Vend sell screen, click on the register/outlet name in the top left of the sell screen and click Switch Register.
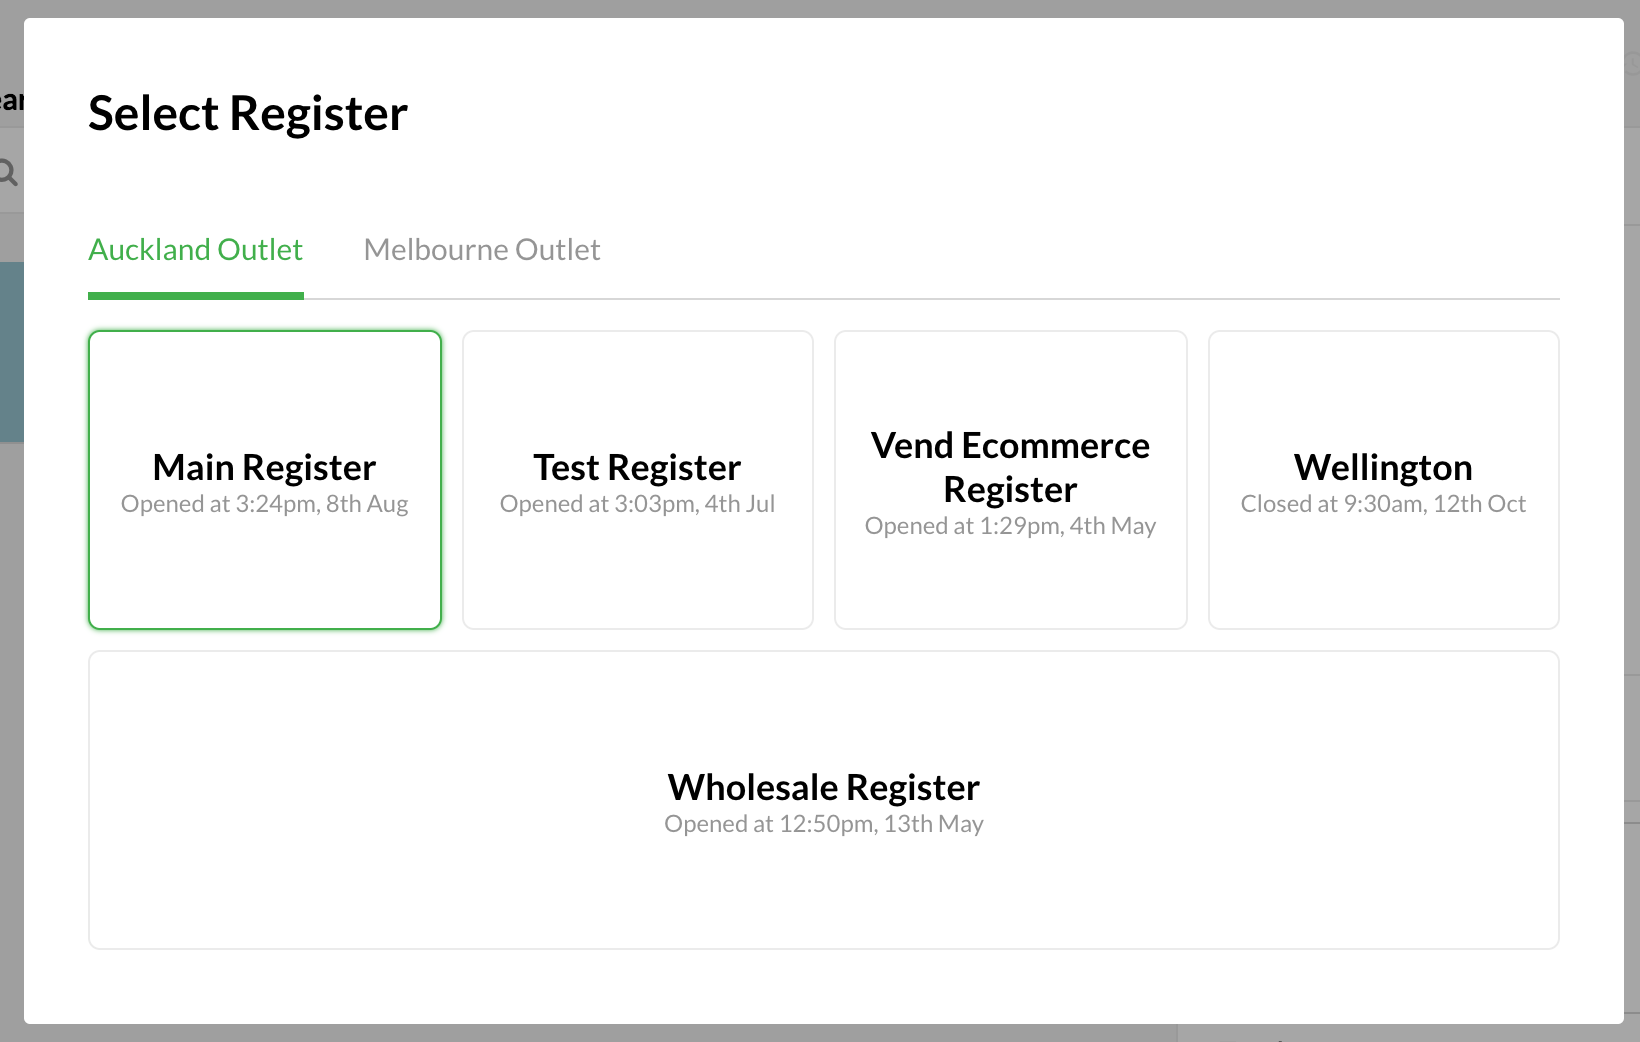
Once you've done this, you can view your outlets and registers and choose which register to switch to:
Switching Outlets outside of the Sell Screen:
To make things easier, we've added an outlet filter to all pages in Vend with outlet information; this filter will replace the use of the outlet switcher along the top of the Vend screen.
To learn more about how to switch outlets and outlet switching permissions, check out the information below.
How to switch outlets:
You no longer need to use the Outlet Switcher along the top of the screen to switch outlets. Now, when on a page with outlet information, you can use the outlet filter. This will allow you to filter any data on the page you're on, by outlet, without having to leave it.
The outlet filter box can be found above page information in the filter section.

Clicking on the dropdown arrow will allow you to select an outlet of choice.

Once selected, the page data will filter accordingly.
Note: If the outlet filter is greyed out, this means you don't have the right permissions to switch outlets.

Who can switch outlets:
Only Admin users can readily switch between outlets. However, it is possible to allow certain managers or cashiers to switch outlets if required. If you need to unlock a cashier or manager user to have access to all outlets, follow the steps below:
Navigate to Setup -> Users and click on the Managers's username.
You should now be in the Edit User screen. Find the Outlet dropdown and select All Outlets. If you'd like to restrict this user to certain outlets, click the add new outlet button and select the outlets from the dropdowns.
Note: If you change the access permissions of a user, they may need to logout and log back in again for it to take effect.
Related Articles
Switching Users After a Sale
If you have users using the same device and want to save some time with logging in, you can enable the "Ask for user on Sale" setting. With this option enabled, each time a sale is processed, you will be prompted to select the user for the next ...Removing Outlets and Registers - VEND
MANDATORY: Please read the following before deleting an outlet or register: Things you should know about deleting outlets and registers **If you have registers assigned under an outlet you need to delete the registers first then move on to deleting ...Adding and Removing Registers
If you want to use Vend on an additional device, you'll need to add a new register. To do this, navigate to the Setup tab and click on Outlets and Registers. Once here, click on the Add a register button within an existing outlet or create a new ...Syncing aggregated inventory from multiple Vend outlets to Shopify
When setting up Vend with Shopify, you can now combine and sync inventory from multiple Vend outlets and surface this on your Shopify store. You can select the inventory from one or more Vend outlets and make this available online for your customers ...Vend Integration Guide
Important notice These details are accurate at the time of writing this Help file. However, from time to time Vend may make further changes that are unknown to Unleashed.When importing products from Vend, Unleashed will also pull across Stock On ...