What are product variants and how do I set them up?
Product variants are made up of a parent product that includes basic information and a set of child products that represent different variations of this parent product.
To create a product with variants you will need to turn on "This product has variants" from the create product page. The first product you create will become the parent product; the next products are populated based on the attributes and values you set.
To learn more about how variants work and how to create them, follow the instructions below:
Tips:
The first (parent) product (which contains all the details including product description, images and pricing) is also the first variant.
Once variants are enabled you must set the attribute categories, like the size and colour, and all the values for these attributes on the same product page.
Every 'variation' (i.e., 'small brown', 'medium brown', 'small blue', 'medium blue') has a unique stock keeping record (SKU) and inventory value.
Adding product variants directly into Vend
Important: Previously, variants were setup after saving and adding a new product. With the new Quick Variants feature, you will need to put in all the variants of your product at the same time.
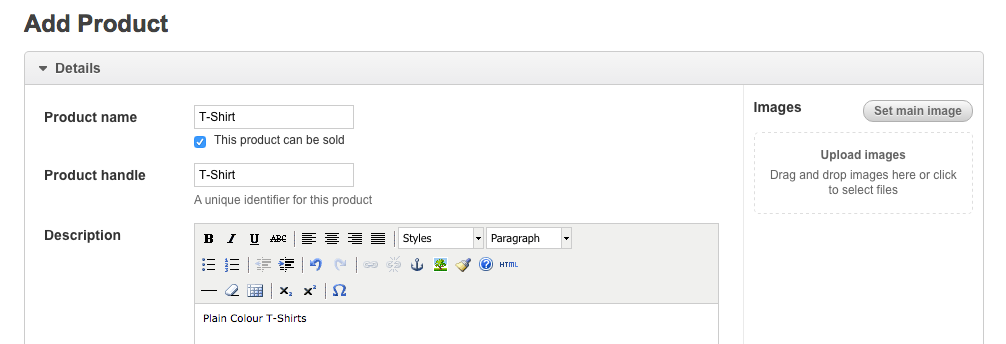
1. Create and add fields to your parent product:
First up you will need to create a master (parent) product. The parent product is the primary product you intend to create variants of. In this case, we are creating a T-Shirt. You will want to fill out all the standard information you would for a normal product including name, handle, SKU, price and tax.

2. Add the variants of this product:
Important: Your product cannot have more than 200 variants. If you find that you have too many variants for a single product, you may want to split them into two or more products with variants.
Next, you will want to scroll down to the bottom of the product edit page; here you will find an option to enable Variants for this T-Shirt product. Turn this on and begin adding your attributes.
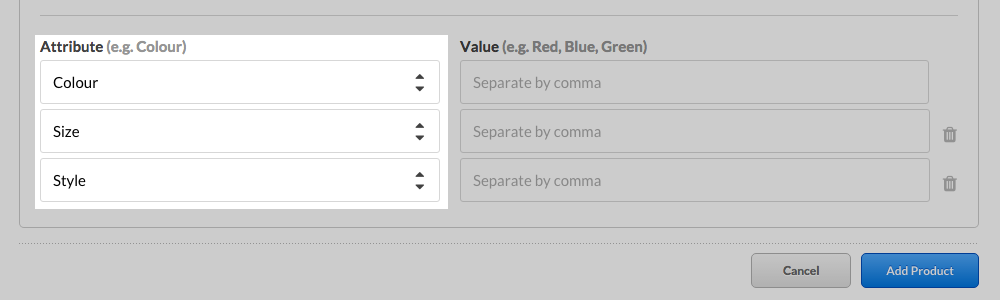
Adding your attributes:
Your attributes are the different features of your product. These attributes might include size, colour or style. You can add one, two or three attributes to your product. In this case, we will be adding three attributes for our T-Shirts.
Tip: If you think you will need more than three variants (attributes) for a product, you may want to split this product. For example, if you have a t-shirt with the variants colour, size, material and sleeve length you can create two products: One for the short sleeve t-shirt and one long sleeve t-shirt then three variants (colour, size and material) for each.
Adding your values:
Once you have added your attributes, you will need to add values for each of these attributes. These may be the various colours, sizes or styles that your product has. To add values, begin typing them into the value field next to each corresponding attribute.
If you have more than one value, click enter or separate each one with a comma. You will notice a blue box will appear around each value confirming that is has been separated.
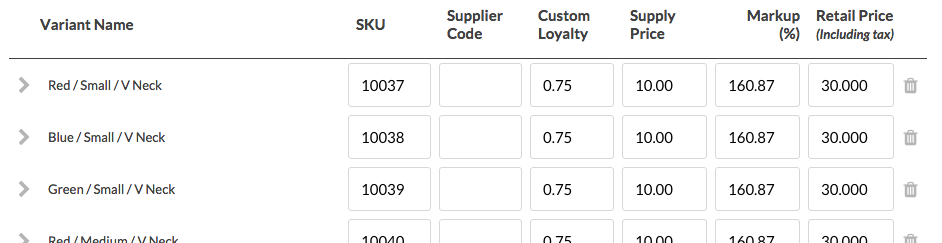
Once you have added the values for each attribute, you will see each product variant appear below.
If you would like to add additional information to these variant products follow step 3 below.Otherwise, you can confirm that everything looks correct and click the 'Add Product' Button at the bottom of the page to save the product, and its variants.
Important: Editing variants after they have been created involves a more manual process. Because of this, it is important to check that everything is correct before creating a product with variants for the first time.
3. Add additional information:
Now that you have a list of your variants, you can click to expand them and make a range of product specific edits.
Reorder point and Reorder Amount:
While it is important to add inventory to these products using Vend's stock order function, You can choose to add your reorder points and reorder amounts from this product edit page.
To do this, click on the variant product you would like to edit, select the inventory tab and input your desired reorder point and reorder amount.
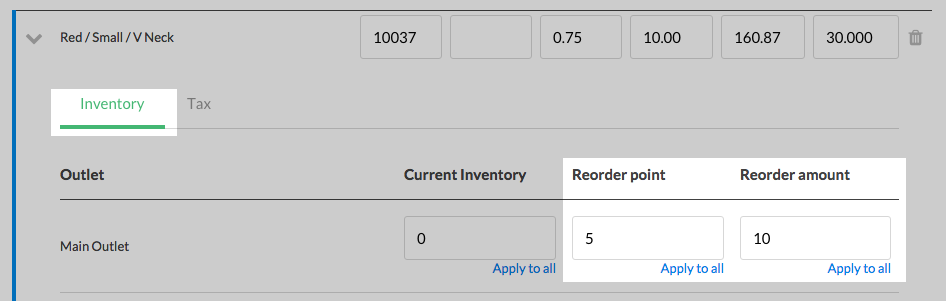
The reorder point is the quantity at which this variant product will be auto filled the next time you create a stock order containing the product. The reorder amount is the default amount that you will order when your product hits its reorder point.
Once you have set a reorder point for a product and its inventory is lower than this set point, the product will automatically be ordered (to the value of your reorder count) when you next create a stock order involving this product.
Important:
If this product already exists in another open or sent stock order for the same outlet it will not automatically be added to a stock order.
The reorder amount you set will be the amount of stock that is added to the product's current stock after it drops below its reorder point, not the new total stock amount.
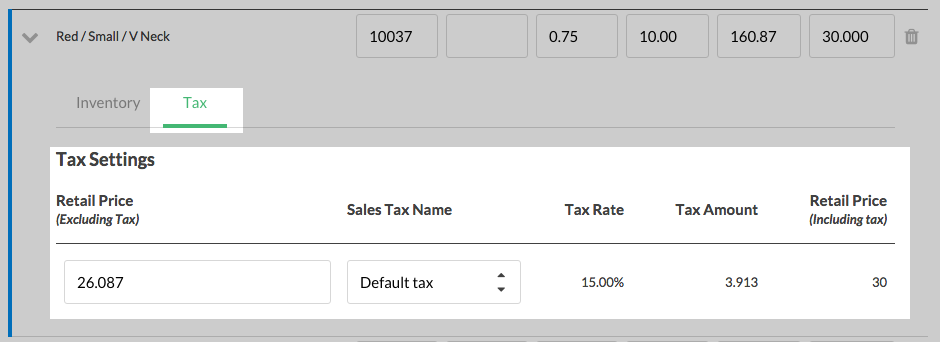
Tax:
If you need to specify different tax rates for some of your variant products, click the 'taxes' tab and change the values as required.
Pricing:
Each variant product will assume the supply price, markup and retail price of the main parent product. You can adjust this on a per variant basis by clicking the variant you would like to edit and changing the desired price fields.

Custom SKUs:
If you have pre-existing barcodes, you may want to change the SKU code for the product manually.
It is important to note that Custom SKU's may only contain letters, numbers or the following symbols: | _ / ( ) . + # -
Note: the SKU field is not case sensitive so you can use upper or lower case characters.
You can edit this field here:

4. Order in the stock for these Products:
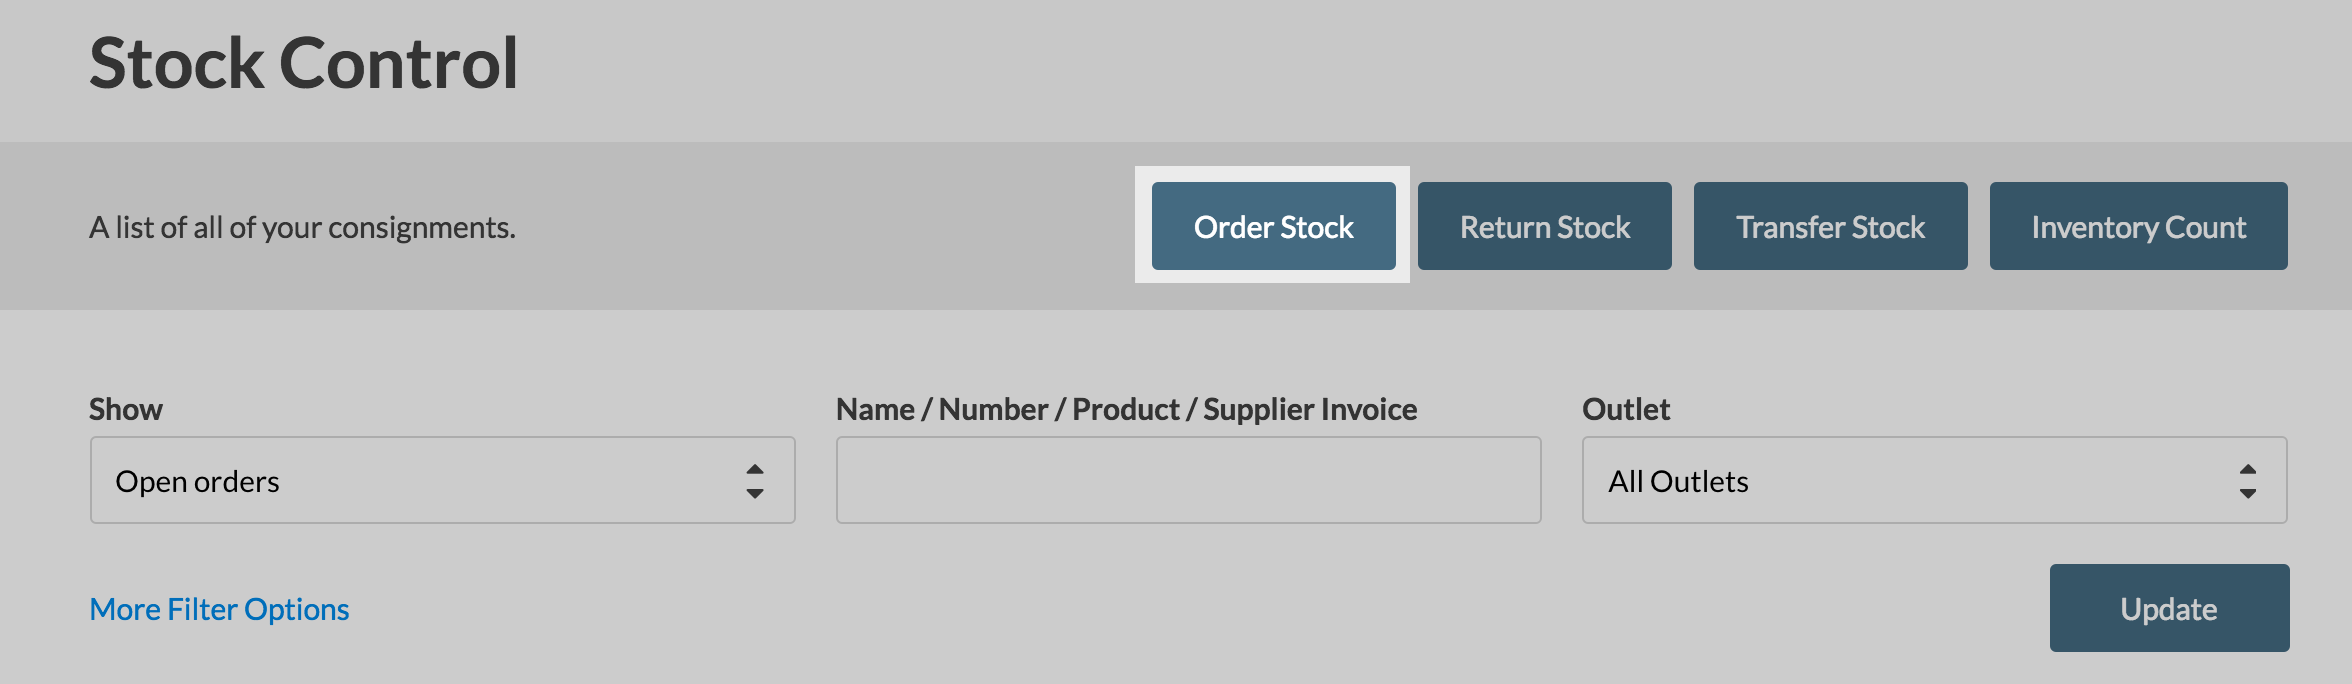
Once you have created all the product variants, you will need to add some stock. To do this head over to the Stock Control page and select Stock Order.
Note: It is important to add inventory in this way as it creates an audit trail for your product stock changes.
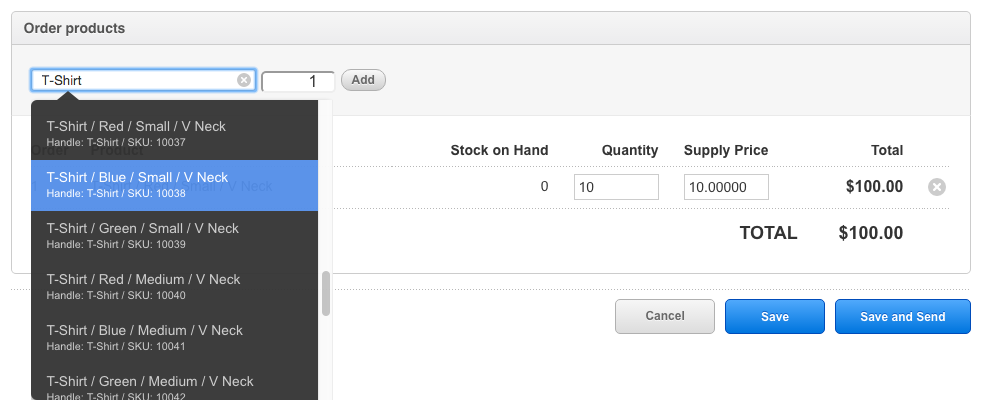
When you've created a new stock order, search for the product variants, adding each to the stock order. After you have added them all, you can specify the stock for each item.
Tip: Even if you already hold the physical stock in your store, processing a stock order is the best way to stock your products in Vend.
For more information on how to conduct stock orders in Vend, check out this link here.
Related Articles
Managing Variants in Vend
Product Variants are an important part of working with Vend for many retailers. Many products work best as variants. A blue t-shirt, for example, might have variants of Small, Medium, Large and X-Large. If you have questions about how to create ...The Shopify Integration - How does it work, and how do I set it up?
The Vend-Shopify integration enables you to easily link an online Shopify store to your Vend account. If you're new to selling online, the integration takes the pain out of setting up your first store, and makes it easy for you to manage sales, ...How do I apply a tax rate to an individual product in my tax-exclusive store.
Some products have different tax codes, for example fresh fruit and vegetables in some countries do not attract tax. This can be easily managed within Vend. Set up all required tax codes in Vend Choose the appropriate tax per product When you set up ...How do I apply a tax rate to an individual product in my tax-inclusive store.
How do individual product taxes work? Some products have different tax codes, for example fresh fruit and vegetables in some countries do not attract GST. This can be easily managed within Vend. Set up all required tax codes in Vend Choose the ...Create New Products
Adding new products and displaying lists of products for maintenance You can add a new product using the Add Product menu. Alternatively, you can also go to the Product List page under Inventory | Products to edit and/or view a list of existing ...