Lightspeed X Series | Inventory Count
What are inventory counts?
Inventory counts (also known as stock takes in some countries) help you to keep track of your inventory.
During an inventory count, you and your staff count and record each item in your store. When the inventory count is submitted, your store's inventory records are updated, and you get a report of unexpected variances in your inventory levels, including cost figures.
Inventory counts help you to keep on top of your inventory movements and identify any discrepancies faster.
There are two types of inventory count:
Full count: This is (usually) completed at the end of financial year in order to provide your accountant with an exact value of your inventory. It includes every item in your store, including your storeroom. During a full count, you should close your store to ensure you get an accurate representation of your inventory levels. This generally means counts are done outside of usual trading hours.
Partial counts: These are normally a small section of your inventory, usually a particular brand, type, or supplier's items. Many retailers complete these during regular open hours in order to help keep your store's inventory accurate during the year. You can even run multiple partial counts at the same time (just make sure you don't have the same product in more than one count).
Completing regular partial inventory counts helps you to keep on top of your inventory, and ensures that your end-of-year inventory count runs more smoothly.
Important: It is possible to perform the same inventory count from multiple devices, however, we do not recommend this. If you do choose to perform an inventory count on multiple devices, it is very important that you save the count on each device before completing and that you only complete the count on one device.
When should you complete inventory counts?
Full counts:
- At the end of your financial year.
- Your accountant may also recommend you do one at your mid-financial-year point.
- Before selling your business
- After a really busy period, like Boxing Day or Black Friday sales.
You can also do one at other times, however, full counts are a lot of work.
Partial counts:
- All the time! We recommend regularly scheduling your partial counts throughout the year. Because you can schedule in advance, you can easily stagger these to ensure full coverage of your inventory each quarter, for example.
How do you complete an inventory count?
Important: A full inventory count should always be completed when your store is closed. This ensures that no items are counted twice, or sold after they have been counted.
For information on completing an inventory count, follow the steps below:
Preparation
Scheduling
With Vend inventory counts, you can schedule your counts in advance, so you can plan out your year and your team can see what they need to prepare and count.
Before you begin: If you're planning partial inventory counts, make sure you've set up your products with brands, types, suppliers and/or tags to help you refine your searches.
To schedule a new count:
- Click the 'Products' tab in the menu bar, and select 'Stock Control'
- Click the 'stock-take' button. You'll be taken to the Inventory Count home page.
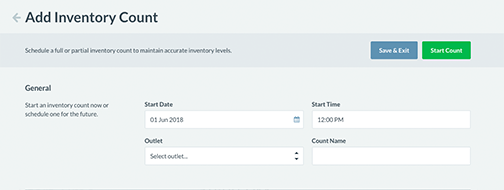
- Click the 'New Inventory Count' button
- Choose which outlet your inventory count is for.
- Set the date and time for the inventory count (this will default to today's date, and can't be in the past)
- Give your count a name (something that will tell you what you're counting or why)
- Select whether the count will be a full or a partial count.
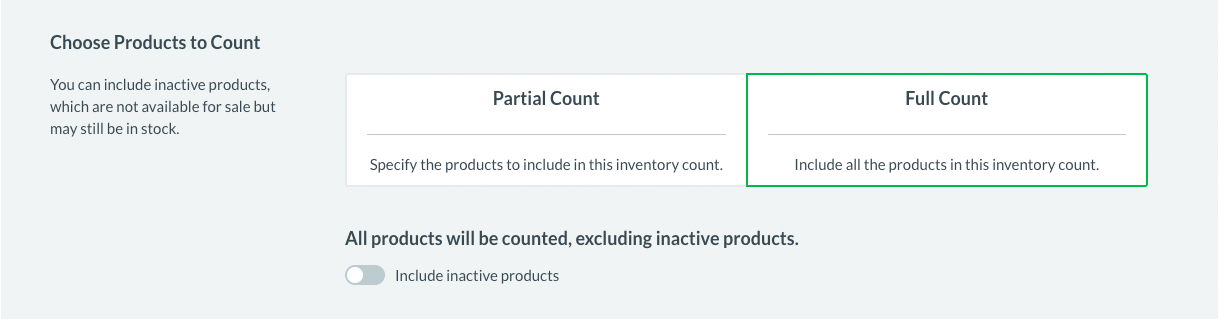
For a full count:
- Click the 'Save' button at the bottom of the page. Your count will now be scheduled.
For a partial count:
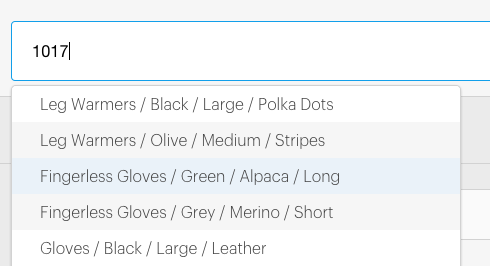
Use the search field to start adding filters to your inventory count. This will search for any:
- brands
- types
- tags
- suppliers
- individual product names/SKUs.
that match your search term. For example, searching for 'Jeans' would show the type 'Jeans' and the brand 'Guess Jeans'.

It's important to understand how the filters work. For example:
- Search for the term 'Jeans' and select the type 'Jeans'. All products with the type 'Jeans' will be added to the count.
- Then, search for the term 'Levis' and select the brand 'Levis'. This will remove any products from the count that don't have the brand 'Levis' as well as the type 'Jeans'.
- Search for the term 'Lee' and select the brand 'Lee'. This will add any products with the type 'Jeans' and the brand 'Lee' back into your count. In other words, and products with the type 'Jeans' and either the brand 'Lee' OR 'Levis' will be included in your count.
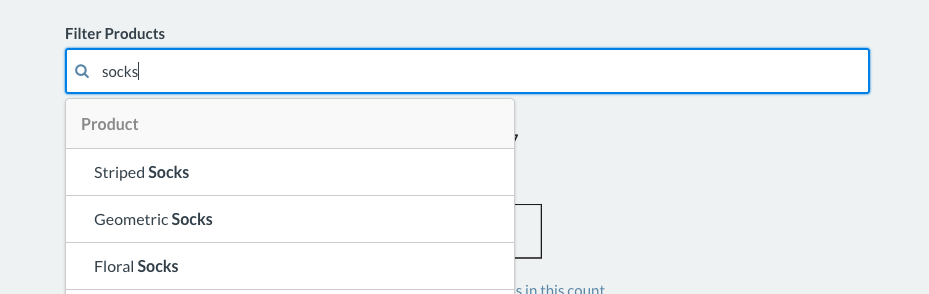
You can tell when a tag or type is part of the same group as they will be grouped together under the search bar, like in the image above.
You can also add individual products to your partial inventory count.
Once you've added all the items you want to count, click 'Save' to save your scheduled count.
You can also click 'Start' to start counting immediately.
Preparing inventory
On the day before, or the day of, your inventory count, depending on how much you're counting, you'll need to prepare your inventory to be counted.
Each store will have a different process for this, but we recommend:
- Checking your barcode scanners to make sure they are functioning
- Tidying all areas you'll be counting, including any items on hold.
- Turning all labels barcode-side out for easy scanning
- Printing new labels for any products missing labels
Completing the count
When you're ready to start your count, open the inventory count home page.
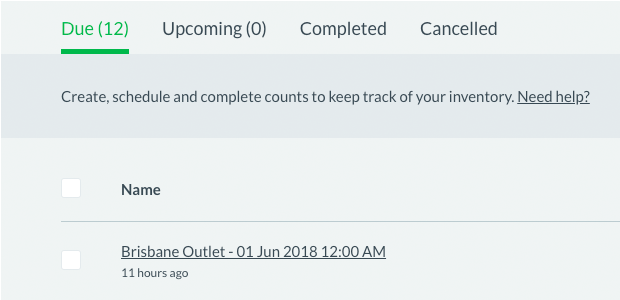
- Find the count you want to start on your 'Due' list.
- Click the count name. The count settings page will open. You don't need to worry about updating the date and time if it's wrong - we'll update it to today's date.
- Click 'Start'. The inventory count will commence.
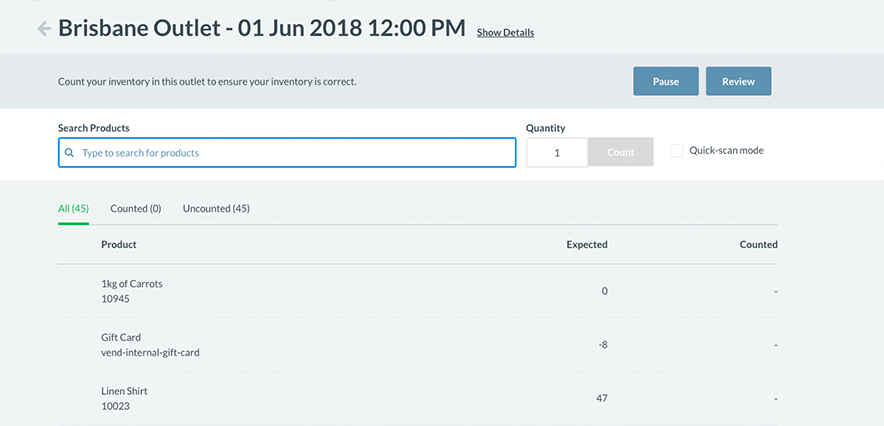
You'll see a page with a list of all your items to be counted, as well as the expected count for those items. You don't need to count the items in the order they appear on the page.
Important: Don't count any items currently on lay-away/lay-by. These items have already been debited from your inventory and will cause an inaccurate count.
To count your items, you can:
- Scan the barcode of each item. If you're doing this, make sure you tick the 'quick-scan mode' box.
- Scan the barcode once, and then manually enter the count of every item.

- Search for an item's name or SKU, and then manually enter the count.
- Find the item in the list. and click the row. Then, enter the count amount. (Not available in quick-scan mode).
When an item is counted, it appears at the top of your counted list. It will have a tick next to it if you've reached the expected quantity. It will then appear in your counted tab, and the number of items in your uncounted tab will be reduced.

Your count will automatically be saved - you can see the latest save time at the bottom of the page.

I'm getting a "PRODUCT NOT FOUND" message even though the product exists in my store:
if you get this message when searching a product check that:
- Inventory tracking is enabled for this product.
- The product being added is not a composite (Only the products that make up a composite can be counted.)
- The product is not set to inactive or, if it is, that you have specified the count to include inactive products.
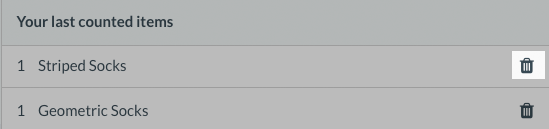
Using your Count Feed - undoing a count
On the right-hand side of the page, you'll see a list of your most recently scanned items.

If you've made a mistake, just click the 'x' button to remove that item from your count.
When you're finished counting, click 'Review'.
What is Quick-Scan mode?
Quick-scan mode enables you rapidly scan each item's barcode in your store to add it to your inventory count. Your scanned item will automatically be counted as soon as you scan the barcode.
If you'd prefer to use the barcode to look up the item SKU and then enter the final count number before submitting it, un-tick the Quick-scan mode box.
I'm getting a red "unexpected" symbol next to products after I add them to my inventory count:

When you are performing a partial count you can sometimes get a red "unexpected" symbol next to your products. When this symbol appears it means that a product has been added to the partial count that doesn't match any of the filters you specified when creating the count.
If you would like this symbol to disappear you may need to create a new partial count and broaden your filters. If you have already started counting or are happy to continue with your current count you can simply ignore the symbol and continue as it will still accept the adjustment for this "unexpected" product regardless. If you are certain that this product should fall under the filters you've applied, head to the product screen and edit the product in question to ensure that it's been setup correctly.
Reviewing the count
Once all your counts are submitted, you'll need to review your counted items.
When you open the review page, there are five tabs you can view:

- Unmatched: This lists all items that had a count greater or less than the expected amount. This includes items where you expected a negative amount and counted 0.
- Matched: This lists all items you've counted where the total counted equals the expected amount.
- Uncounted: This lists all items where the total count is 0. This includes items with an expected count of 0.
- Excluded: Any items you manually exclude from your count.
- All items.
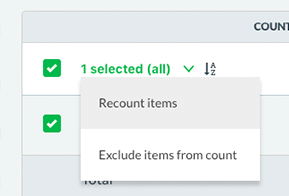
Review the items in your count, especially the unmatched and uncounted items. If you have discrepancies, you can:
- Tick the box next to an item, and choose to exclude the item from the count, or
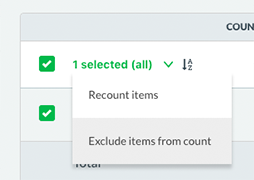
- Tick the box next to an item, and choose 'Recount items'. This will set the count for these items to zero, so you can count the items again.
- Click 'Resume Count' at the bottom of the page, and count the items again.
Important: If you resume counting, the item will still show the quantity scanned so far. Use the 'Recount items' option on the Review page to reset to zero. Alternatively, on the count page you can enter a negative quantity for that item in the quantity field to remove items, or to zero the inventory level for an item to start from scratch.
Trading while counting?
If you were trading while counting, you will need to make any final adjustments based on sales or returns made during your count period.
If you sell or return an item after you've counted it, that item will need to be adjusted. For a sale, you'll need to decrease the count quantity by one in your inventory count. For a return, you'll need to increase the quantity by one.
If you sell or return an item before you've counted it, these items will have the correct inventory value but a discrepancy may appear on the review page (as the expected count would not have changed.)
Note: Any sales made when conducting and inventory count will still be correctly recorded in your sales history.
Submitting the count
Once you've checked and confirmed your count, and are satisfied all items are accounted for, click 'Complete'.

Remember, don't do this until ALL of your staff have completed and saved the counts on their devices.
If you have any uncounted items, we'll alert you, as the inventory count for these items will be set to 0 when you click submit.
Once you've clicked complete, we'll start processing your count. This can take several minutes to complete, especially if you've got lots of items.
Once it's complete, the results will be displayed on the page.
You'll have three tabs:
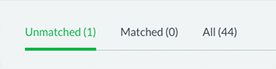
- Unmatched
- Matched
- All
These will list your items, the expected amounts, the final counts, the change in units after your count, and any associated cost for that change (for example, if you're one unit short, it will tell you what that costs you).
Scrolling down to the bottom of the list will display your total changes in units and total changes in costs.
You'll see two figures for each of these - the total increases (for items where your count was higher than expected) and total decreases (for items where your count was lower than expected).
Export the data
Click the export buttons to get a copy of your results.

There are two options:
- Export by CSV: This gives you a CSV file with a line for each product counted. You'll also have columns for expected and final count, change in cost, and a total value of each product's inventory after the count. This is typically used for importing into another system or for creating your own reports.
- Export PDF: This gives you a formatted PDF report, including the expected and final count, change in cost, and total value of each product's inventory after counting for each product. You'll also have a summary with total changes for your whole count.
Abandon an inventory count
Sometimes, you may need to stop doing an inventory count that you've started. This may be because you've run out of time to complete it, for example, as an inventory count should always be completed in a short time period.
This is called abandoning a count.
To abandon an in-progress count:
- Open the count on either the 'Edit count' or 'Review count' page
- Click the 'abandon count' button.
Abandoned counts will appear on the 'Cancelled' tab of the inventory count home page.
Cancel an upcoming inventory count
To cancel an upcoming count:
- Tick the box next to the count.
- Open the drop-down at the top of the count list.
- Select 'Delete'
Review historical inventory counts.
You can view historical counts and export the results at any time.
To view:
- Click the 'Completed' tab on the inventory count home page
- Click the count you wish to open.
Related Articles
Lightspeed R Series | Inventory Count
Accurate inventory counts are crucial for maintaining proper stock levels, reducing discrepancies, and ensuring your business runs smoothly. By following the steps outlined in this video, you can efficiently conduct an inventory count using the ...Unleashed | Inventory Count
Inventory management is crucial for any business, and conducting accurate inventory counts ensures you have the right stock levels, reduces discrepancies, and helps in making informed business decisions. In this video, we'll walk you through the ...Creating Lightspeed X Series (Vend) Account
Being a retailer, if you are looking for a cloud-based POS, Vend is the right choice for you. Vend provides you with advanced inventory reports, real-time sales, easy accounting, and financial control. Check this video for more information.Lightspeed X Series | Stock adjustment
Stock adjustments in Lightspeed X Series help you keep your inventory accurate when there are discrepancies. These discrepancies can arise from reasons like damaged goods, lost stock, theft, or manual corrections after a stocktake. By recording a ...Doing inventory counts
Doing inventory counts Use inventory counts to reconcile inventory, determine shrinkage and correct your inventory counts. You can do either full or partial counts. NOTE: An inventory count cannot be imported or merged to another count. Special ...