Adding and Removing Registers
If you want to use Vend on an additional device, you'll need to add a new register. To do this, navigate to the Setup tab and click on Outlets and Registers. Once here, click on the Add a register button within an existing outlet or create a new outlet in order to create a new register there.
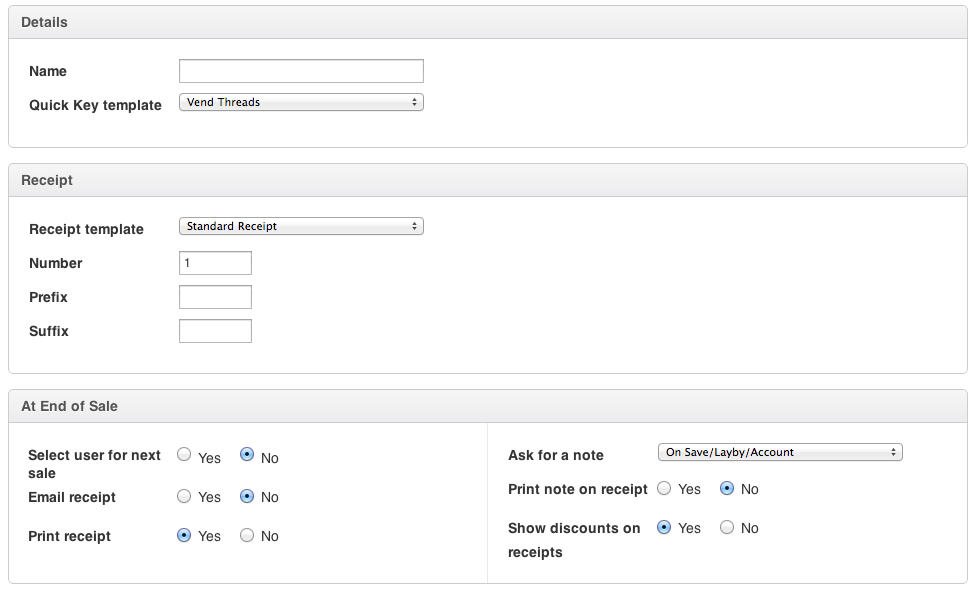
Name - Identify this register. This is particularly important for multiple registers in one outlet.
Quick keys template - Choose which Quick Keys template you wish to apply to this register. If you haven't yet set up your Quick Keys, you can learn more about configuring quick keys template here.
Receipt template - Choose from the standard receipt template or customise your own receipt.
Prefix - This is to identify sales made from this register. It's useful when you have multiple registers at one outlet.
Number - This enables you to set the start point for receipt numbering. Unless you would like to start numbering receipts from the end-point on your previous POS, leave this as-is. If you would like to number from your end-point, enter the last receipt number from previous register.
Suffix - This is to identify sales made from this register It's useful when you have multiple registers at one outlet.
Email receipt - If you would like to email receipts, choose 'Yes'. After every sale you will be prompted to enter an email address for the receipt.
Print Receipt - If you would like to print receipts after sales, choose Yes. You can also print one-off receipts using your computer's printing shortcut, such as Ctrl+P for Windows, or Command+P for Mac OS X.
Ask for a note - Choose when you would like to be asked for notes on a sale. Options are Never, On Sale/Layby/On Account, or On All.
Print note on receipt - If you would like the notes you have added to be printed on the receipt. This can be useful for table numbers, returns numbers, and more. Choose No if you wish to use notes for internal purposes.
Show discounts on receipt - Enable this feature if you would like discounts to be displayed on receipts.
Select user for next sale - You can be prompted after each sale to select the next user. This is helpful for multi-user retail environments, where you want to track sales for each user. Set this to 'Yes' if you want the turn on prompting.
Adding more registers will automatically update your billing if required. A prompt will appear to advise you of any billing changes before you add registers or outlets. You can also check your plan and billing information under the 'Account' tab.
Deleting a Register:
To delete a register, navigate to Setup -> Outlets and Registers and click on the name of the register you would like to remove.

From here, click the "delete register" button in the right hand corner of the page.

Important: Deleting a register cannot be undone.
Related Articles
Cash Management in Vend
Before Getting Started There are a few important things to know about Vend's Cash Management feature. Cash management is automatically enabled for each of the registers you want to use it on. If you integrate with Xero and are looking to set up cash ...Activating, Billing, and Cancelling Vend
I want to activate my account Awesome! If you've made any trial sales before activating your account, you may want to delete these. Contact our Support Team for assistance completing this, so we can make sure you don't delete the wrong things ...Removing Outlets and Registers - VEND
MANDATORY: Please read the following before deleting an outlet or register: Things you should know about deleting outlets and registers **If you have registers assigned under an outlet you need to delete the registers first then move on to deleting ...Adding a New Outlet
For a business with more than one store, or with a warehouse, setting up additional outlets helps you to manage your inventory and track your sales effectively. Why should I set up more outlets rather than registers? When you set up your store's ...Adding widgets to your dashboard
Do you use third-party applications with Vend? With widgets you can add information from third-party apps to your Vend dashboard. Widgets appear as charts, graphs, calendars and lots of other useful formats, depending on the application. Widgets can ...